

Silhouette Printable Magnetic Sheets
Silhouette CAMEO® or Silhouette Portrait®
Ink Jet Printer
Digital Photo
Magnetic Notice Board (or other magnet attracting surface)
In this tutorial I have used a photo of my daughter and the Basic Tabbed Paper Doll file designed by Samantha Walker. There are several different dolls in the Design Store to choose from, but the easiest files for this project are those which are 'Regular Cut' rather than 'Print and Cut'.
PERSONALISE YOUR DOLL'S FACE
You will need a nice clear photo, with the child more or less facing forward. Open up the doll file in your software. To start with you will only need the doll body. Ungroup the pieces and move all but the body parts away. Ensure that your photo is a file format that your Silhouette Studio® software can read. and move it to a place on the Desktop where it is visible when the Silhouette software is open.


Now, there are two ways to fill the head with the photo. Firstly try to drag the photo into the head by selecting the head, then click and drag the photo onto it and then release it. It will probably be flipped and upside down. You can rectify this by using the advanced Fill Pattern Window (Mirror Pattern Horizontally and Rotate 180°). Use Scale to resize the photo and Pan to centre it. The alternative method is to drag the photo to a space in the work area. Resize and then centre the head on it and use Modify > Crop, but you'll have to use the head shape as it is. (which is this case would look a little strange).


Make a copy of the body and work on one copy. Now, this may seem a little harsh, but you need to remove the head from the doll, as it is only the part we want to fill with the photo.
Follow the steps in the diagram above.
Select the body
Follow the steps in the diagram above.
Select the body
- Highlight Knife Tool
- Uncheck Auto Apply
- Ensure Treat Unfilled Shape option set to Solid
- Select a knife (your choice). I used the Poly knife and made a V shaped cut.
- Click Apply Selected Knife, and move the head away from the body.


Now this is the trickiest part and involves some trial and error (the Undo/Redo function will be your friend). Select the filled head shape and Click on Edit Points. A series of grey dots appears around the head (the head on the right). Drag a few points (leaving some in place between) to touch the edge of the hair in the photo. Then delete the ones left behind and modify the shape to follow the outline of the head until it looks like the one on the left (changing individual lines to Curve can help). Modify the points on the chin to display a little of the chin shadow. When you are happy with the face move it into place on the body. Resize if necessary. Fill the body with an appropriate skin colour. Using the dropper tool to select a colour from the face will give a good match. Now group the head and body together.
CUSTOMISE THE CLOTHING

I decided to make some modest underwear by cutting the swimsuit into two pieces. I used the Curve Knife (DE only).

I removed the tabs by using Edit Points and deleting points on the tabs. The Straight Knife would do a similar job.

I then coloured the parts using options in the Fill and Fill Patterns Windows. This is good time to experiment with the different options until you get something that you like. Place the underwear on the doll and group it together. Go to the cut window and change the cut line to cut outside edge.

At this point you can involve the children and really have some fun customising clothing and accessories. I used the Sash Dress file, removing the tabs and duplicating the items, decorating and then grouping them. I also used some accessories from the Ladies' Accessories file and made some coordinating items. You'll see that I made ankle socks and grouped them with shoes and a little pool of shadow to cut down on the number of small pieces. I also made an offset for the doll and the clothing items.
CUTTING AND ASSEMBLY
I arranged the finished designs on Letter sized sheets with Registration Marks, sent them to print and then cut according to the recommended settings. This media cuts like butter. If you've not used it before you'll be amazed at how cleanly it cuts.

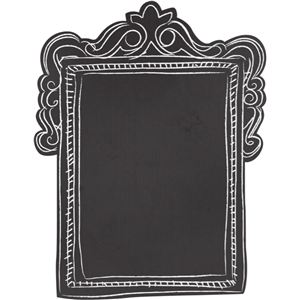
No real assembly is required, the pieces can be placed on a magnetic surface right away. I thought my board looked a little plain so I added the chalkboard frame. The frame needed to have the centre removed. A simple rectangle can be cut from the centre, or it can be edited to follow the contours of the inner hand-drawn lines - a tutorial for another time!

I hope you and your kiddos enjoy this one. Have fun! Janet

Profile | My Blog | Pinterest | Twitter | Instagram
FILES USED:
 |
 |
 |
 |
PRODUCTS USED:
 |
 |
 |
 |
What a great idea! It would be great fun for an adult as well :)
ReplyDeleteYes, I think so too. In out household, I Would say that this project was not just fun, it was hilarious!
Delete