

Hi everyone. It's Verity here from Pretty Little Button bringing you another project. Today I have a quick project to whip up to add to your table for the kids to play and win a prize whilst waiting for dinner to arrive. The prize is completely up to you and this standing tree card leaves you plenty of space inside to let them know. The scratch-off sticker sheets are great for making a run game and allow the kids to scratch off to see if they have 3 matching red stars to win (well you can choose what number and colours are needed to win). These are so quick to make you can even make one for the adults too!
Christmas tree table topper scratch of card details:
Add your designs from the design store into your design space. I find it easier to change the colour of the designs to the colour of cardstock I plan to cut out off.

The black stars represent the starts I want to cut out of the scratch off sticker sheets. However, I needed to make these slightly larger than the stars to cover them up. Offset tool to the rescue!

For these stars, I added a 0.06-inch offset and deleted the original black stars from the design to make sure they wouldn't cut later on.

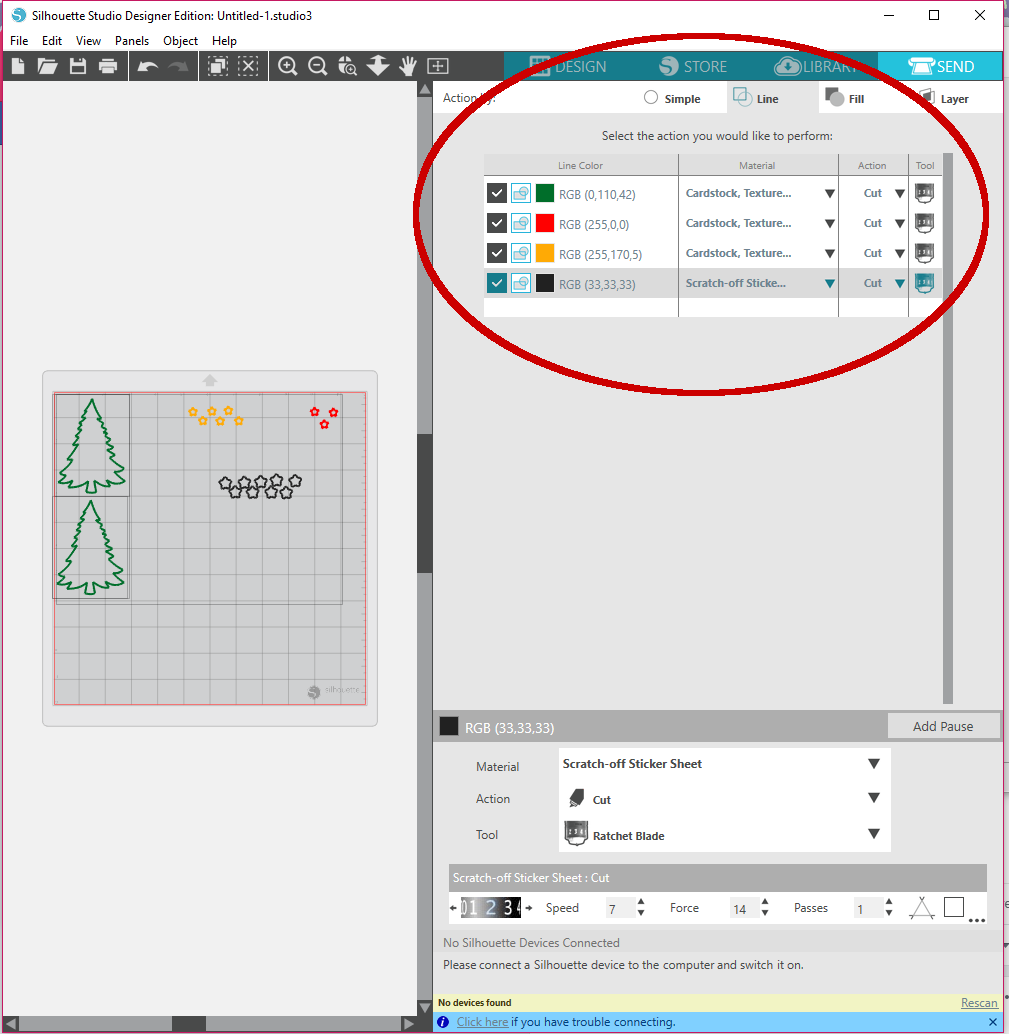
To make it easier to see where to put the different colours of cardstock on my mat so I only had to load it up once, I changed the 'reveal' of my cut mat from 0% to 100%.

The line colour also makes it easier to see the different shapes to cut out of different materials. If you have the cameo 3 you can also set this to cut from either blade holder 1 or 2, however, I have the cameo 2. So I initially cut the cardstock and before it cut the scratch off sticker sheets I changed the blade number for the cut settings.
Christmas tree table topper scratch of card assembly:
To assemble, add a little shading to the trees with green ink and a blending tool. Next, score a line at the top of the tree that will make the back of the card. Add adhesive above this scoreline and adhere the two trees together. This creates a hinge at the top of your trees to open and form the card.

Next, peel the scratch-off stars from the backing and adhere on top of the cardstock stars. The adhered the star layer to the card, using a bit of liquid adhesive to the back of the card stars to ensure they stay in place.

If this has inspired you to try this out, please post below. I would love to see it!
Until next time,
Verity

Profile | Pretty Little Button Blog | Instagram | Facebook
Christmas tree by Sophie Gallo, Design ID#32030
PRODUCTS USED:


No comments:
Post a Comment