

Hello, Janet here again wishing you a Happy New Year! At the the start of a new year there are often lots of lovely new stickers in the Silhouette Design Store and this year is no exception. I love these Little Bird Stickers by MiniLou (#284076) and I think they'll look great in my new planner. Stickers from the store can be used in many different ways and I thought I'd show you some easy ways to use them when printing them onto Silhouette Printable Sticker Paper.

Once I started working with these bird designs I realised that there are so many ways to use them, that I decided to write a Part 2, published next week, with even more ideas included.
 |
| Little Bird Stickers (#284076) |
Using a regular home printer it is possible to print your own stickers and then cut them out using a Silhouette Cameo or Portrait. This process uses the Silhouette's Print & Cut capability. Some folks find the idea of Print & Cut a bit overwhelming, so I've included some basic instructions for you. Feel free to skip this section if you are already a Print & Cut ninja.
Print & Cut Instructions
(a) Page Setup for Print & Cut
In the Page Setup panel, change the Page Size to match the sticker paper (Silhouette Printable Sticker Paper is U.S. Letter sized). Also tick the Show Print Border and Show Cut Border boxes.
From the Registration Marks tab, select Type 1 in the Style dropdown box, I like to also increase the Thickness to .60 to make the marks easier for the sensor to detect. If you were to look at the virtual mat, you'd see that the registration marks are joined by the cut (red) line. Any item outside of this red box will not cut.
(b) Print Page Setup
In the Main Menu (top of the page), change the Print Page Setup to match the Page Setup (i.e. Letter size). If there is a borderless option for Letter size DO NOT select it. Leave the scale at one hundred percent.
The print (grey) line will now be visible within the page borders and outside the cut line. Any part of an item outside the grey box will not print. Where possible avoid overlapping the hashed area (dark printing in this area can cause the sensor to mis-read the design).
(c) Print the Design
Once your have placed your sticker design in the correct position, print the design on your printer (from the Main/Top menu chose File > Print). For most printers select 'Best' or 'Photo Quality' for the best result. You may notice that any line with the thickness set to zero will not be printed.
(d) Cut the Design
Press the printed sheet onto the cutting mat, aligning it with the top left-hand corner of the sticky area. Load it into your Silhouette and open up the Send tab. Select the cut setting for "Sticker Paper, White". Adjust the force to achieve a "kiss cut" (cutting through the sticker layer, but not the paper backing). I usually reduce the force to '12' and recommend you use a Test Cut to find your ideal setting. Highlight the Cut option and check that the correct lines on the design will be cut. If they are correct, Send the design to cut. The Silhouette will attempt to read the registration marks and then cut the design.


The easiest way to use the stickers is to Print & Cut them as they are, without changing the size or layout.

Basic Print & Cut
Open the design and examine the file. This sticker file consists of two layers: all the coloured bird designs on a solid white background in one layer, and the cut lines for the individual birds in another. Print & Cut files from the store are often designed in this way.

Set up a Print & Cut page (as detailed above).
The cut lines are bigger than the birds as these bird stickers are designed to have a white border around each bird. If you click on the Send tab (with the Simple Action selected) the cut lines are displayed as thick lines when the Cut lines are turned on (just click on 'Cut' if it is not highlighted).

If you prefer to 'Cut by Line', you'll notice that there is a 'No Color' line around the coloured sheet. Ensure that the cut box remains unticked as it is not intended to be cut.

Once you've made the adjustments detailed above, send the sheet to print. This is how it should look.

Now send them to cut. If you remove the excess sticker paper around the stickers they would look like this. I've removed one sticker to show how a successful 'kiss cut' looks (the sticker layer is cut, but not the backing sheet).

Trimming the Stickers
Prior to cutting you can add a trimming cut line to neaten your sheet of stickers by drawing a rounded rectangle around the design. Change the colour of this line and choose to 'cut by colour'.

Cut the bird outlines (red) with the sticker paper setting and the rectangle (blue) with a higher setting (I used the 'Cardstock, plain' setting, increasing the force to 22) to cut through the backing paper as well.

Resizing
To resize the birds, both layers need to be edited together. Select both layers of the design, grab one of the corner resizing handles, hold down the shift button on the keyboard and move it towards the centre (assuming you want to make them smaller).
If the set is small enough, you can duplicate the design to fit two copies on to the page.

This is what they look like when cut. As well as looking really neat and professional and are also a great size to enclose with greeting cards.

Make Planner Pages
The sticker sheets can be sized to exactly fit into your planner. You can resize the outer box to allow sufficient space for holes to be punched along the outside. Here I've resized the sheet to fit my Happy Planner Classic (9.25" x 7", or 234.95mm x 177.8mm). Remember to leave enough room on the left so that the holes won't go through the stickers.

Alternatively you can scan, photograph (with a Pixscan mat), or draw out a complete planner page and cut a sheet including the holes. I have added extra birds to this sheet. This calls for some different editing techniques which I'll cover in next week's post.

Don't miss Part 2 published on the Silhouette UK Blog on 12th January 2019.

Meantime, here are links some other planner projects on the blog. Just click on a pic to visit the page for that project.

|

|
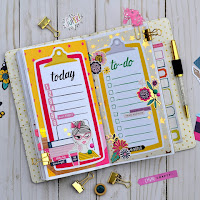
|
Let us know how you get on.
Bye for now,


Thanks for this Janet, very informative.
ReplyDeleteFaith
Hello, dear
ReplyDeleteA debt of gratitude is in order for perusing this blog I trust you discovered it bolsters and supportively data. I have perused your blog great data in this blog. It was great learning from this (Facebook Helpline Number) blog. Your blog is a decent motivation for this blog.