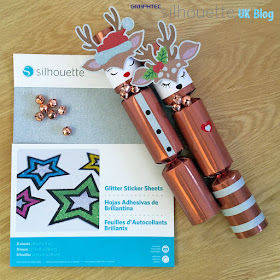
Hi, Janet here with an introduction to the NEW Silhouette® Glitter Sticker Sheets which are now available in the UK.
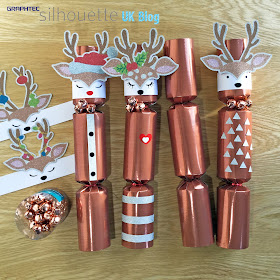
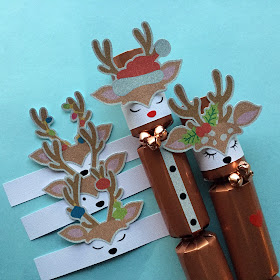
I've included a little festive project, using the glitter stickers to decorate some home-made Christmas crackers using the
Oh Deer! heads by Lettering Delights from the Silhouette Store.
GLITTER STICKER SHEETS
There are 8 sheets in a pack, each sheet being 8.5in. x 11in., or 215 mm x 280 mm. The sheets are glittery with a slightly silvery colouration. They can be printed with any pattern on a home printer. I used my regular inkjet printer and the colours were bright and clear. The sheets are adhesive-backed, so no additional adhesive is needed.
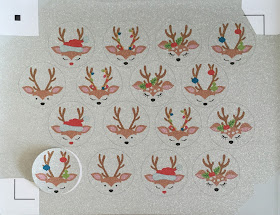
Recent versions of the Silhouette® Studio software have a recommended setting for the Glitter Sticker sheets under "Sticker Paper, Glitter" (Blade 1, Speed 5, Force 10 and a single pass). I found that this setting gave a perfect 'kiss-cut' with my AutoBlade and a sticky mat.
However, I didn't find the whole Print & Cut process as straightforward as usual so thought I'd share my difficulties and some tips in case you have a similar experience.
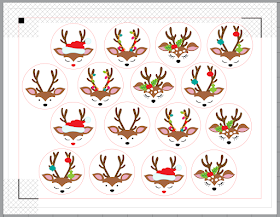
I started off using the sheets to make a sheet of round stickers to use as gift seals and to add to gift tags, but was alarmed to find that on my first attempt the round sticker shape was distorted. Additionally, the circles were not aligned with the printed designs.
TIP 1: PAGE SETTINGS/TEST CUT - Set Page Settings to US Letter and then carry out a test on regular white card or paper. To eliminate any user error, do the first Print & Cut with media of the same size as the sheets (i.e., US Letter size). If you don't have letter sized card you can trim down a piece of 12" x 12".
TIP 2: PRINTER SETTINGS/PRINT & CUT GUIDE LINES - Ensure that your printer is also set to print to US Letter. I find it useful to check with the 'Show Print Border' and 'Show Cut Border' guides turned on in the Page Setup panel. UPDATE: Set up your Print & Cut in portrait rather than landscape (as I did). This allows the marks to be printed entirely within the material's non-glitter corners. For the same reason, use the other default settings too.
If the grey (print) guide line is off the page on the virtual mat, then check the page setup and orientation and change the Print Page Setup if necessary (File > Print Page Setup).
If you still have a problem with alignment, check that your printer settings are not set to 'borderless', that 're-size to fit' is off, and that scale is set at 100%.
Tip 3: GOOD LIGHT CONDITIONS - Carry out the Print & Cut process in good light. If the software fails to pick up the registration marks once the printed media is loaded into the Silhouette, it is most likely a problem with light. Low light, bright light and shadows can all cause problems. I had no success with the glitter sticker sheets until I used them in good daylight.
Tip 4: REGISTRATION MARKS - The Sticker Sheet instructions advise the use of default registration marks. To restore the defaults, in the Page Setup Panel select the correct Style of registration mark (usually Type 1) and click on 'Restore Defaults'. (optional) At this stage I increased the Thickness from 0.50 to 0.70 (regardless of the unit of measure).
Tip 5: WHITEN THE REGISTRATION AREA - The sticker sheets have a smooth area at the corners where the registration marks print. However, I found that I didn't have success with the sheets until I covered these with pieces of white sticker paper (this is a hack I use for any shiny or coloured Print & Cut media). Only 3 pieces are required as shown in the photo below.
GLITTER STICKERS FOR CHRISTMAS CRACKERS
I used these same designs to decorate a set of home-made Christmas crackers (we
really wanted some fun rose gold crackers this year). Here is a quick overview on making the decorations.
1. Open all the Oh Deer! files in one tab.
2. Arrange them as you want them to cut (they are already coloured).
3. Recolour the grey colour to match the copper/rose gold crackers. You can enter the RGB numbers shown, but you may need them to be a little different for your printer.
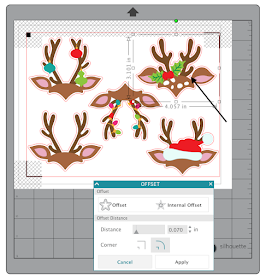
4. Move the facial features aside and make an offset of the heads. Release compound path and remove any tiny pieces. Print & Cut the heads from a glitter sheet.
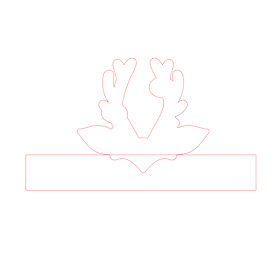
5. To make the wrapper, use only the offsets, and weld each one with a rectangle which is long enough to go around a cracker with a small overlap.
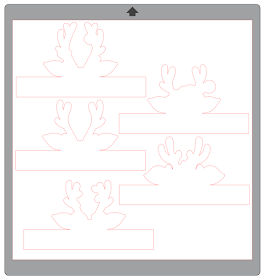
6. Cut the wrappers from medium weight white card.
7. Cut the features from black and red vinyl (I made duplicates).
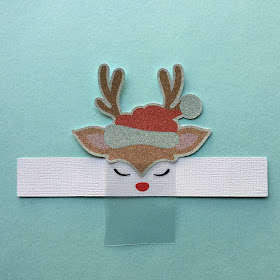
8. Adhere the stickers onto the wrappers and partially cut around the lower part of the head to allow it to stand proud from the cracker.
9. Transfer the vinyl features to the lower part of the wrapper.
10. Adhere the wrapper to the top part of the cracker. Add additional decorations and scraps of glitter sheet.
I'd love to see what you make with the sheets. You can share photos of your makes over on the
Silhouette UK Facebook page.
Bye for now,
DESIGNS USED:
PRODUCTS USED:


