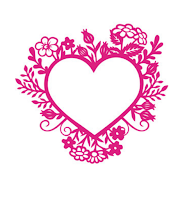
I wanted to show you how you can add photos to your paper cut designs and cut them in almost any shape you want. So here is a design I made for our upcoming wedding anniversary with a photo of my little family framed. Hope you like this tutorial!
Supplies needed:
Silhouette sketch pensRibbon
2 colored cardstock
White cardstock
Picture on jpeg or png file
Frame
Silhouette CAMEO/CURIO/PORTRAIT
FLOWER GARDEN HEART Design (ID #114787)
LABEL TAG FRAME Design (ID #24109)
WINGED SKETCH FONT (ID #73988)
RHAPSODY SKETCH FONT (ID #76534)
1. Preparing your design:
- Open the flower heart file and resize it to fit in side your frame. I used a RIBBA frame from Ikea so I adjusted the heart to 20 x 18 cm.
- Choose to release compound path. When that is done, copy the heart shape.
- Copy and paste the heart to the side, to use for the foto. Now you can gather your paper cut design and make compound path.
- Add your picture, and adjust your heart shape in front of the picture. Adjust the size of your picture till you get the desired parts to fit inside the heart.
- Gather the heart and picture and crop the design.
- Put your picture shape to the side along with your paper cut design and work on the label.
- Release compound path and create an internal offset, about 0.33 cm. Choose to have corners on the edges instead of round.
- Move the internal shape down and gather your design with the holes and make compound path.
- Choose the Rhapsody Sketch font and write your text and adjust the size to fit inside the internal offset shape.
I always like to create a mockup of my full designs, with the colors I am using before cutting to see if I need to change something. And this will also help me see what size the label should be as well. If you would like to do the same, set page size to your frame size, and assemble all parts together.
2. Cutting and assembling your design:
- First cut your background paper for your frame. Mine was cut at 23 x 23 cm.
- To print and cut your picture, set your page size to your current printer. and add registration marks. Make sure your picture is inside the registration marks.
- Print and cut, putting the print settings to your preferred picture settings.
- Add your cut settings and choose cut edge. now your picture is ready to be cut. (NB! Remember to put the right cut setting according to the thickness of the paper you are using. Do a test cut to make sure its cutting properly.)
- Cut the papercut design and assemble the cut pieces on your background paper.
- For the labels I used the sketch pens. add your label design and the writing on the page. Go to your cut settings and choose Silhouette Sketch Pen. On cut settings, choose "No cut" on the label but only on the text. Send to silhouette and your machine should start writing your text.
- Remove the sketch pen and put back your cutting blade. Go back to cut settings and choose "No cut" on text but "Cut edge" for the label. Send to your silhouette.
- Once your text label is done, you can cut your background label as well.
Now you can assemble the rest of the design and insert the ribbon on the holes of the background label.
This wasn't that bad right? If you decide to try it, I would love to see what you make with this tutorial!
DESIGNS USED:

PRODUCTS USED:


No comments:
Post a Comment