Hello, Janet here again, with a post using Print & Cut with the large cutting mat. I've customised a light box with a large photo, using my Silhouette® Cameo to make perfectly sized panels.
I'm a bit late to the light box party, but have been looking at getting one for ages, so I was really pleased to receive this one as a Christmas gift. I've seen that you can buy photo panels to go in the light boxes, but I wanted to make one with a photo of a place dear to my heart. Because of the size of my light box, a tad over A4 size, I used A3 paper and the larger Cameo cutting mat (the Silhouette 12-Inch x 24-Inch Cutting Mat). With the larger mat I was able to make a giant Print & Cut and make panels that were the perfect size for my light box. The instructions below will show how you can do it too (and maybe help with any large-scale Print & Cut projects you are thinking of undertaking). Of course, if you have a smaller lightbox, you could make the panels with the regular cutting mat.
SUPPLIES REQUIRED:
A3 Printer Paper
Large Format Printer (A3 or bigger)
Silhouette 12-Inch x 24-Inch Cutting Mat
Silhouette Cameo® 3
INSTRUCTIONS:
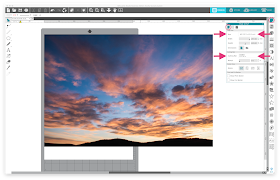
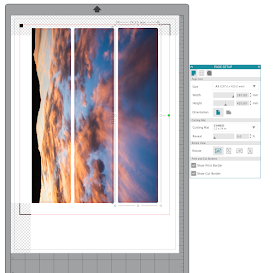
STEP 1. Bring in Photo and Adjust Page Settings. Open the Studio software and then bring in your digital photograph (File > Open, then navigate to your photo, select and click OK {or drag it onto the mat if you have Designer Edition or above}). Adjust the page and mat settings for A3 paper and the 12" x 24" cutting mat (Page Setup panel, Page Size tab, choose A3 page and Cameo 12" x 24" mat).
STEP 2. Adjust Printer Settings. In the same panel and tab, click the 'Show Print Border'. In the main menu (at the top of the page), click File and select Page Setup Menu. Choose your printer and change the paper size to A3. Ensure printer paper size is set to 100%, or Actual Size, NOT Borderless (if you have that option). A grey box indicating the print boundary should be displayed on the virtual cutting mat. NOTE: If the grey box aligns with your paper edge you've got borderless turned on, turn it off!
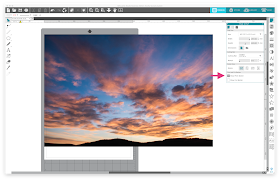
STEP 3. Adjust Photo Dimensions. Measure the height and width of the front face of your light box. Draw a rectangle, select it and then open the Transform panel and the Scale tab, enter the light box dimensions and click Apply.
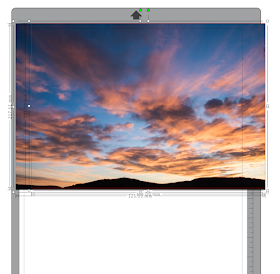
Holding down the shift key, reduce (or enlarge) the size of the photo until it is slightly larger than the lightbox rectangle.
STEP 4. Prepare the Strips. Measure the height of one of the letters that fits in the light box (assuming your light box came with some letters, if not measure one of the gaps from the side to see the full size of the opening ). This is the height that you'll make each strip. Enter the dimensions with the padlock open (width remains unchanged) in the Transform panel and press Enter.
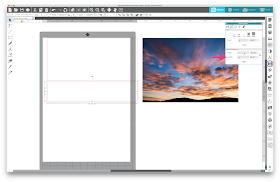
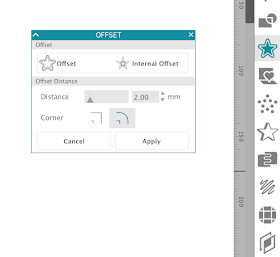
STEP 5. Make a Printer Gutter. Create an external offset of the rectangle (select the rectangle, pen the Offset panel, select Offset and click Apply). The default of 2 mm is perfect. The inner rectangle will be the cut line, and the outer rectangle is the extent of the printing.
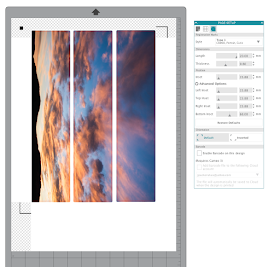
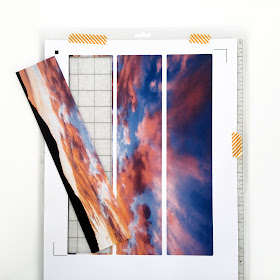
STEP 6. Make the Strips. Duplicate the rectangle twice and align all three on the photo with minimal gaps, but no overlaps. Discard the large rectangle. Copy the photo and paste it twice (right mouse click, select Copy, select Paste in Front, select Paste in Front again), now you have 3 copies. Send them to the back (select photos, right mouse click, select Send to Back). Open the Modify panel, select one of the outer rectangles and one of the photos and click Intersect. Repeat for the remaining rectangles. You'll now have 3 strips. Change line colour of the outer edges of the strips to clear whilst leaving the inner rectangles red.
STEP 7. Prepare to Print. Turn on the Registration Marks (open Page Setup panel and Registration Marks tab, select Style, Type 1). Select all the strips and rotate them, and position them on the virtual mat.
(Optional) To save paper and reduce the distance the mat needs to travel, open the Advanced Options and use the slider on the Bottom Inset to move the lower registration mark closer to the strips.
STEP 8. Send to Print. Check that the strips are within the Cut and Print borders (turn them on if necessary). Send the file to your printer ensuring that A3 paper is selected in Print Page Setup.
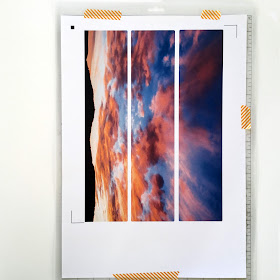
STEP 9. Prepare to Cut. Mount your print onto the mat and secure it with additional tape if your mat is getting less sticky. Load your mat.
In the Send tab select Cut by Line. Set the red lines to Cut and deselect the clear lines so that they won't cut. Select your media, adjust cut settings if necessary, and click the blue Send button.
The optical eye should first detect the registration marks, then auto-adjust the blade and commence cutting.
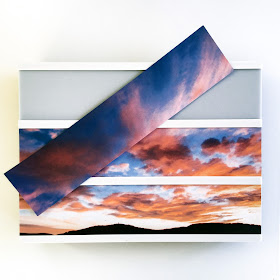
STEP 10. Install the Strips. Remove the strips from the cutting mat and simply slide them into the slots on your light box.
Add letters as required.
This photo, of the view from our house, was taken by my husband (there are SOME advantages of living in north east Scotland)! I'd love to see what photos you put in your light box. Why not share them on the Silhouette UK Facebook page?
Bye for now,
PRODUCTS USED:

|

|

|







No comments:
Post a Comment