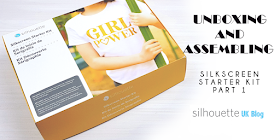
Hello, it's Verity here from Pretty Little Button. This week is Silkscreen week, so I have another post for you using the Silkscreen starter kit from Silhouette. I have done two previous posts on using the kit, one the unboxing showing you what comes with the kit and also how to cut and print your first design. Check the links at the end of the post to both of these posts for more details. Now I had in mind to create a cushion, however, I knew the design I wanted would be a one of design - I wasn't going to be printing this more than once. Instead of using heat transfer vinyl to create a permanent screen I have used regular adhesive vinyl for a temporary screen which is removable. This allows you to apply another design to the screen and print through that as well. Now, bear in mind, you will get ghosting, which I have pictures below, but the screen is still usable. If it stretches your supplies, there's no harm!
Silkscreen printed cushion - Create Happiness process:
To start off, add your design in your design space. I use the Antelope font for 'create'. The aperture of the screen measures a US letter size, so select this in the paper size drop down menu in the Page stupe window.
As I wanted my text as large as I could, I wanted to orientate my page in the landscape orientation which is in the same Page Setup window.
The beautiful of making these adjustments to the page size allows you to position your design within the centre of the page using the transform window.
Now I decided, I wanted my text even bigger and therefore separated the two bits of text from one another. The using the rotate feature (little green circle above the text), I could rotate the word at a diagonal across the design space. This gives more room to enlarge the design.
Now I recently did a mini screen printing workshop and notice that they use adhesive vinyl for their screens but placed the vinyl on the underside of the screen - so it is positioned between your fabric and screen. This allowed for a much smoother pull of the paint over the screen without your scraper catching on any vinyl edges.
Therefore I flipped my design horizontally so I could adhere the design onto the back of the screen and for the word to print the correct way round. If you design to adhere your design to the top of the screen you do not need to do this.
Once cut, weed out the positive aspect of the design as seen below.
I then adhere this down to the underside of my screen. I had a few areas where there was no vinyl cover the screen around the edges. To prevent pain accidentally going through where it isn't wanted added non-porous wash tape around the edge to seel the screen.
Once flipped over, you can see the vinyl through the screen and the phrase reads correctly. My wooden slats were a little loose on the edges, so I kept them in place with some micropore tape.
Once I had printed the first design, I removed the screen from the frame and removed the adhesive vinyl. Next, I washed the screen and dried it. As you can see below, you can see a 'ghost' of the screen I just did. The screen is coloured but this does not add affect the screens ability to print in those areas as long as you wash your screen straight away.
Below I adhered my second design to the screen - you can see the ghost of the previous screen but you are able to see the newer design over this.
Silkscreen printed cushion - Create Happiness photos:
If this has inspired you to try this out, please post below. I would love to see it!
Until next time,
Verity

Profile | Pretty Little Button Blog | Instagram | Facebook
FONTS USED:
ANTELOPE by Polem, Design ID#251515


Such a beautiful project, thanks for all the info.
ReplyDeleteFaith