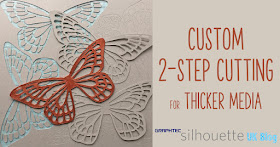
Hello, Janet here from the Crafting Quine blog. This week the Silhouette UK Design Team have been experimenting with the Silhouette Chipboard sheets. I have used these sheets a lot and have found that they are fantastic where thicker card is needed, and layer beautifully to make strong embellishments.
One of my favourite Silhouette makes ever are these chipboard arrows. This link to the original post contains lots of information on using the chipboard, and also on different finishes that can be applied to layered chipboard shapes.
This time around I did encounter a small problem with cutting the sheets though. My mat was getting a little old and had lost some of it's tack. When I sent it to cut it moved around on the mat, and I had to cancel the cutting operation. Next time around I added some masking tape to the top and bottom of the sheet, and also made and saved a two-step custom cut setting to improve my cut and to help me remember how to cut it on future occasions. The first cut, cuts about half way through the media, and the second follows the first and cuts all the way through. This allows the pressure on the first cut to be lower so movement of the media is less likely, and the second cut ensures that the surface is cut more cleanly. It works for thicker and more difficult to cut materials, and also coated media such as metallic card and specialist printing cardstock.
My project is a set of fairy wings (Lori Whitlock's Butterfly, Design #9794) cut from the Silhouette Chipboard, part of a mixed media project which I've yet to complete. I took a butterfly design, and erased the tail and antennae, and then duplicated it to fit four copies on to the 12" square sheet of chipboard.
To prepare the design for cutting it is necessary to have two copies of the design, one exactly on top of the other. To do this use the right mouse click, select Copy, then select Paste in Front.
While the new copy is still selected, select a new colour for this one set of lines (Line style panel, Fill Colour tab). If you were to move this new copy away, you'd see that they are two copies, one on top of the other. However, don't move either, or if you do, re-align them (Transform panel, Align tab, click Centre [NOT Centre to Page]). I made the new set purple.
When you go to cut the chipboard, select the Cut by Line tab, and you should see both line colours (the new one, and the original red set).
I find that the default force is too high anyway, and reduced it to 29 or 30 anyway. I then created two custom settings. Click here to find out how to save the save the custom settings. I named one Chipboard Step 1 of 2, and Chipboard Step 2 of 2. Drag step one to the top so it cuts first if it isn't there already.
You can see in the pictures below the settings I used for both steps. Your settings may differ depending on the age and use on your mat and blade. Do carry out test cuts to ascertain your perfect setting.
You can see in the pictures below the settings I used for both steps. Your settings may differ depending on the age and use on your mat and blade. Do carry out test cuts to ascertain your perfect setting.
Here are the butterflies that I cut out - ready to layer together to make my fairy wings.
I'd love to hear if you find this useful. You can comment below or upload a pic to the Silhouette UK Facebook page.
Bye for now,
DESIGNS USED:
 |

|

|

|


No comments:
Post a Comment