Wednesday, 30 November 2016

Embrace Life Sketch Pen tutorial

Embrace Life Sketch Pen tutorial

Hiiiii Caroline here with a layout I created using a simple star shape, sketch pens and the modify tool.

Here is the layout...


This is a super easy technique but packs a punch, plus you get to add a whole bunch of text to highlight your memory.

I started off using this shape from the silhouette studio...


I only wanted to use the top left star so I deleted the other three and then re sized the star to be much larger. Once you have done that, just pop it off to the side.

Now to create your text. I was documenting Freya looking at an amazing statue of a head with mosaic tiles all over it. I decided to have a look on Pinterest for some quotes that would fit the theme and this one stood out to me:

'We are mosaics - pieces of light, love, history, stars - glued together with magic and music and words'

I typed out the quote by clicking the text button on the left. Once clicked a box will appear on the right which allows you to choose the style of font and the size. I wanted to fill the whole page with the text so once I had typed it out I just copied and pasted until it was all filled up....


Now you need to go back to the star shape and drag and drop it over the text...


The next step is to select the whole design and clicking object and group - this is very important!
Now on the top right click the modify tool and options will appear beneath it, click crop and it will look like this...


VERY IMPORTANT - highlight everything as above and again click group, this enables you to resize or move your shape and text about the page as one.

Once that is done you are ready to print your design using the sketch pen setting and you have the background to your page done.

I decided to ad in some stitching in a couple of different coloured threads just to add some texture to the page.

Finally add your photo and embellishments and then sit back and admire your handiwork HA!

Here are some close ups...


I hope you enjoyed this and that you give it a go, I was so chuffed with how this turned out and will be doing it more often on my pages.

I'll be back soon with more pages and ideas.

'Til next time
C x

You can find me here:
Blog
Facebook
Instagram
Pinterest
Twitter

Products Used:

PRODUCTS USED:


Light hold cutting mat for Cameo


Tuesday, 29 November 2016

How to Add a Hanging Loop


How to Add a Hanging Loop on Silhouette UK Blog by Janet Packer . Snowflakes by Lori Whitlock.


Hello,
Janet here again with a simple post about adding a hanging loop to your own designs or those bought in the Silhouette Design Store. With the addition of a hanging loop, a simple design can be transformed into a gift tag, a present decoration, a tree ornament or even a banner element.


To demonstrate how easy hanging loops are to design and use I have chosen some snowflake files from the Store designed by Lori Whitlock. Her files have always been a good choice for 3D cutting files, and I regularly choose her fonts for reliable cutting and readability. Now I'm finding the individual design elements are great too and they cut really well, even at smaller sizes.

The snowflake decorations here have hanging loops attached and are cut from faux leather. They can be used on a festive key chain, or as an embellishment on a handbag or a zipped bag. These contain an additional smaller snowflake in the centre.


Add hanging loops to Lori Whitlock snowflake files by Janet Packer on the Silhouette UK Blog


HOW TO MAKE THE HANGING LOOPS

It takes just minutes to design a hanging loop (seconds once you've practiced). Here are the steps in brief (they are expanded  at the end of the post. Look for *****):
  1. Draw a circle
  2. Copy it on top
  3. Drag one circle smaller, aligned and proportionate
  4. Select both
  5. Make them a compound path
  6. Check (optional)
  7. Draw a rounded rectangle (optional)
  8. Weld to design.


HOW TO JOIN THE HANGING LOOP TO DESIGN

1. Position the loop onto the design where desired.
2. Select all and weld, or ungroup and select the background piece and weld the loop to that.
3. If it won't weld the design piece might not be a compound path, so make it into a path or join breaks in the path (open Edit Points - red dots indicate an incomplete path).


A hanging loop welded to the background of this snowflake design make pretty gift tags.


ADD MORE THAN ONE LOOP

To make a hanging element from shape (for a banner, for example), it might hang better  (and shift along the cord less) if it has two hanging loops.


MAKE DIFFERENT SHAPED LOOPS

You can easily make a shape into a slider to decorate a parcel or a card.  Sometimes a different shaped loop is better for this. If you are wanting a ribbon slider you just adjust the height of the inside of the loop to be around the width of your ribbon


ADDING A LOOP TO A LETTER

Of course it is straightforward to add a loop to a letter too. In order to weld a loop onto a typed letter just ungroup it and weld the two things together. These can be put to all sorts of uses, I like to use them as re-usable gift tags for family Christmas presents make from faux leather and glitter heat transfer material.


***** HANGING LOOP (STEP-BY-STEP INSTRUCTIONS)
1. Open up the Silhouette Studio software, just the basic version will do. Now you need to draw a circle using the Ellipse Tool. To do that, click on the design area, hold down the Shift button on your keyboard, and click and drag your mouse in a diagonal line. When you have a circle, release both the mouse and the Shift button, but release the mouse FIRST. The size of the circle is not important at this stage.


2. Now make an identical copy of the circle on top of the first. To do this, click on the Select arrow and then click on the circle. This selects the circle. Then select Edit > Copy, and then Edit > Paste in Front, from the top menu.  This can also be done using the exact same right click options on your mouse.  Although its hard to see, there will be two copies of the circle there.


3.  One of the copies is automatically selected. If you deselect by mistake (by clicking away from the circle) click on the circle with the mouse. Move your mouse to the bottom right drag handle (white square), click on it and at the same time hold down Shift, Alt plus Cmd on your Mac keyboard (Shift plus Alt in Windows), then move the drag handle towards the centre of the circle. Release the mouse and drag handle when the smaller circle is about half size.
4. Now, click on Select again and draw a box around the two circles.
5. Now both circles are selected you are going to make them into a single shape (like a polo mint). To do this click on Modify and Select Make, under Compound Paths.


6. You can check that it has worked by filling the shape with a colour (any colour will do, as the colour will disappear with the next step anyway).


7. Now you can either weld this directly onto a shape, or make the hanger a little longer by making a 'neck' for it. To make a neck draw a rounded rectangle of similar width to the circle.


8. Align the two shapes (Object > Align Centre) and then weld the polo and the neck together (Modify > Weld). This new shape can now be overlapped on a design and welded to it.


9. You might even find it useful to save a file to your library containing a collection of loops in different shapes and sizes.


I'm sure you'll find lots more uses for your new hanging loops.

Bye for now,


   Profile | My Blog | Pinterest | Twitter | Instagram


DESIGNS USED:


PRODUCTS USED:


Monday, 28 November 2016

Line Art Typography with Free Design Files

Line Art Tutorial with free files for sketch pens with Silhouette Cameo by Nadine Muir for Silhouette UK blog


Hello, Nadine here with a tutorial showing you how to use sketch pens to make line art typography.  The sketch fill options is a feature exclusive to the Designer Edition of the Silhouette Studio software.  Fear not Basic Edition users, I have converted the free files to regular lines so you can use them without these advanced sketch pen options!

What you’ll need

  • Silhouette
  • Optional Free Cut File – Download here
  • Card
  • Silhouette Sketch Pen or Pen Holder plus pen of your choice


STEP ONE: Design


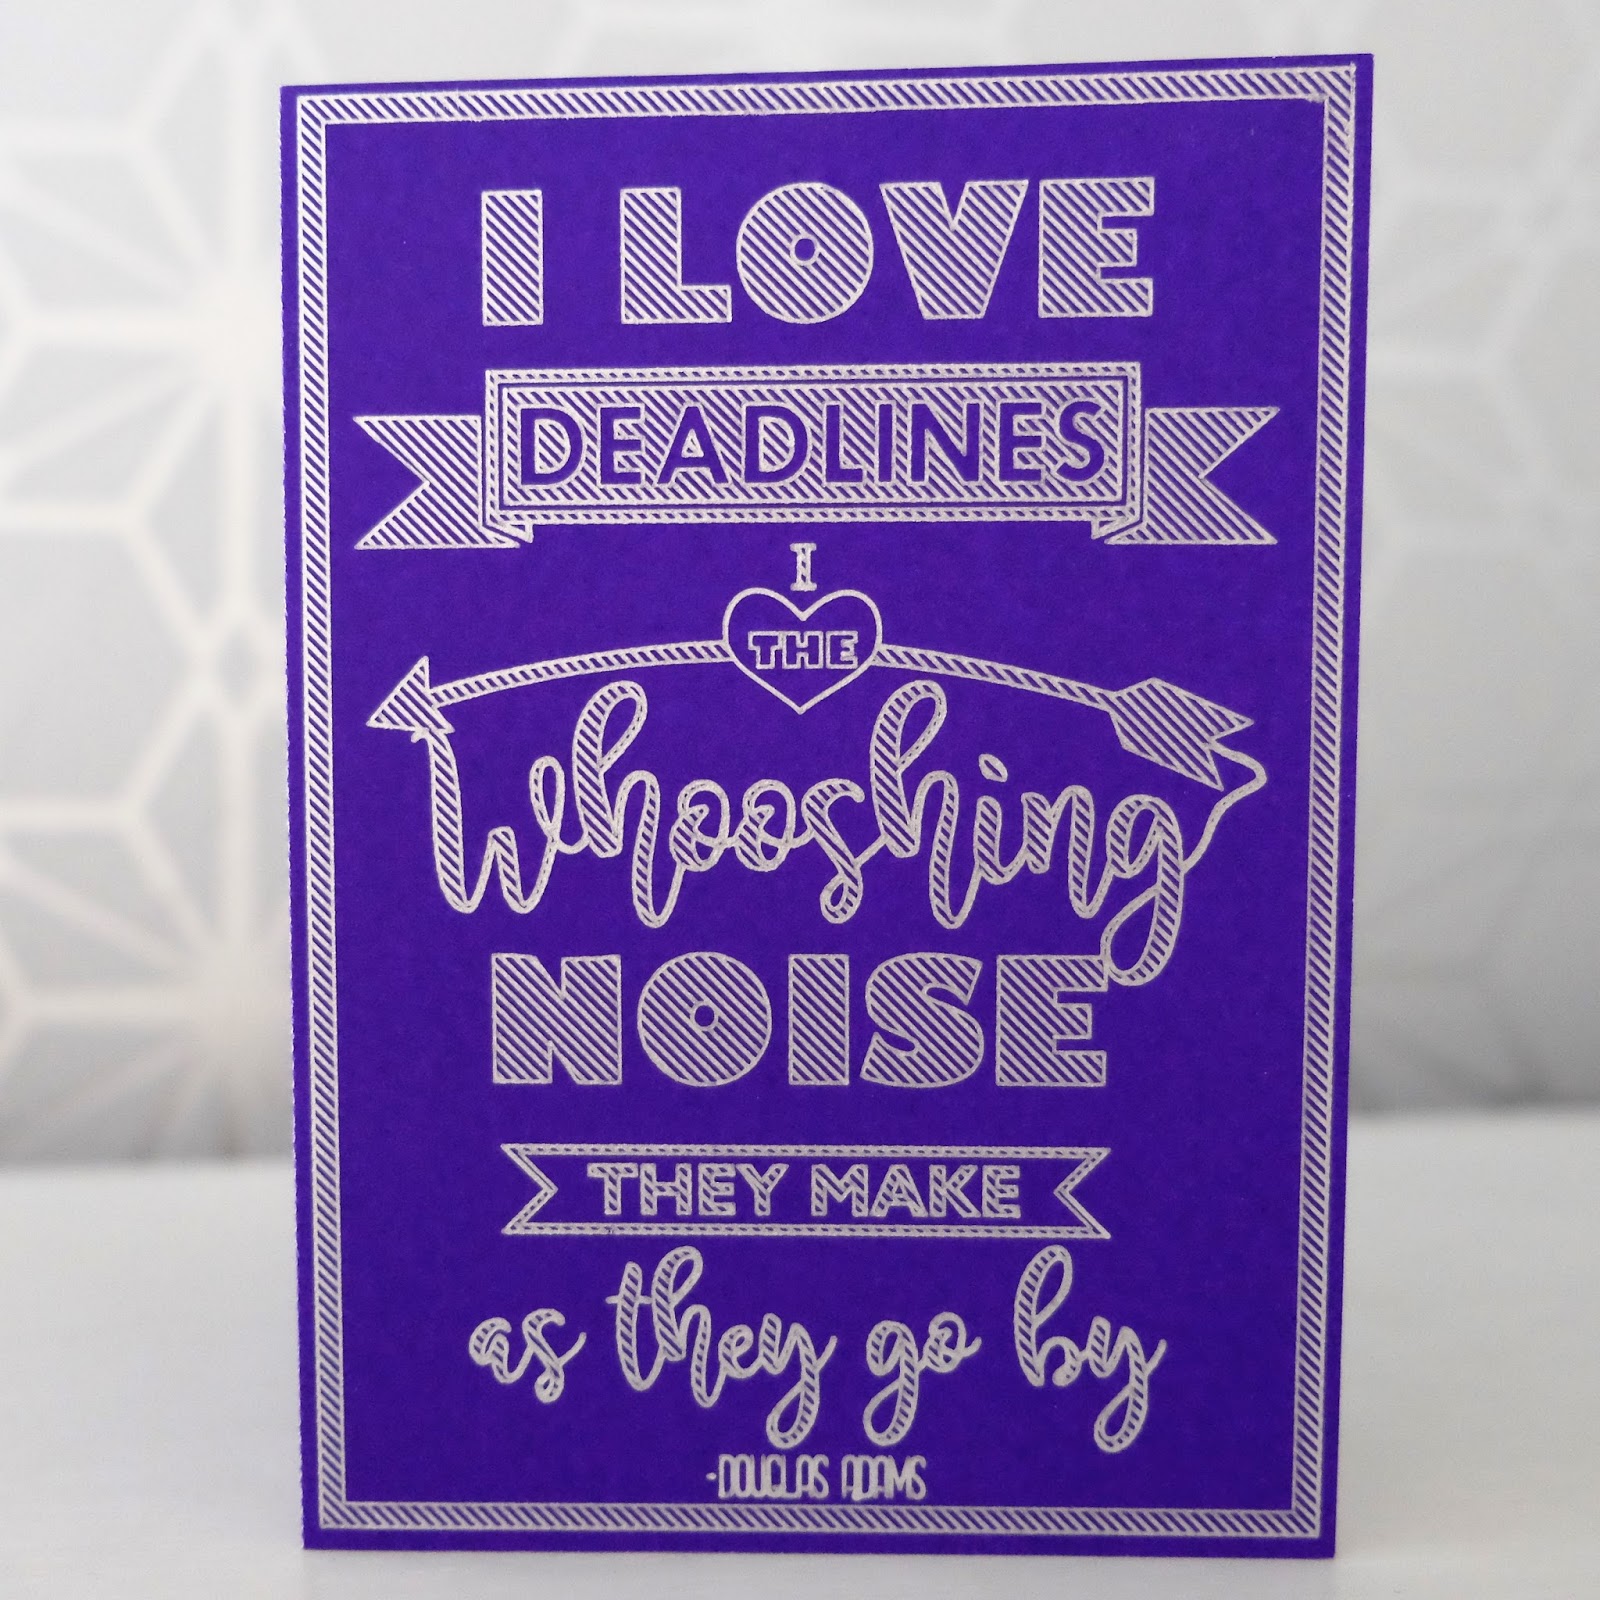
I have included a free download of the typography art that I designed using the quote ‘I love deadlines, I love the whooshing noise they make as they go by’ from Hitchhiker’s Guide to the Galaxy author Douglas Adams.

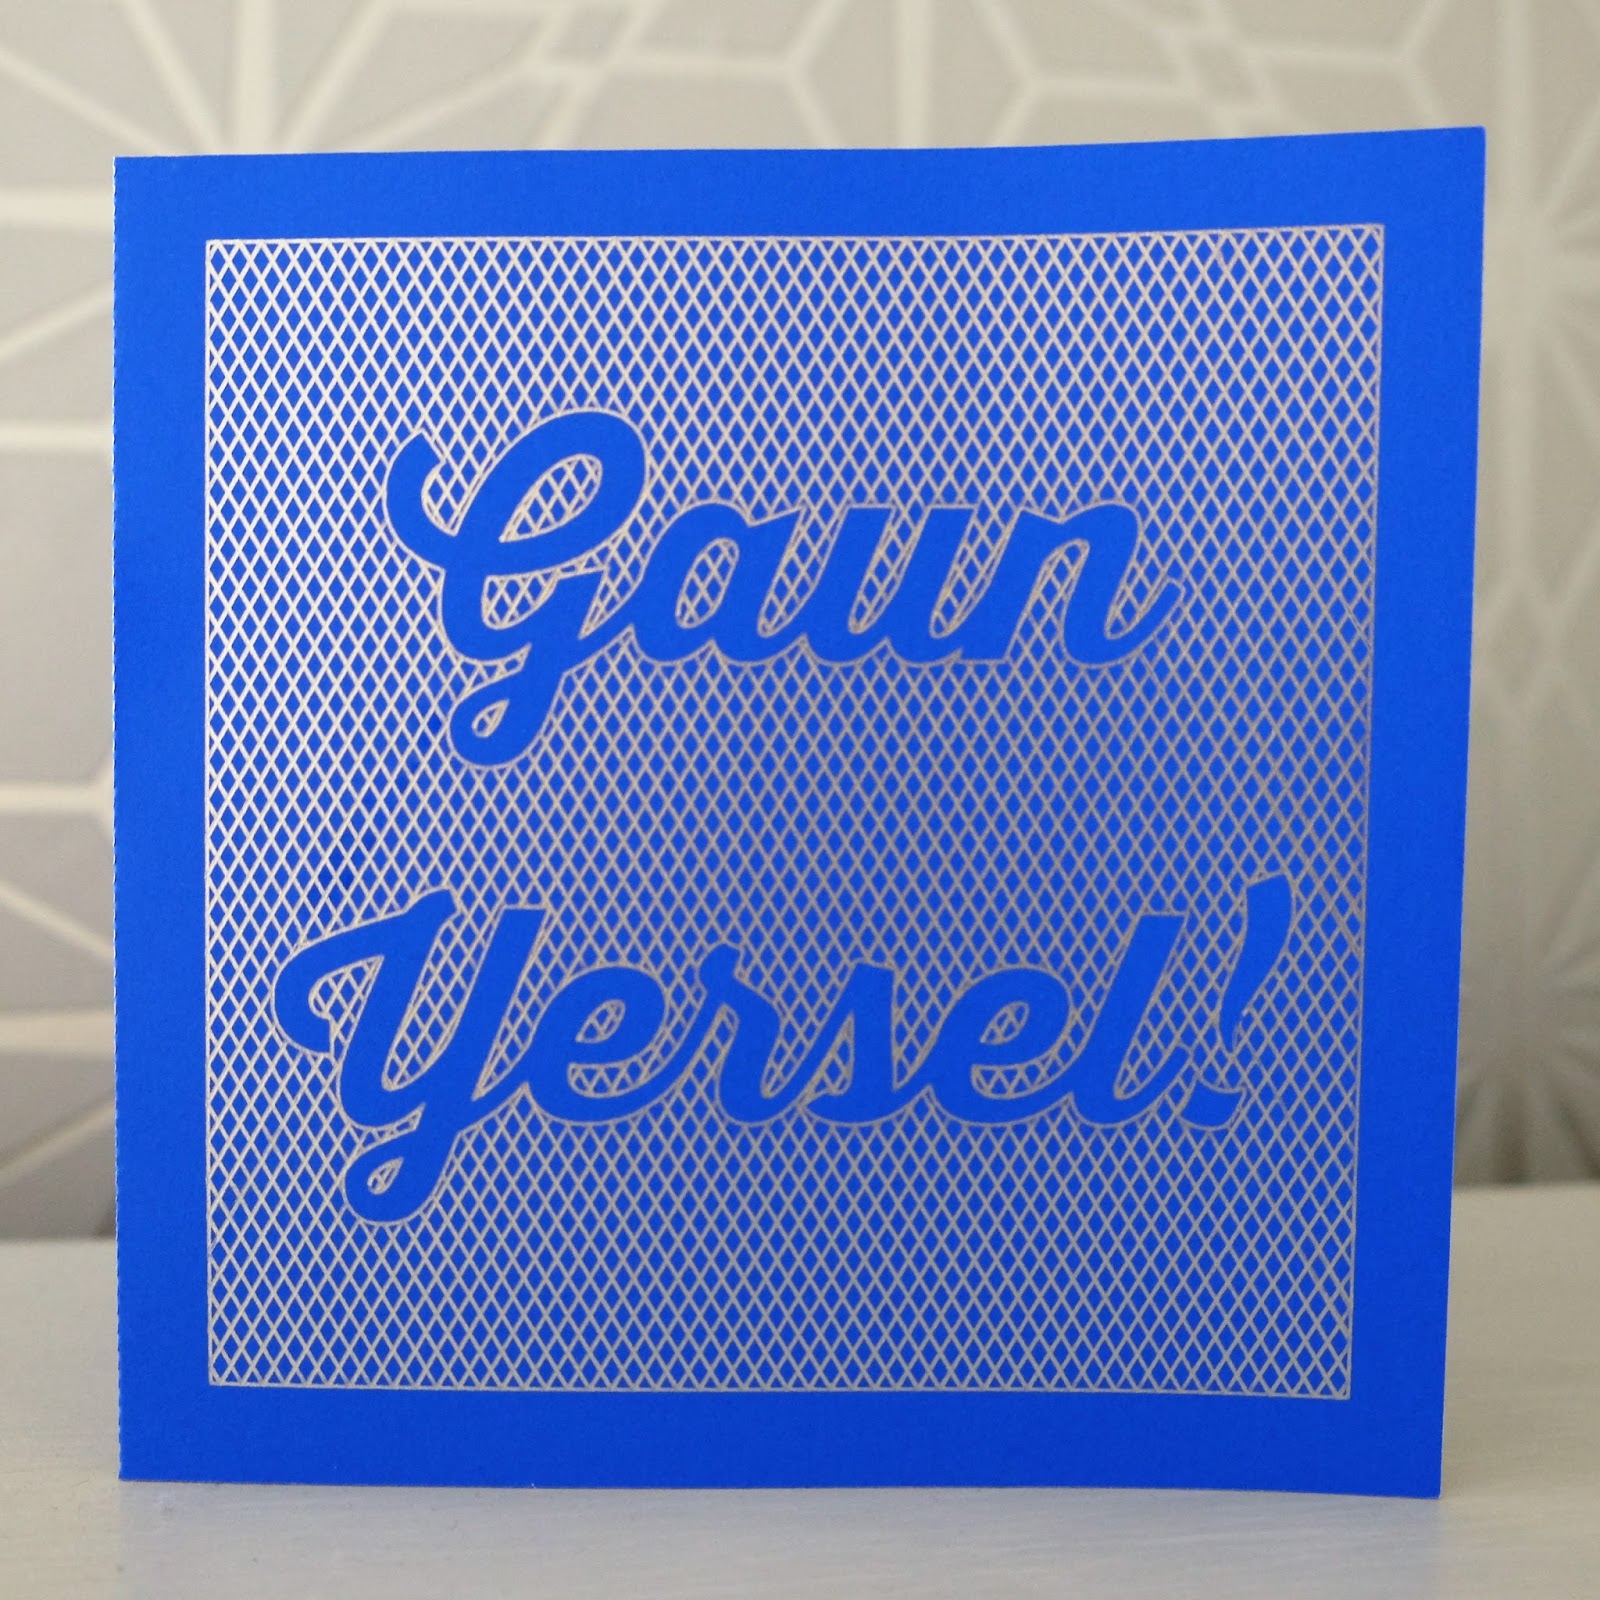
Given that we are a UK site, I also decided to also make some cards with local colloquialisms.

Download designs here - they are ready to go if you want to skip the tutorial and get straight to the cameo :)
Douglas Adams I love deadlines quote.  Free file for sketch pens by Nadine Muir for Silhouette UK blog


If you make your own design, I recommend chunky fonts for this style, in particular font types with heavy or ultra bold weights are good.  There are also many typography style designs available from the Silhouette Design Store.

STEP TWO: Make Compound Path

The key to making the line art work is to make your shape a compound path (available on the right-click menu or using shortcut key cntl + E).
Top tip
It's super easy to switch between having the letters filled to the background instead, simply pop a square / rectangle around the lettering and make compound.

If you're not familiar with compound paths, I did a tutorial on this recently explaining them and how they are different to grouped shapes: Mastering Modify Tools tutorial.  The tutorial includes a printable cheat sheet.

Use compound path for sketch pen fills


STEP THREE: Sketch Fill


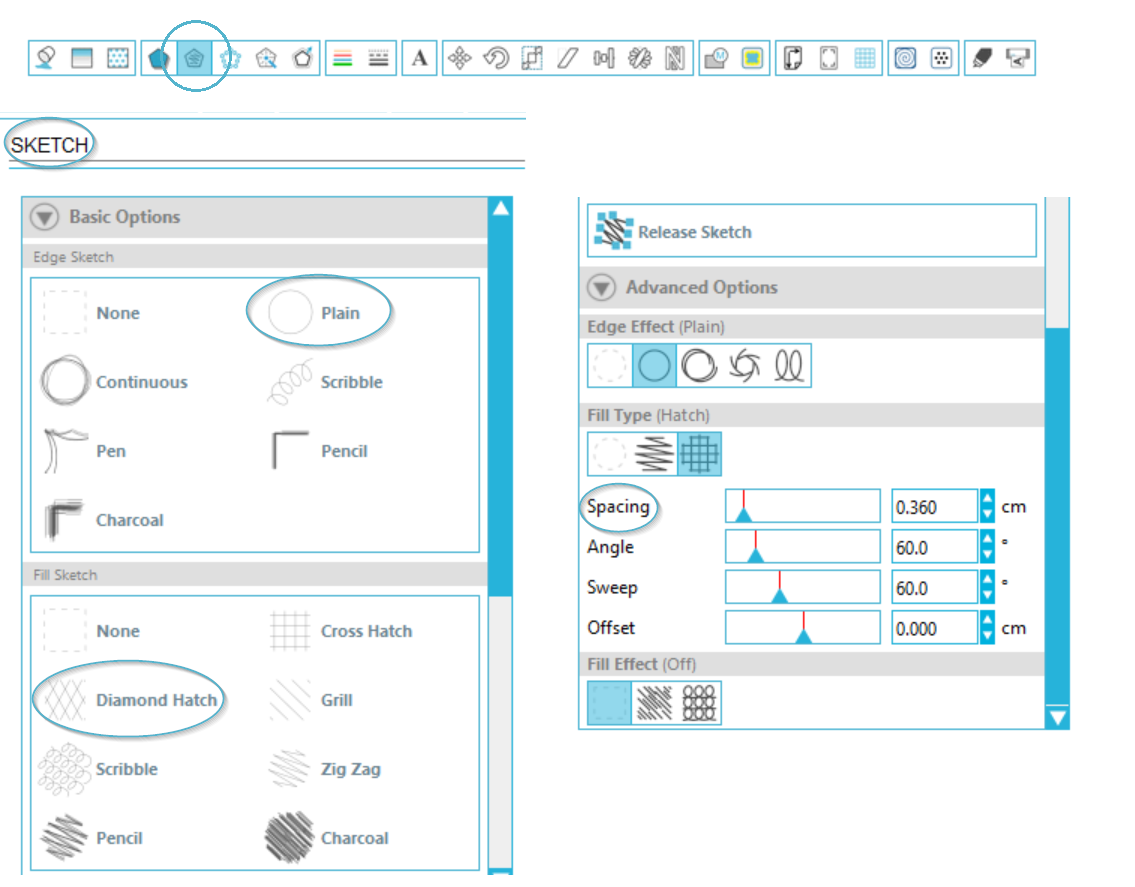
The sketch pen menu has basic options to pick the edge and fill style.  Scroll down to the advanced options and you can use the sliders to adjust the spacing.
Sketch pens menu.  Line art tutorial by Nadine Muir for Silhouette UK

Top tip
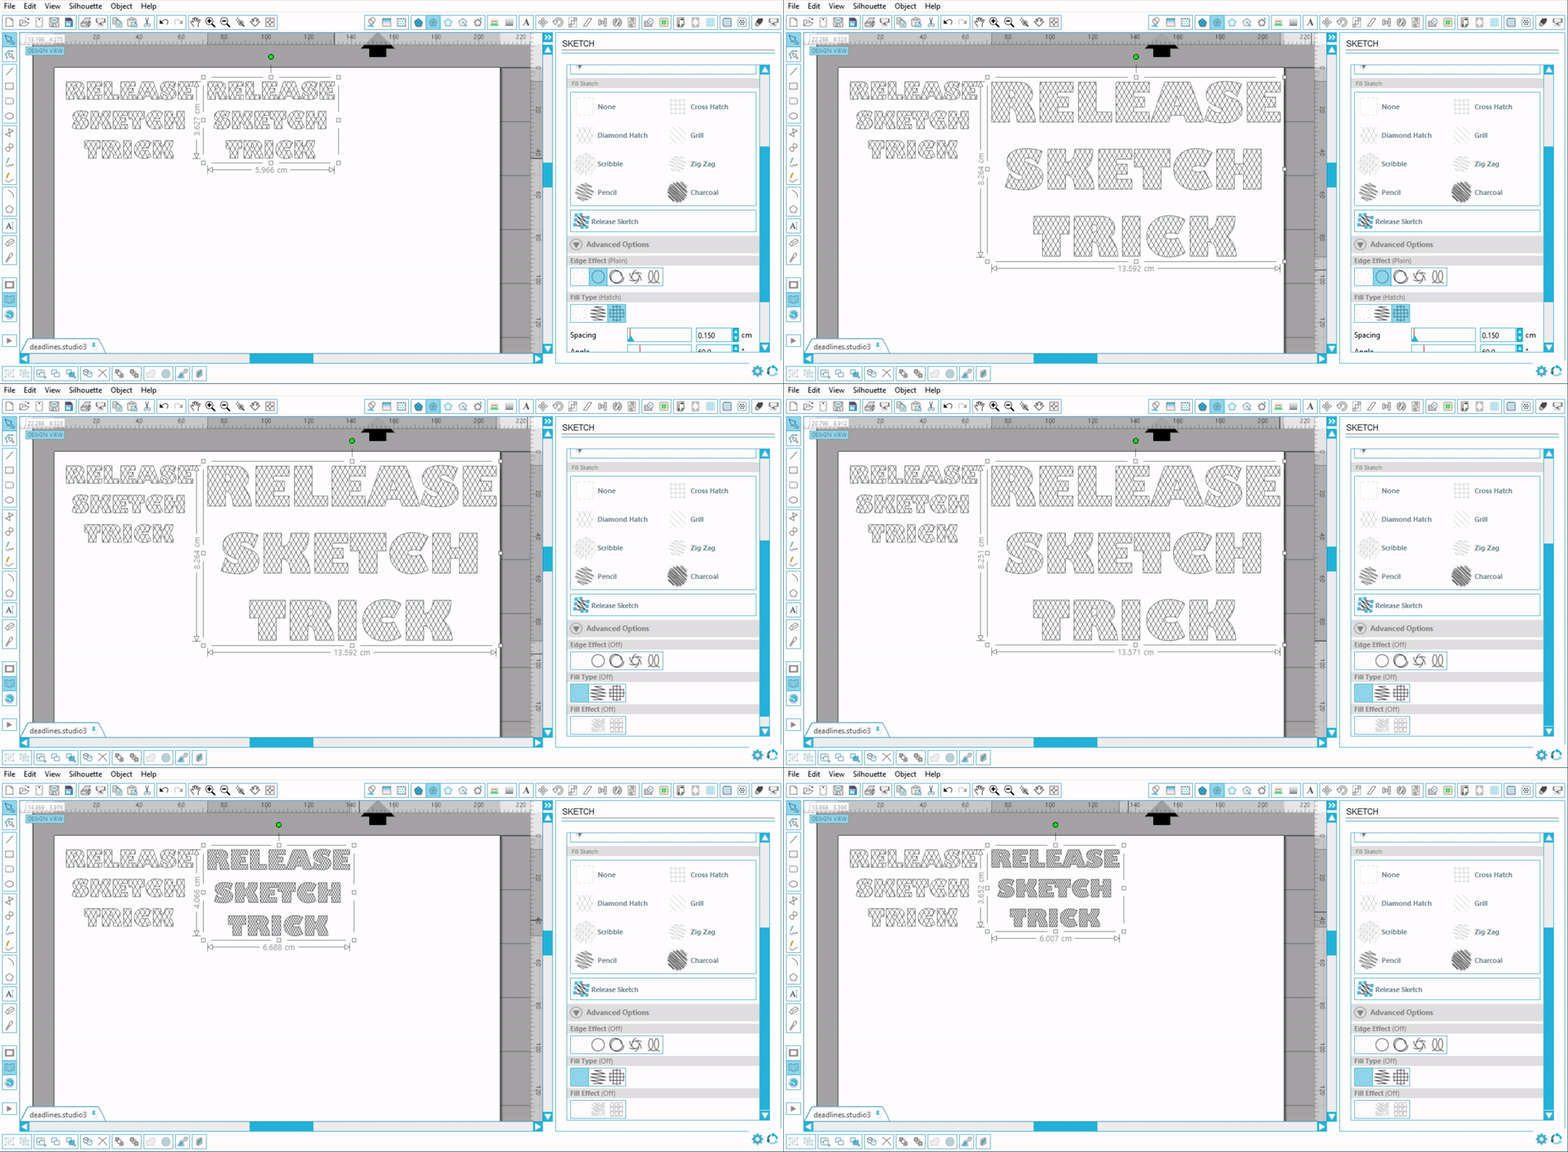
You can cheat the minimum spacing allowed by using the 'Release Sketch' trick.  Increase the size of your design until you like the spacing, then click 'Release Sketch'.  This will convert your sketch to regular lines so will remain the same when you scale it back down.


Release Sketch trick to scale spacing any size


STEP FOUR: Send to Cameo

The Cameo 3 and Curio can sketch and cut together as they are dual carriage.  If you have an older machine, just sketch first, then cut in the advanced mode of the Cut Settings window.


FINISHED PRODUCT

Line Art Tutorial using sketch pens with Silhouette Cameo by Nadine Muir for Silhouette UK blog

Line Art Tutorial with free files for sketch pens with Silhouette Cameo by Nadine Muir for Silhouette UK blog

Line Art Tutorial with free files for sketch pens with Silhouette Cameo by Nadine Muir for Silhouette UK blog

Line Art Tutorial with free files for sketch pens with Silhouette Cameo by Nadine Muir for Silhouette UK blog

Line Art Tutorial with free files for sketch pens with Silhouette Cameo by Nadine Muir for Silhouette UK blog


DESIGNS USED:


PRODUCTS USED: