Hello again,
Janet here with my first new project with the Silhouette UK 2017/18 Design Team.
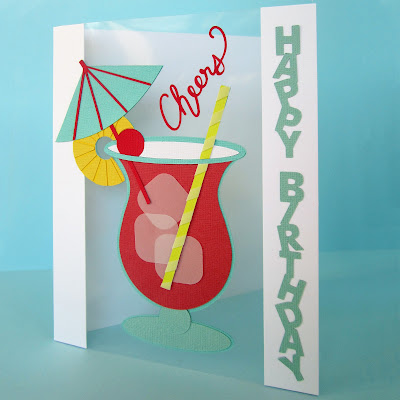
I love to add acetate windows to my cards, I feel it adds drama to an otherwise conventional card design. The card I've made today makes use of an acetate panel, a colourful topper made with Silhouette Adhesive Cardstock, and a happy birthday sentiment using vertical text.
TO CREATE VERTICAL TEXT
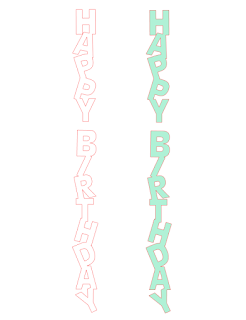
Ordinarily, when you use the Text tool, text is created horizontally. However, you can create vertical text by forcing each letter onto a new line.
Step 1: Click on the Text tool and the Text Style panel will open. Type text in a suitable chunky font. I used LW Bubble Letter.
Step 2: Ensure text is highlighted so it is in edit mode (green box around the text). Click on the thick bar to the right of the text and drag it to the left. Alternatively, place your cursor between each letter and press Enter/Return on your keyboard. Do this also if there is more than one letter left on a line.
Step 3: In the Text Style settings, select the Centre option.
Step 4: Reduce the Line Spacing to bring the letters closer together.
Step 5: (optional) Draw a temporary rectangle around the text to act as a guide for rotation, spacing and size. Rotate some of the letters to give them a more irregular/bouncy look. To do this, Ungroup the text and by clicking on an individual letter, grab the rotation handle and move some letters clockwise, and some anti-clockwise. Adjust the spacing so that there is a little overlap on each letter.
Step 6: Delete the guide rectangle. Weld each word together. Group the whole sentiment. Re-size to fit your project.
TO MAKE THE CARD
What You'll Need
A4 Pearl Heavy-weight Cardstock (300 gsm)
A5 Heavy-weight Clear Acetate (at least 220 microns)
Double-sided Adhesive Tape
Silhouette Adhesive Cardstock (white, strawberry, pink, sea mist, mint, yellow)
Silhouette Vellum
Downloaded Umbrella Drink file by Doodlebug #160426
Downloaded Cheers file by Rivka Wilkins #72361
Downloaded LW Bubble Letter font by Lori Whitlock #47853
- Fold A4 card in half and cut off at 1in. to the right of the fold, leaving a 1in. flap on the card front (leaving back intact).
- Cut three additional 1in. strips from the cutoff piece.
- Adhere the A5 acetate on top of the 1in. flap using double-sided tape.
- Adhere one 1in. strip to the underside of the far right edge of the acetate, aligning it with the edge of the card back.
- Adhere the remaining 1in. strips on either edge of the front to sandwich the acetate.
- Cut the adhesive card pieces and vellum to make the topper as shown in the diagram.
- Cut out the Cheers sentiment and vertical Happy Birthday sentiment from adhesive cardstock.
- Assemble the topper on top of the base piece, wrapping the extra vellum strip around the straw and tucking the vellum ice cubes under the straw and umbrella stick.
- Peel the backing from topper and sentiments and adhere to the card.
This makes a effective card with no trace of stray adhesive. Even the inside of the card is neat with no additional effort required.
The Silhouette Adhesive Cardstock makes it super easy. I hope you'll try it.
Bye for now,
DESIGNS USED:
 |
 |
 |
PRODUCTS USED:
 |
 |
 |
 |
 |
 |
 |


Beautiful Janet, great step by step too.
ReplyDeleteHugs
Linda xxx
Thank you for your lovely comments Linda.
ReplyDeleteWhat a lovely bright card. I particularly like the vellum ice cubes 😊
ReplyDeleteThanks Hilary, I love adding in different textures and vellum is a favourite!
Delete