
A friend is attending a wedding in a beautiful, unusual setting today. She asked me if I would make a card for her to give to the happy couple featuring a photograph of the castle they are marrying in.
Here is my tutorial for using Silhouette Studio and your Cameo product to make a card with a printed vellum overlay, with the sentiment perfectly positioned on the bottom section of the photograph.

You will need:
- Silhouette Studio
- Silhouette Cameo
- Photograph of your choice
- Cardstock
- Vellum
- Printer
- Double sided adhesive tape
Step One
Open Silhouette Studio and set up your page for a print and cut project. My cardstock is A4, so I have set my page size to A4 and turned on registration marks.

Draw a square and use the scale tool to ensure that it is the size of the finished front panel of your card. I wanted to make a 5in x 5in square card.

Add another square the size of your complete, unfolded card. Mine is 10in high x 5in wide. Then, use the align tool to align these two shapes centrally, and the small shape to the bottom of the large shape. This will form the template for my work.

Step Two
I want to ensure that my cut lines are set up correctly before I go any further. The large 10x5 shape will be cut out to form my card, but the small 5x5 shape is purely as a guideline for positioning elements on my card, so I want to turn off the cut lines on this shape. I used the cut settings window to set this shape to "No Cut".

For this finished card I will be printing two pages: one on cardstock, with the photograph, and another on vellum, with the words I want to "float" over the picture. I opened a brand new document in Silhouette Studio, and set it up the exact same as my first: A4 page, registration marks turned on.
Then, I copied and pasted the two shapes from the first document into the second. This will position the shapes in the exact same spot in both documents.
I saved the first file as "CARD" and the second as "VELLUM" to keep myself right.

Step Three
Working in the CARD file, insert a photograph of your choice to the file. In my case, it was this beautiful castle, but this technique works fantastically with family photographs or portrait style pictures.
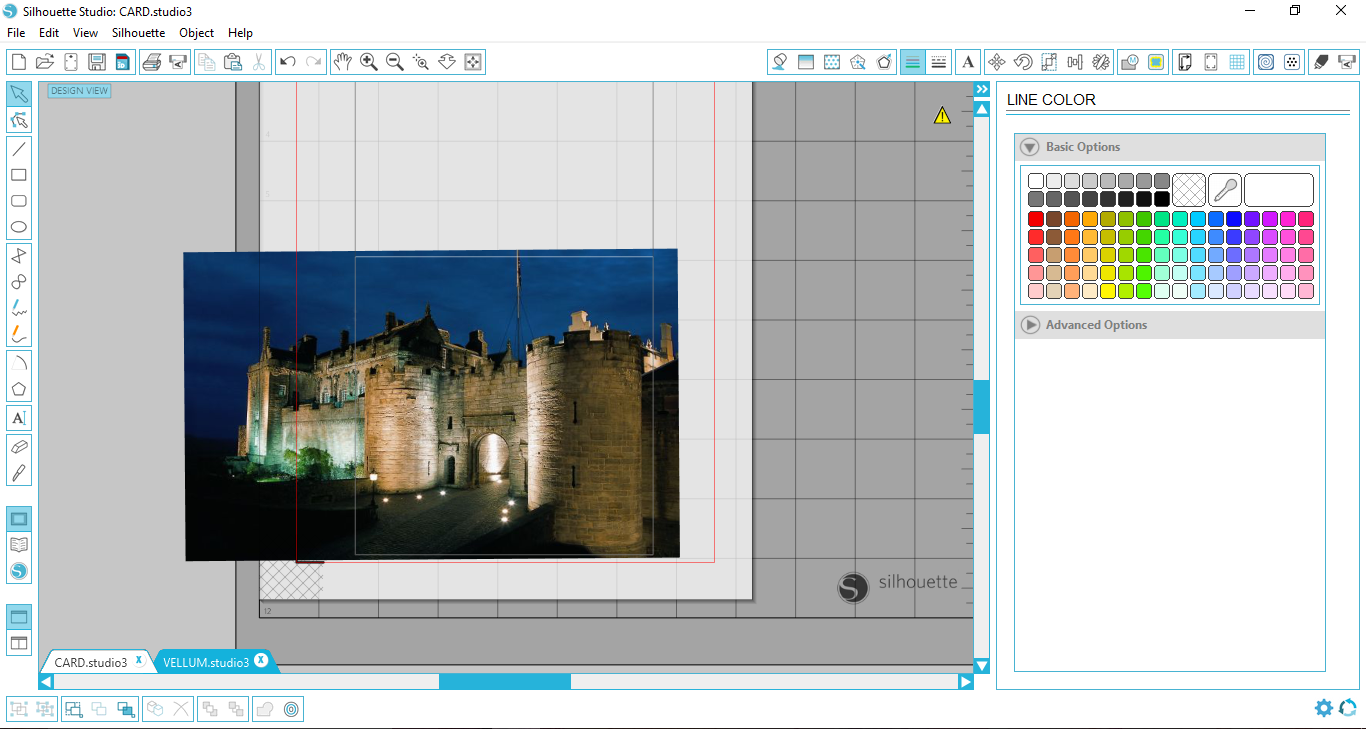
Right click on the photograph and send it to the back behind your other objects. This lets you see your guidelines for the finished card. I changed my square guide's line colour to white because it would show up more clearly against the dark castle photograph.
Time to "shoogle"! Move your photograph around to find the best placement that you like. I used the 5x5 square to crop the photograph and see how the finished picture would look on the card front. I tried a variety of different setups:


I chose the crop that I liked the best (option 2) and made my final crop. This will now form the cardstock part of my card.
At this stage, make sure that you select the large 10x5 outline and set the line colour to None.
Step Four
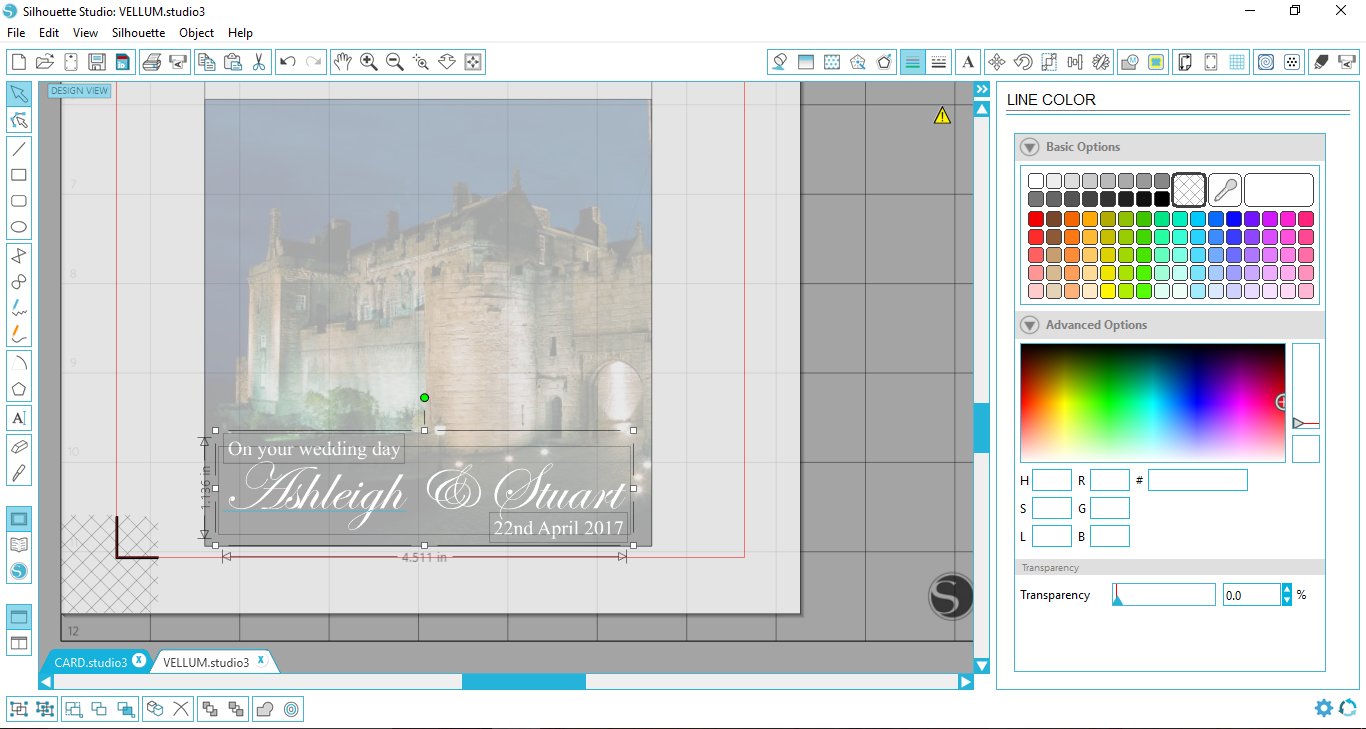
Now, copy the cropped photograph from the CARD file, and paste it into the VELLUM file. Using the Advanced Options in the Fill Colour tab, slide the transparency down so that you can work over the top of the photograph as a guideline.

Use the text tool to write out the sentiments you would like to float over your photograph on the vellum.
Now, carefully position these sentiments in the "dead" space of your photograph. In my case, this is in the dark pathway and grounds beneath the castle itself. For family photographs, it might be the sky, or background, or over clothes. This will let you avoid writing sentiments over an important face or aspect of a picture!
Then, delete the photograph, and the 5x5 guideline. Select the large 10x5 shape and set the line colour to None.
Step Five
Your two files should now look like this:
CARD

VELLUM

Print both of your files to the appropriate media.
(I needed to use a handy tip with my vellum, which didn't really like my printer much - I used washi tape to attach the vellum to a sheet of A4 card to "trick" my printer into thinking it was just a sheet of regular cardstock!)

The vellum that I had was an old sheet I had bought, and it had little sparkles woven through it. I thought this would add a lovely magical feeling of stars over the castle photograph.

Your printed CARD file will look like this:

Step Six
Now, load your cardstock onto your cutting mat, and pop it into your cutting machine. Send the CARD file to your Silhouette, and it will work its magic. I used blade 4, speed 5, thickness 22 for this heavy cardstock.
Do the same with your vellum. I used blade 1, speed 5, thickness 10 for my thin vellum.
Score the card at 5inches, and the vellum at 5inches.

Run a narrow strip of double sided adhesive tape along the top of the rear of the cardstock. Insert the folded card into the folded vellum overlay, and your sentiments should be positioned absolutely perfectly in the "dead" space of your photograph.

I cannot wait to use this technique again with portraiture photographs. I think I might position a quote about little boys over a gorgeous photo of my son next!
PRODUCTS USED:
 |  |  |
No comments:
Post a Comment