Showing posts with label Washi Sheets. Show all posts

Sunday, 28 April 2019

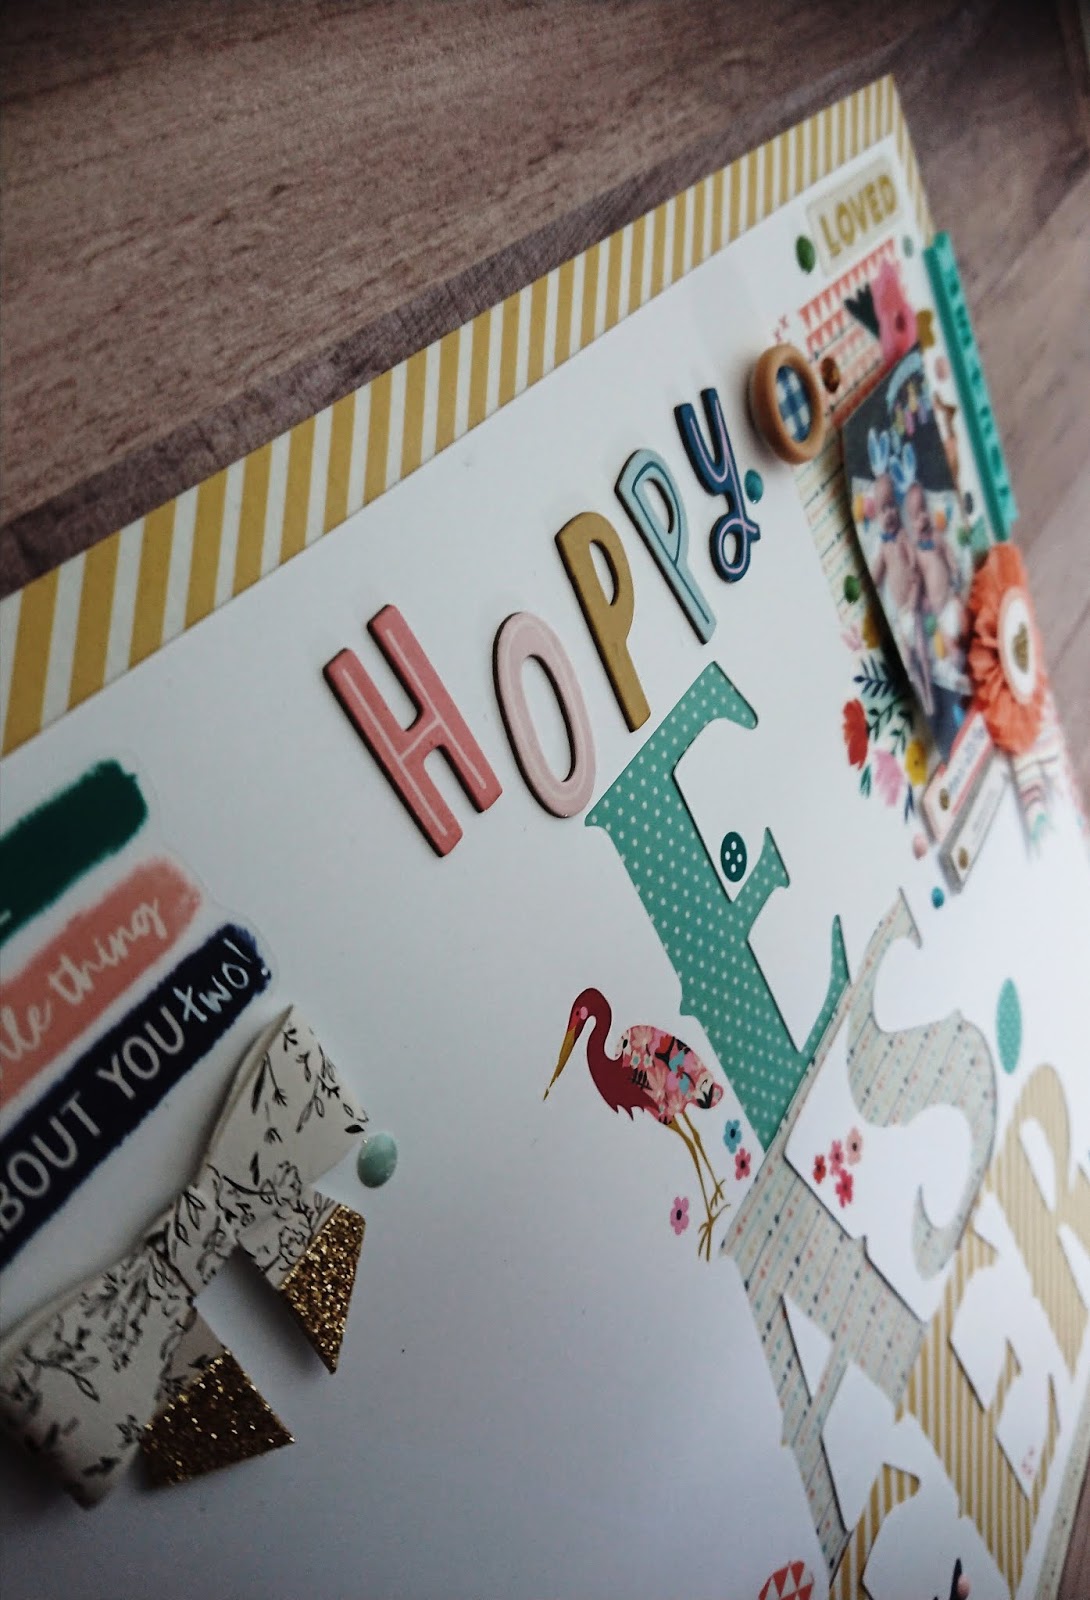
Scrapbooking with Steph - Hoppy Easter 12 x 12 layout


Hello all crafters and welcome to this weeks blog post!

Soooo I started off with my product of the week....a washi tape sheet and then found this delightful cutfile in the store https://www.silhouettedesignstore.com/designs/120065?search=easter&sortby=relevance&submitted_search=true I cut the words out on flat white card stock and the bunny and the eggs out of the washi tape paper (ensuring I changed the material to the washi tape paper setting)

With the main body of washi tape paper I gutted it with a one inch border, I backfilled the letters with the leftover washi and finally cut two pieces of the wash tape to 2 x 3 inches to use as photo mounts.


When making this layout I started with the top right hand corner and clustered together my photo and the washi tape 2 x 3 cut outs, another 1/2 x 4 inch piece of the turquoise washi, some rub on embellishments, a sprinkling of glossy dots a rosette and a wooden button once I was happy with that I stuck it all down.


I then created another small embellishment cluster in the top left hand corner before adding the title "Hoppy" between the two clusters.


I felt the layout needed some more washi so I added the bunny to the bottom left and the eggs to the middle as well as some more rub-ons around the letters to complete the layout.


I hope you have enjoyed this weeks blog post......until next week and if you decide to scraplift this layout we'd love to see what you come up with, please share and tag us on the below Instagram addresses.

Steph xo
Instagram: silhouette_uk & stephanielouise123

Saturday, 3 November 2018

Corrugated Paper Leaf Wall Art


Hello, Janet from the Crafting Quine Blog here again. Today I have an autumnal home decor project using the Silhouette Corrugated Paper which gives this project lots of additional texture. I've used the Fall Leaf Hexagon Shadowbox file by Carta Bella from the Silhouette Design Store. My choice of file this week was influenced by the gorgeous Autumn Leaf Card posted earlier in the week by our new design team member, Helen. Do check out her post to find out how to make your own fab version.


Silhouette Corrugated Paper
This is a new product to me, and I'm thrilled by how beautifully it cuts. There are 6 sheets in a pack, each sheet being 8.5in. x 11in., or 215 mm x 280 mm, (3 white and 3 kraft). The sheets have a corrugated finish and an adhesive backing, protected by a white peel off layer. A 'kiss cut' is the ideal cut, cutting through the corrugated layer, but not the backing paper. This means you can cut your shapes out in advance and just peel them from the backing and use them just like textured stickers.


The Silhouette® Studio software recommends a setting for the adhesive cardstock sheets under "Corrugated Paper" (Blade 8, Speed 3, Force 33 and a single pass). I found that this setting cut a little too deep, so I reduced the Blade to 7, and force to 28 to achieve a 'kiss cut', allowing the cut pieces to be peeled away from the backing. Of course, your ideal setting may differ, so I'd advise that you carry out a test cut first.


What You'll Need
Silhouette Corrugated Paper (pack contains White and Kraft)
Medium-weight Kraft Cardstock
Medium-weight White Cardstock
Silhouette Washi Sheet (or Patterned Paper)
Liquid Craft Adhesive
Dimensional Foam Pads
Silhouette CAMEO® 3
Silhouette 12" x 24" Cutting Mat


Making the Three Shadow Boxes

STEP 1: Adjusting the File. I made two additional copies of the file, cutting one at the original size and two larger ones. The length of the long piece which forms the frame was just under 11.5-inches for the original and I increased the size (along with the other parts) to 13.75-inches for the middle one, and 16-inches for the largest one. The bigger sizes extend beyond the regular 12" x 12" mat, so require the use of the Silhouette 12" x 24" Cutting Mat.


STEP 2: Cutting the Pieces. I cut the frame piece for all three boxes from regular kraft cardstock so that all the frames would match. The medium hexagonal piece was also cut in kraft, and the other two in white cardstock. The smallest one was from white cardstock covered with a piece of Silhouette Washi Sheet. This could also be cut from patterned paper, but the washi gives an additional semi-translucent effect. I also cut the hexagonal piece from the white and kraft corrugated papers, trimming off the fold pieces, and adhering the corrugated panels to the centres of the hexagons.


STEP 3: Additional Pieces. To make assembly really easy, I cut duplicate hexagonal pieces for all three boxes from kraft cardstock, turned them over, and adhered the sides level with the lower edge of the long frame piece. Then I was able to adhere the decorative hexagons on top, knowing that they were mounted level within the frame yet still set back from the front frame edge. The additional hexagon also provides a void at the back where a hanging hook can be attached, that will be invisible from the front.


STEP 4: Decorative Leaves. I cut three different sized leaves; one from each colour of corrugated card, and one from washi-covered card.


Duplicates were cut from regular cardstock and adhered behind to give extra dimension. Further dimension was achieved by adhering the leaves to the shadow box with dimensional adhesive pads.


STEP 5: Displaying. Once the hanging hooks were adhered on the reverse, the boxes were ready to hang on the wall. NOTE: If the leaves had been aligned so that the flat edge of the frame formed the base, the boxes could be placed along a shelf, or even stacked on top of one another with the leaf upright. I wish I'd thought of that before I'd assembled them!


Do let us know if you have made any projects with corrugated card or paper with your Silhouette. It's easy to add a photo to the Silhouette UK Facebook page.


Bye for now,


  Crafting Quine Blog@CraftingQuine


DESIGNS USED:

PRODUCTS USED:

Monday, 2 April 2018

Washi Sheet decorated wooden shapes using your PixScan mat


Hi everyone. It's Verity here from Pretty Little Button bringing you another project. For the post today I'm using the Washi sheets from Silhouette. I have some plain wooden shapes in my stash, both letters and different shapes. I suddenly thought, why not use the colourful washi sheets to decorate them and make them more interesting. In order for this to work, I needed a way of getting the shapes into Silhouette, and this is where the PixScan mat comes into play. The mat allowed me to get the exact shapes and sizes of the shapes without any guesswork. So if you are ready, read on to find out how to make these cards.

Washi sheet decorated shapes cards:

To start off, I placed by chosen wooden shapes on my PixScan mat. I took a picture of this with my phone, which I have already calibrated with my software. What is important when taking this photo as the wooden items are 3D, is to make sure you have as little a shadow around the objects as possible. See below.


Poorly lit with shadows cast around the edge of the letters - this will make it difficult to get a trace for the true shape of the letters.


Good lighting and a small amount of shadows - this will result in a good trace later reflecting the true shapes of the letters.

If you have shadows surrounding your objects you will find it more difficult to trace the outline of the shape. Instead, it will incorporate the shadow into the outline making it larger. Next, select the trace button and trace your embellishments. I found it easy to each shape individually to get the best outline. Make sure you adjust your threshold and high pass settings to get just the outline. These settings may vary from shape to shape, so have a play with the toggles until you have the best trace.


Once you have traced the outline, you may need to adjust the edit points for a smooth outline. I place the outline back over the shape to alterer any areas that may not have traced correctly. When you are happy with your traces you are ready to cut these out. Load up your mat with your chosen Washi sheet and select Washi sheet in your cut settings. As always make sure you do a test cut, I had to halve my pressure setting compared to the recommendations otherwise it would cut all the way through. Just like sticker paper you want a kiss-cut where it cuts the washi sheet but not the backing paper.

After your shapes have cut, you can go ahead and peel the shapes off and apply to your wooden embellishments.


I also used the traced letter shapes to create a flat washi sheet sentiment without adhering to wooden letters.


Furthermore, I used the traced letter shapes with the pen holder to draw out the sentiment. Even though the tracing at the beginning took a little time, I quickly got three cards out of that effort!


If this has inspired you to try this out, please post below. I would love to see it!

Until next time,

Verity


Profile Pretty Little Button Blog | Instagram | Facebook

PRODUCTS USED:


Friday, 18 November 2016

Washi Tape Patchwork Scrapbook Page


Hello, Karen here with another technique to make a layout background that will be unique.

You will need:

Silhouette Cameo
White 12 x 12 Card
Black Silhouette Sketch Pen
Silhouette Washi Tape Sheets.

Step 1 - cutting the Washi Tape sheets.

  • I used the OFFSET function, set at 0.1, to give the shapes an outline.
  • Next I copied and pasted the outline to a new drawing area and changed this outline to a broken line to give the impression of stitching. I used a sketch pen to draw this onto the piece of white 12 x 12.

  • I returned to the drawing area with the hexagons on and ungrouped them.  I selected the top third and deleted the remainder.  I then replicated these twice more so that I could cut them from the three different patterns on a washie sheet.  


  • I then cut five different patterns of washie sheet to use on my layout.

Step 2 - Constructing the layout.

  • This was the fun part - putting your patchwork together.  The washie tape is so forgiving that you are able to remove the hexagons and put them somewhere else several times - giving you the opportunity to build up your pattern evenly.
I was really pleased with the final result and chose to use a small photo so as not to cover up too much of my patchwork.  I added a title, which I had,again, outlined with a broken line to give the illusion of stitching.


DESIGNS USED:


PRODUCTS USED:


Saturday, 2 April 2016

Washi Stickers for Planners and Calendars


Hi, Bev here with a tutorial on how to use the Silhouette Washi sheets to create fun stickers and tabs for your planners, agendas, notebooks etc.

What you will need:

Silhouette Cameo
Silhouette Washi Sheets
Silhouette Cutting Mat and Blade

Step One:

Open a new page in Silhouette studio and start to think of what shapes you would like to use for your stickers. I started with a circle and a flag shape, created simply with the tools in your studio.


You can create the flag shape by using your grid lines as a guide.  Choose the polygon tool and hold the shift key to ensure the line remains straight.


Once your shapes are complete, you can use the replicate tool to produce as many of that shape as you wish.


I added some pentagons using the regular polygon tool and some long rectangles.  You can really be as creative as you wish here, choose shapes that suit your needs.

The Washi sheets are 12x12 and fit perfectly on your Silhouette cameo mat.  The sheets have three different patterns per sheet.  I wanted to make the most of the different patterns so I positioned my shapes accordingly on the page.


I selected the cut egde option and used the washi sheets setting.  I adjusted my blade accordingly and used the suggested settings.  I found these worked well, but its always good to do a test cut if you are unsure of the settings for your particular machine. Then you are ready to send to the Silhouette!


Once cut, you can peel the Washi sheet from the mat.  My stickers were left behind on the mat and i used the Silhouette pick me up tool to remove them.


I then had a little pile of stickers all ready to be used in my planner! The backing paper remains on the stickers until you are ready to use them.


And there we have it! a super simple project to brighten up your diary or calendar and you can make almost any shape you can think of.


Also the fabulous thing about these Washi sheets is that you can write on them. The stickers in my planner are written using biro. Although it is of course a good idea to test on a small area first with your chosen pen.

I have loved sharing with you and look forward to seeing what you all create!


PRODUCTS USED:

Light hold cutting mat for Cameo