Saturday 31 March 2018

Let the Light Shine Through You - a Stitched Layout | Niki Rowland


Hey there! Niki here with you today sharing a layout and easy tutorial on how to turn any cut file into a stitching template. I love the look of stitching on a layout and this way I can combine my love of cut files and stitching!

I started off by choosing a title and went for this lovely saying 'Let the Sun Shine through You'. I downloaded it and opened it in my software.


I then re-sized the file and re-positioned it to where I wanted it.

I then selected the file (simply by clicking on it) and then went to the dropdown Line Style menu and selected the third option down - the dashed line. This then immediatly converts all the cut lines into dashed lines. I then send this to cut and the machine cuts all the litte dashes instead of solid lines. These are then perfect for stitching though.

Handstitching does take absolutely ages and this was no exception! I had picked out a piece of Pink Paislee Summer Lights paper to go around the edges of the cardstock and I choose my threads to roughly match the colours in that paper. 

I started off with two shades of purple and then faded down to pink, then yellow, then turquoise and finished with blue.

I contemplated colouring in each word with a light wash of paint in the same colour but decided against it in the end as I liked the outline look so much.

Once the stitching was complete I then kept the rest of the layout simple becuase I wanted to show off that glorious stitching! I've used lots of embellishments from the Summer Lights collection to bring it altogether.


I love the way the layout turned out and it documents a lovely day out we had on a summer holiday - fab memories.

Thanks so much for joining me today, happy scrapping xx 


DESIGNS USED:
PRODUCTS USED:


Wednesday 28 March 2018

Design Of The Week - Bunny and Chick Candy Holder - 28th March 2018


Hello, hello, Karen here with my weekly take on the free Design of the Week. 

This week it is a Bunny and Chick Candy Holder.

I decided to make them into a cute little Easter banner.


I released the compound path on the chick so that I could turn the sweet holder to be horizontal.  I also extended the cuts slightly to allow me to get my little Easter eggs in. 


Unfortunately, I couldn't extend the cut lines on the bunny as there wasn't enough room so had to use smaller eggs for that one.

I added small holes either side for me to thread my cord through and once they where on the cord I added the eggs. 


Monday 26 March 2018

Happy Easter Decoration - Faux Wooden Sentiments


Hi everyone. It's Verity here from Pretty Little Button bringing you another project. For the post today I'm using the Wood sheets from Silhouette. This is a fairly quick post today as this Easter decoration is very easy to make, but I wanted to inspire you to use the wood sheets to create Faux Wooden Sentiments.

Happy Easter Decoration - Faux Wooden Sentiment details:

For the main decoration I used designs from the design store (see below for details). I cut the sentiment out white cardstock 3 times and adhered these together with glue. This creates a dimension die-cut sentiment. I cut one sentiment out of the wood sheets. The programme will have cut settings for this stored in the drop-down list, but remember to do a test cut first. Your machine may cut slightly differently, i.e blade pressure etc so always test first.

For the additional eggs, I used a white gel pen in my pen holder to draw the eggs designs. I manually coloured in the areas of the egg, though you could leave this plain. To cut these out, make sure you add an offset to your egg and only have the offset line to cut. Make sure you have switched all other lines in the design to no cut.


The sentiment was adhered down on to a white paint base. I added some colour spring inspired ribbon to the board and to hang the decor. I foam mounted the middle egg for added interest and dimension.


This was very quick and easy to make, perfect for a last minute Easter decoration. If this has inspired you to create one, please post below. I would love to see it!

Until next time,

Verity


Profile Pretty Little Button Blog | Instagram | Facebook

DESIGN USED:

Easter Eggs by Dresden Carrie, Design ID #77249
Happy Easter by Sweet Afton, Design ID #180754


PRODUCTS USED:


Friday 23 March 2018

Sunday's with Steph - Quick and Easy Spring Card

Hello and welcome to this weeks blog post!

So apparently the beast from the East has gone for now and a lot of us are appreciating a little bit of good weather!!  With this in mind I decided to make a little spring card.

I chose a simple daisy design https://www.silhouettedesignstore.com/view-shape/61009 loaded up my mat with some thick card stock and let it work it's magic!

With it's normal tapping and wiring noises it cut out my design in a matter of moments.  As a rule now I always set the machine to cut through the design twice which ensures I always get beautiful cut lines in the card that I am using.

Once the card was cut I removed the pieces and painted the back ground with a ombre effect from blue to green to represent the sky and the grass and then painted the stem with the same green tones as the grass and the centre of the daisy a pale yellow.

The longest this making this card was the ensuring the paint was completely dry before making it.  I raised all of the items on foam risers and turned the edges of the petals up before wrapping some embroidery thread and twine round the bottom of the card and raising the background on foam before sticking it to the card.

Really happy with how this card turned out.


Happing crafting and I'll see you next week

Steph x x

Design a Faux Leather Pen Holder for Planner, Notebook or Journal

Make your own pen holder for planner notebook or journal from faux leather paper. Designed by Janet Packer (CraftingQuine.blogspot.co.uk) for the Silhouette UK Blog


Hello, Janet here showing how to create a custom pen holder for your planner, notebook or journal using the Silhouette® Faux Leather Paper.  The faux leather is stronger and more durable than cardstock, perfect for this job. 

Make your own pen holder for planner notebook or journal from faux leather paper. Designed by Janet Packer (CraftingQuine.blogspot.co.uk) for the Silhouette UK Blog


I've used the faux leather in many projects previously, and although it takes a little more care to cut then card, it is well worth the effort. I've included some tips to make the job easier if you decide to try it for yourself.  I've also included links to some previous faux leather projects below. Just click on the photo to visit each one.


Faux Leather Bracelets by Janet Packer Faux Leather & HTV Ginger Jar Rocking Horse Baby Gift with Faux Leather Saddle MDF Bunny Decorated with Cork and Faux Leather Dimensional Dog Card with Faux Leather Nose and Collar


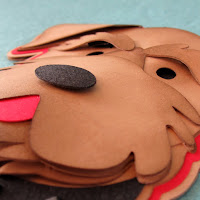
I chose to decorate the ends of my holder with a shell image from the CG Under the Sea Dingbats Font using metallic heat transfer material.  I think shells compliment the pretty mermaid scale fold-over elastic, but any relatively simple shape could be used in its place.


Materials Used
Silhouette Faux Leather Paper
Silhouette Metallic Heat Transfer
1 metre of Fold Over Elastic (5/8" thick)
Fabric Adhesive
Iron or Heat Press
Silhouette Cameo, Portrait or Curio


Make your own pen holder for planner notebook or journal from faux leather paper. Designed by Janet Packer (CraftingQuine.blogspot.co.uk) for the Silhouette UK Blog


STEP 1: Design the Pen Holder

To design the holder, draw a pair of rectangles of similar size to your pens and then draw a larger rectangle to encase them and form a base for them. I selected a shell from the CG Under The Sea Dingbat font (click here for more info on how to do this) resized it to fit, added an offset, and welded that offset to the larger rectangle.  Then add some slits for the elastic; horizontal ones for the long strap to go around the planner, and vertical ones for loops to hold the pens in place.  I added 3 mm diameter circles to the ends of the splits. They allow the elastic to lay flat when threaded through the slits.
 
Make your own pen holder for planner notebook or journal from faux leather paper. Designed by Janet Packer (CraftingQuine.blogspot.co.uk) for the Silhouette UK Blog

Then duplicate the complete design and delete the horizontal slits from one copy, and the vertical slits from the other. Move the shells aside to be cut from metallic heat transfer material.


STEP 2: Cut the Faux Leather

I changed the line colour of the slits so that I could be sure of cutting them completely in the Faux leather before proceeding to cut the outsides.  Cutting by Line makes this process easier.  This step is necessary as the faux leather will curl from the mat once the outside lines are cut completely.  I found that the default cut settings for the faux leather weren't sufficient to cut on the first attempt, so increased the blade depth gradually until it cut through.


I used the deep cut blade, but on a regular blade setting. The deep cut blade isn't necessary, but I knew it would be good and sharp (a sharp blade and a sticky mat are a MUST for cutting faux leather successfully).


The faux leather has a tendency to curl and pull away from the mat. To minimise this, I recommend cutting a piece off the roll rather than trying to use the roll intact. Some masking tape to secure the piece is also a good idea.


STEP 3: Cut and apply the Metallic Heat Transfer

Cut the shell shapes from metallic heat transfer material (remembering to place the shiny side down, I use a mat, but it is not essential).


Apply the shells to the backing piece with the vertical slits (the front) with a heat press or iron (I press with a heat resistant sheet in 10 second increments until the backing paper can be peeled away, peel it, then press similarly until the surface texture of the faux leather is visible on the heat transfer material).


STEP 4: Measure, Cut & Add the Fold-Over Elastic

For the front section, thread the end of the elastic through one set of vertical slits and the pens, cutting it off to leave sufficient to overlap on the back. Repeat for the other set.

Thread the remaining elastic through the horizontal slits and ensure there is enough to wrap around your notebook, planner, or journal, with sufficient to overlap on the back. Trim off the excess at the red line (right hand picture below).


Make your own pen holder for planner notebook or journal from faux leather paper. Designed by Janet Packer (CraftingQuine.blogspot.co.uk) for the Silhouette UK Blog


Apply adhesive where indicated by the red shapes to attach the elastic.  Similarly, adhere the front to the back piece behind the shells.

Make your own pen holder for planner notebook or journal from faux leather paper. Designed by Janet Packer (CraftingQuine.blogspot.co.uk) for the Silhouette UK Blog


That's it - job done! Once the adhesive is dry just install your pen holder to the outside, or within the planner/notebook or journal to act as a place marker.

Make your own pen holder for planner notebook or journal from faux leather paper. Designed by Janet Packer (CraftingQuine.blogspot.co.uk) for the Silhouette UK Blog


This design can be adapted for different themes, just choose a relatively simple shape to weld to the basic rectangle. I hope you'll try it.


Bye for now,


   Profile | Crafting Quine BlogInstagram @CraftingQuine


DESIGNS USED:


PRODUCTS USED: