Friday 31 May 2019

Printable Canvas Wedding Gift


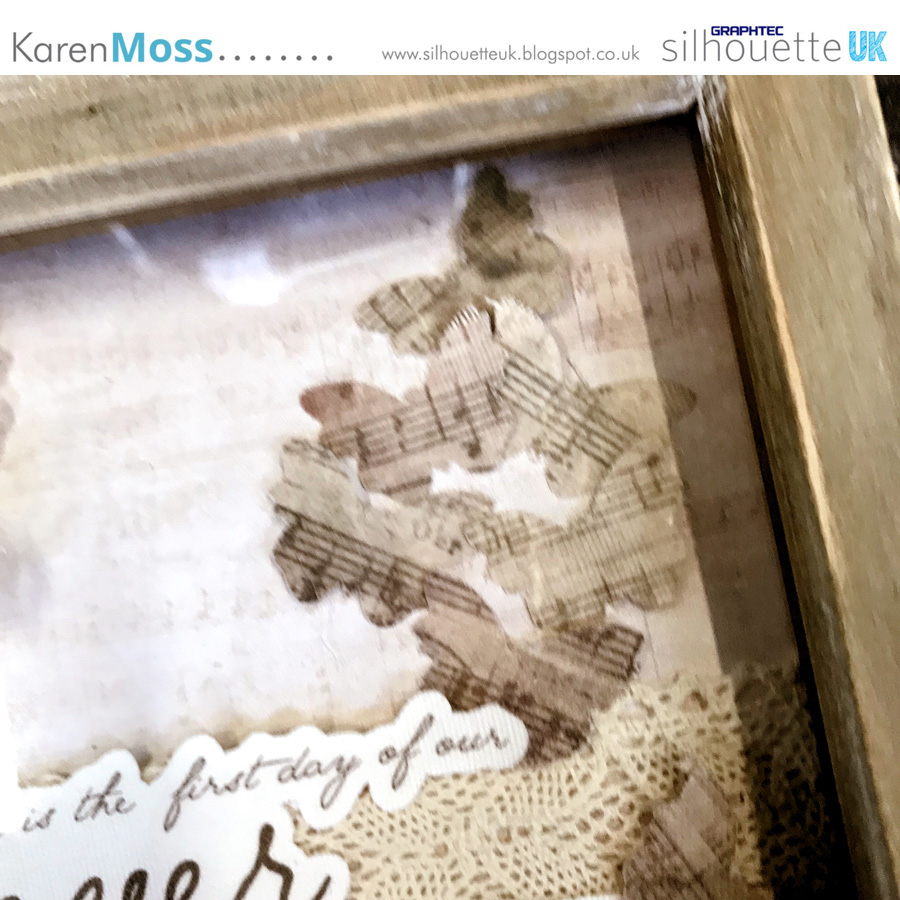
Morning everyone :) It's Jordy back at it again with a simple, but beautiful design that any newly wed couple would love to receive. The beauty of this design is that it can be as easy as you want. We're going to be doing a simple print and cut design, which you can add some heat transfer vinyl too to add a little extra. 


Materials Used:

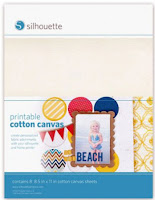
Silhouette Printable Canvas.
HTV Scraps.
Small frame.

Silhouette Machine & Software:

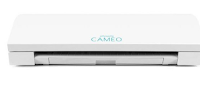
Silhouette Portrait 2.
Silhouette Studio V4.2.4.

Silhouette Files:

Wedding List - Phrase by Kolette Hall (ID: 62587)
Rings Wedding Monogram by Studio Illustrado (ID: 147668)


Step 1: Opening the file in Silhouette Studio.


Once you've chosen your design, locate it in your software and open it in Silhouette. For me, the file opened as two versions so I ungrouped the file and deleted the version I didn't like. The other design, for the second picture frame was even more files. You just need to un-group and play around until it's the way you want. The best part of Silhouette Studio is you can't go wrong - just hit undo or ctrl + z. 


Step 2: Design!


One of my favourite thing about Silhouette Studio is how easy it is to design things. I wanted to make sure both my designs had the gold colour of the wedding's colour scheme so I was able to select a gold toned colour in the software and start to visualise how my finished product will look. My plan is to have the black text printed on the word phrase, and then add in the gold as vinyl. The monogram is going to be all vinyl!

Because we are going to doing print and cut on the phrase, you need to prepare the file for cutting. I removed the monogram and gave it its own file, and moved the gold text to another file as well - as we're going to be cutting that from vinyl. I have a little trick for making sure you get the file not only the right size, but also so you can line up the vinyl perfectly. Don't forget, you need to turn on registration marks for this project - you can hit "M" on the keyboard to get the registration marks to come up.

Step 3: Preparing the file.


To ensure the design fits in my photo frame, I made a box that was the size of the frame itself - in this case, 4"x6".

Don't forget that you only want the black text to print, so go ahead and remove the yellow/gold text and put it into another page out of the way. We'll deal with it in a minute!

Step 4: Printing out the file.


One thing to remember is that Silhouette's printable canvas isn't A4 size like most UK products. It's classified as a letter size so ensure that you change your page size to letter which is 8.5 x 11.0 inches.

Because we are going to doing print and cut on the phrase, you need to prepare the file for cutting. I removed the monogram and gave it its own file, and moved the gold text to another file as well - as we're going to be cutting that from vinyl. I have a little trick for making sure you get the file not only the right size, but also so you can line up the vinyl perfectly. Don't forget, you need to turn on registration marks for this project - you can hit "M" on the keyboard to get the registration marks to come up. Now send your file over to the printer and wait for the results!

Step 5: Cutting the HTV. 


Now it's time to cut the HTV! Open up your seperate page that you have all the gold text along with the monogram. I plan on separating this out even further and having the black monogram on a separate page and the silver diamond on another. I like to work by colour when I'm cutting which is how I like working. Once I have it all set up, it's time to send your heat transfer vinyl through to the machine. Don't forget to check your cut settings!

Step 6: Putting it all together.

Now you have everything printed and cut, it's time to put it together. Don't forget to weed the heat transfer vinyl! Don't forget to mirror your HTV if you are working on an older Silhouette Studio, newer versions prompt you about mirroring when you send to the cutting machine. Once you have adhered the vinyl, run the design back through the machine and cut out the box. This will ensure the file fits in the frame - but you can do it with scissors too!


Wednesday 29 May 2019

Wedding Frame using Printable Canvas

Hello, hello - Karen here with my usual Wednesday post.  This week I have used printable canvas in my project.  I must confess that I haven't really used this before but was thrilled with how well it printed (I used an inkjet printer) and also how nicely it cut.

For my project I have made a frame with a phrase added that is suitable for a wedding gift.


I started by choosing a background to print and resized it to 8ins square. 


Then I reduced the depth of colour by using the colour palette tool and sliding the transparency down to 33%.


I printed it out cut to size for my background.

To decorate my frame I found a suitable phrase on Pinterest and used SNF Georginana to write it - I wanted a fancy font.


I typed it in two different sizes and moved them about until I was happy with how they looked.  I then added an offset.

I wanted to have something additional to decorate my frame and decided on some butterflies but I wanted them to coordinate with the rest of the design.


I used the knife tool to cut the darkest section of the background and added it below my phrase. Then I added some butterflies.  As this was a solid section of printing I knew that the butterflies would be completely covered with the pattern and there wasn't a need to add an offset. 


Once they were all cut all that was left was to add them to my frame, together with some lace and purchased flowers. 


DESIGNS USED


PRODUCTS USED
 

Monday 27 May 2019

Wedding Card with Printable Canvas

Hi folks,

It's Cheryl here again with another project completed to show you. We are still with the Wedding Theme and there is so many ideas that you can pick for wedding theme. I opted to go with the card as having attended a wedding recently I noticed there was a lack of wedding cards and there was a few very very similar ones. I honestly prefer handmade cards as you can personalise them in so many ways. The wedding I attended recently was a for a young couple in so much love it was cute and this is why I opted to do this card and I hope you like it.

Materials Needed
Silhouette Printable Canvas Sheets
Card
Glitter card or any other card or heavy paper
Ribbon and Gems to decorate
Dst or Glue
Cameo 3
Silhouette tool kit

From the Store you will need to get files:
Wedding (2) by Precious Moments Design ID: #203650
Blank Floral Wreath Square Card by SAS Designs, Design ID #258428
A Perfect Day Banner by Simple Stories  Design ID #62168

Here's your step by step guide of how to make your own Wedding Card with printable canvas

Step 1: You should start with opening the Blank wreath Card in your silhouette studio software and I would to do this on 8x8 card base but can be changed to a size that suits. You will see that to do it as an 8 inch card you will need to have an 8x8 card base that you can put to the side. Turn the card until you have laid it out like this:


Step 2: Go to view and select show design page setttings and you will see on the right hand of your screen you will then see it like this:


Step 3: Make sure that your page on this panel is at A4 and that you have selected your appropriate cutting mat size. I would then if all is correct here I would then at the top right hand corner go to send and you will then see:


Step 4: You should check that your card fits in the thick double lines on the mat, if correct under tool in the material section under dropdown choose cardstock, plain, then it should say Cut and then under the 3 section of blade under the drop down choose your appropriate blade. You should change your the dial to 5, then change your speed to 10, Force as 30 if using heavyweight cardstock then passes to 2 and it should look like this but your machine will be connected. If all correct then press send to cut.


Step 5: For the A Perfect Day Banner once opened follow the same steps but I would adjust your speed to 7 and then cut as above if looks like this:


Printable Canvas

Step 6: In your silhouette studio software open the Precious moments wedding 2 and it should look like this:


Step 7: If you are wondering about why it looks so big is because that is the view of the actual size when cutting. At this stage measure the middle cut out of your blank floral wreath and if you need to adjust the size of the image I would do so at this stage. Now put your printable canvas into your printer, and on your silhouette software design space go to view and select registration marks and your image will now look like this:


Step 8: You will now see a grid like design at the top of the page and in a square at the lower left handside this is for your pnc so that you know how big your image can go but more importantly diagonal from right top to left bottom you will see a black corner marker this is your registration Marks. Over at the right handside you will see registration marks box and in the style choose the option for your machine most likely Style1. Now go to file and print and follow your printers instructions.

Step 9: Now you have printed out your image you will see on the printable canvas the 2 registration marks on the corners along with your image. Well line your printable canvas on your cutting mat and load into your silhouette to be cut.

Step 10: Now you will see the thick red line around your image well the registration marks will tell the software where your image is and what its to cut. So under tool 1, your material selection will now be cotton canvas printable. Your action and blade will remain the same as per your card you cut out previously. On the dial I would change it to 2 or 3, then speed keep low like 3, force stay high like 30 onwards and passes you can choose 1 or  2. then hit send to cut.


Step 11: Now you have your image printed out on the canvas we can now put your card together. Decide whether you want patterned or glitter paper/card for the background, whatever you choose use that to cover the front of your card base. I chose a green glitter to make it look like a garden theme and in the central space I would put on your card base but before sticking it down stick the printable canvas into place then stick the top card down and here I chose to put the 'perfect day' banner on the bottom right handside and I chose ribbon as close to the brides colour theme as I could and ran ribbon up the left hand side and at the upper left hand corner I made a ribbon bow the same colour then I added some pearls and gems and here is what the finished card looks like.


Well now you have your finished card and it is already to give to the recipient just pick a nice verse to put inside and you will have made a card that the new couple will want to cherish. I hope you have enjoyed this project and I look forward to bringing you my next project which may be perfect for the men in your life.

Speak soon
Cheryl xx

Sunday 26 May 2019

Scrapbooking with Steph - Paige Taylor Evans - Diagonal Stripes background


Hello all and welcome to this weeks blog post!

So I found this lovely background cutfile searching under Paige Evans in the Silhouette Store https://www.silhouettedesignstore.com/designs/219450?search=diagonol+stripes+background&sortby=relevance&submitted_search=true and cut it out of textured card on the textured card stock setting passing through twice and then trimmed it down to 11.5 x 11.5 inches.  I flipped it over and covered the back with foam risers before backing the whole piece with another piece of textured card stock (this time a pink piece!)


I found a sheet of colour block card in my stash which I gutted to create a 1" boarder and attached my backed cutfile onto this.


I put that to one side whilst I fussy cut lots of circles from a Maggie Holmes paper and again placed this on foam risers before sticking them to the cutfile.  I had some chipboard frames, one which I put my photo inside and the other I popped under it to give the layout more depth.


I attached a few more chipboard accents. With the buttons I added floss bows before sticking them down and lastly I added my two titles "Embrace Life",a pink plastic perspective saying "Fierce" and some enamel hearts to complete the layout!


Thank you very much for reading! Please if you scraplift we would love to see your work :) please tag us on our Instagram page silhouette_uk!

Until next time....happy scrapping!!

Steph xoxo

Friday 24 May 2019

Pre wedding planning with adhesive magnetic sheets

My nephew recently got engaged so we are all excited about the first wedding in the next generation!!

The happy couple have not actually set a date yet as they need to save up, so this gave me an idea.

I bought a metallic money box in rather bold colours from a shop where everything retails at a pound and simply spray painted it gold.
I took the Silhouette adhesive magnet paper and cut the words ''wedding fund'' using the sweetheart font


leaving the cut shape in place on the mat I cut the words again in a teal cardstock and applied them to the adhesive coated words whilst stable on the mat


I  then used them on the money box

the advantage of  magnetic words is that they can be easily replaced with others for example ''honeymoon fund'' or ''baby fund''!

I then used the adhesive magnet paper to back some bottle caps, cutting it with scissors


 I cut several one inch circles in white card, with the Silhouette Cameo then made simple designs with Silhouette Printable Sticker  Foil

spelling the word love (using Antelope Island font) and then thought these little magnets would be a great reminder on a fridge or notice board as a save the date


I hope this gives you a few simple ideas and some inspiration

Enjoy creating

Ruth xxx

Wednesday 22 May 2019

Save the Date fridge magnets using Adhesive Magnet Sheets


Hello, Hello Silhouette Friends - this week the DT have been tasked with using Adhesive Magnet Sheets in their projects with a wedding theme and I thought that it would be fun to make some 'Save The Date' fridge magnets.


I started by making my magnet holder - this was really simple and is a rounded corner rectangle measuring 3.75in x 7.75in.  I then added score lines at 2.75in and 5.5in.

I drew a .75in circle and split it into two using the knife tool. I added these to the middle section of my card to hold the magnet.


For decoration I chose a print and cut flower design which I resized to fit my magnet holder and cut two for each holder.


I added one to the small flap and then aligned the second underneath that one on the larger flap so when closed the second one is hidden by the first.


Now for the magnet.

For the front, I drew a rounded corner rectangle measuring 2.25 in tall and 3.5 in wide.  Next I resized the print and cut flower from above and added to my rectangle, remembering to turn off the cut edge on the Send panel.  I wrote my text using Beautiful Dreamer font and used the colour picker to make it the same green as on the leaves, adding a green border- not forgetting to set the cut lines to no cut.  I gave it a small offset and multiplied by six to fill my page.  I then printed this out on a piece of card.


To make the magnets, remove all but the cut lines from the magnet front design and cut from the Adhesive Magnet Sheet.  Remove the white backing from the magnet and add the magnet front.

All that was left was to pop a magnet into my holder and tie it with a piece of pretty baker's twine ready to post to the lucky recipients.


DESIGNS USED

PRODUCTS USED