Showing posts with label Printable Foil. Show all posts

Saturday, 24 November 2018

'Tis the Season - Mass Producing Cards with Printable Sticker Foil

Fa La La - Tis the season - Mass producing cards with printable sticker foil - by Janet Packer https://craftingquine.blogspot.co.uk for Silhouette UK Graphtec GB

Hello, Janet here again from the Crafting Quine Blog. Every year I make one or two card designs in multiples, and this year I've picked a lovely contemporary card design by Kristen Magee; the
Fa La La Christmas Card (#234355). As I wanted to mass produce this card I knew that I'd have to simplify it and to add some quick additional shine I also incorporated some of the Silhouette Sticker Foil.

I thought I'd take you through the process of how this card evolved to the point at which I felt I'd made it as easy enough to make in quantity. To do this I reduced the number of layers, and brought in the Print & Cut technique as well as adding some fast and easy extra shine with the foil sticker paper.


Fa La La - Tis the season - Mass producing cards with printable sticker foil - by Janet Packer https://craftingquine.blogspot.co.uk for Silhouette UK Graphtec GB


What You'll Need
Silhouette Silver Printable Sticker Foil
Medium-weight White Textured Cardstock
Square Card Blanks
Liquid Craft Adhesive
Silver Cord
Silhouette CAMEO® 3
Silhouette 12" x 12" Cutting Mat
A3+ Printer (if printing on 12"x12", otherwise an A4 Printer)

The original design has seven layers plus a card base, one layer of card for each colour. It is a lovely card (you can watch the designer put it together, the video link is in the product description), but there are lots of layers to assemble and to post.


STEP 1: Squaring Up for Blanks

I deleted all but the top layer and made it fit a square of the same size as my card blanks (they are 122 mm square). I could cut four of these from a piece of 12" square cardstock.

Fa La La - Tis the season - Mass producing cards with printable sticker foil - by Janet Packer https://craftingquine.blogspot.co.uk for Silhouette UK Graphtec GB


STEP 2: Losing the Layers

With a copy of the above cut file I made an offset of the letters and filled each letter using the colour picking technique.

Fa La La - Tis the season - Mass producing cards with printable sticker foil - by Janet Packer https://craftingquine.blogspot.co.uk for Silhouette UK Graphtec GB


STEP 3: Making the Print & Cut

I then arranged four copies as a Print & Cut on 12" square textured cardstock (I like to print on the non-textured side). You'll need a large format printer to print these on the 12" cardstock. They can be printed with two to a sheet on A4 cardstock with a regular printer however.

Fa La La - Tis the season - Mass producing cards with printable sticker foil - by Janet Packer https://craftingquine.blogspot.co.uk for Silhouette UK Graphtec GB


STEP 4: Adding the Silver Sticker Paper

With a copy of the Print & Cut file, I ungrouped the set of letters. selected just the letters I wanted to cut from the Silhouette Silver Foil Sticker Paper and arranged them on a US Letter-Sized page (to match the sticker paper).

Fa La La - Tis the season - Mass producing cards with printable sticker foil - by Janet Packer https://craftingquine.blogspot.co.uk for Silhouette UK Graphtec GB

Then I cut the letters from the Foil. The default settings for the 'Foil. Printable' are Blade 5, speed 5, Force 33. I was able to reduce the force to  31.


Fa La La - Tis the season - Mass producing cards with printable sticker foil - by Janet Packer https://craftingquine.blogspot.co.uk for Silhouette UK Graphtec GB
I was then able to peel-off the silver stickers and align them over the selected letters..

Fa La La - Tis the season - Mass producing cards with printable sticker foil - by Janet Packer https://craftingquine.blogspot.co.uk for Silhouette UK Graphtec GB


STEP 6: Print & Cut the Tags

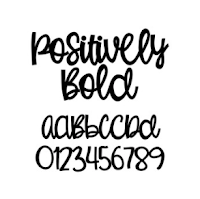
I thought the design needed an extra pop of colour, so I designed these little hang tags using the Sofia Reign Sans Bold and Lettering Delight's Positively Bold fonts. The colours were colour-picked from the Fa La Print & Cut so they matched perfectly.

Fa La La - Tis the season - Mass producing cards with printable sticker foil - by Janet Packer https://craftingquine.blogspot.co.uk for Silhouette UK Graphtec GB


STEP 7: Finishing

To finish, I just layered up the cutout layers with the Print & cut layers and adhered them together and  then to the card blanks with liquid adhesive. Then I affixed the tags with a little silver cord threaded through the hole, and the cards were complete.


Fa La La - Tis the season - Mass producing cards with printable sticker foil - by Janet Packer https://craftingquine.blogspot.co.uk for Silhouette UK Graphtec GB

Do you mass-produce cards to send out at Christmas?  I'd love to see your designs, so do share them over on the Silhouette UK Facebook page.

Bye for now,


  Crafting Quine Blog | @CraftingQuine


DESIGNS USED:

PRODUCTS USED:

Saturday, 1 September 2018

Mini Gold Foil Tropical Leaf Canvas Art

Mini Tropical Leaf Canvas Art using Silhouette Printable Gold Foil. designed by Janet Packer (CraftingQuine) https://craftingquine.blogspot.co.uk for Silhouette UK


Hello, Janet here with a quick and easy contemporary home decor project featuring a set of mini painted canvases and the Silhouette Printable Gold Foil. The printable foil comes in three colours: silver, gold and rose gold, in a pack of eight, 8.5″ x 11″ sheets. These gorgeous sheets are self adhesive and inkjet-printable.

Mini Tropical Leaf Canvas Art using Silhouette Printable Gold Foil. designed by Janet Packer (CraftingQuine) https://craftingquine.blogspot.co.uk for Silhouette UK


To decorate the mini canvases, I used some of the tropical leaf shapes by Amy Robison (#83624, #83618) from the Silhouette Design Store.


Materials Required
Silhouette Printable Gold Foil Sticker Paper
Silhouette Cameo, or Portrait
4-pack of Mini Canvases (12.5cm x 12.5cm, 5" x 5")
Chalk Paint
Water-based Sealant
Foam Brush


STEP 1: Prepare the Canvases

Paint each canvas with chalk paint, allowing the paint to dry between coats. Apply a thin coat of sealant with a foam brush. This dries very quickly and ensures a good adhesion between the foil sheets and the chalk paint, which can otherwise have a powdery surface.

Mini Tropical Leaf Canvas Art using Silhouette Printable Gold Foil. designed by Janet Packer (CraftingQuine) https://craftingquine.blogspot.co.uk for Silhouette UK


STEP 2: Prepare the Files

Draw boxes equivalent to the size of the canvases in the software using the rectangle drawing tool. Open the leaf files, select the leaves and resize them to fit the boxes.

Mini Tropical Leaf Canvas Art using Silhouette Printable Gold Foil. designed by Janet Packer (CraftingQuine) https://craftingquine.blogspot.co.uk for Silhouette UK


Remove the boxes and change the Page Setup size to US Letter.
Note: I added an extra leaf in case that complex leaf shape proved too intricate to cut from the foil. I needn't have bothered though, as the foil cut beautifully.
Arrange the leaves to fit within the letter-sized sheet.

(Optional) To make the arranging process quicker, use the Nesting Tool (Silhouette Studio Designer Edition and above). Increase the padding (space between the shapes) and the rotations as shown, ensuring that you are using the cut area as the boundary.
Note: The rotations value can be at maximum for Printable Foil as there is no obvious surface texture to this media. If I were cutting from linen textured card, for example, I might have rotations set at '0', '2' or '4', depending on the importance of matching the surface pattern on the pieces. 
Read more about the nesting feature here.

Mini Tropical Leaf Canvas Art using Silhouette Printable Gold Foil. designed by Janet Packer (CraftingQuine) https://craftingquine.blogspot.co.uk for Silhouette UK

STEP 3: Cut the Media

Feed the media on a cutting mat into your Silhouette. Click on the send tab and select the 'Foil - Printable' media type. Adjust the settings until a test cut cuts through the foil and not the backing, achieving a 'kiss cut'. I was able to reduce the Force by two, but otherwise the defaults worked fine for me.


STEP 4: Apply the Foil

Remove any tiny waste pieces. I do this by bending the cut foil sheet and lifting off each piece by a corner. Larger waste pieces can be left on the sheet. Carefully peel away one leaf shape at a time and smooth it onto a prepared canvas (no need to use transfer tape for images of this size, just carefully hold it in your fingers).

Mini Tropical Leaf Canvas Art using Silhouette Printable Gold Foil. designed by Janet Packer (CraftingQuine) https://craftingquine.blogspot.co.uk for Silhouette UK


That's it - the canvases are complete and ready to hang on your wall. I love how they turned out. In real life they look so effective for such a quick project. I'm sure you can think of lots of other projects where these foil sheets would look great too. Do share them on the Silhouette UK Facebook Page.


Mini Tropical Leaf Canvas Art using Silhouette Printable Gold Foil. designed by Janet Packer (CraftingQuine) https://craftingquine.blogspot.co.uk for Silhouette UK


Bye for now,


  Crafting Quine Blog | Instagram @CraftingQuine


DESIGNS USED:


PRODUCTS USED:

Wednesday, 4 July 2018

Design of the Week - Here Comes The Sun - 3rd July 2018


Hello, hello Karen here with a little mini album inspired by this week's free design.  A perfect cut file for the lovely sunny days we have been having lately - Here Comes The Sun
I decided to use it for the title on the front of a little mini album for photos of my upcoming trip to Newcastle.

I chose this design by Lori Whitlock  for my album and reduced the size to 98% so that I could get all three pages onto one 12 x 12. 

I used Silhouette chipboard to make the box and the base for my pages. 

Once it was made (Lori Whitlock has a YouTube showing how to make the album and box) I covered the box and pages with patterned paper and cut the 'Here Comes The Sun' from rose gold printable foil


I am really pleased with the final results and it is now packed ready for my little summer adventure. 


Saturday, 5 May 2018

Happy National Scrapbooking Day Cup Cake Toppers using Rose Gold Foil


Hello, hello - Karen here with some cute little cupcake toppers that I made for the cupcakes I am taking to my crop today.  As many of you know the first Saturday in May is always National Scrapbooking day and it so happens that I have my crop on the first Saturday of the month.

I always make cupcakes for the ladies who attend and wanted to make them a little special to celebrate.

As we are showcasing Rose Gold Printable Foil this week, what better media could I use for my quick and simple toppers.

Firstly, I opened this file


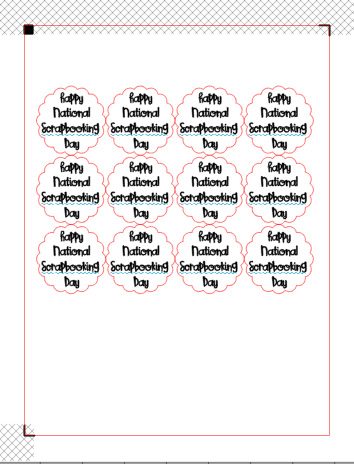
I resized the three scalloped circles to 2ins, 1.75ins and 1.5 ins.  I only had one sheet of gold foil left so had to be economical with how I used it.

I wanted to print on the smallest circle and also have the largest circles cut from gold as well.  A bit tricky as when I turned on the registration marks to print and cut there wasn't enough room for all the circles I needed.


I then had the idea of printing and cutting the small scallops with the registration marks on and then taking the registration marks off to add the larger ones as I would have a greater area to work with.  It didn't matter that some of the larger ones would be cut with a black registration mark printed on them as this would be hidden.

I set out where I wanted my shapes to be. 


Removed the large ones and added text to the smaller ones using this font


I sent it to my printer and was pleasantly surprised how easily it went through.  I then added it to my cutting mat and cut the small circles.

Next I added the large circles back in and removed the small ones and turned off the registration marks.

Finally I cut the middle sized circles and the large ones from adhesive backed card.


All that was left was to assemble them - an easy job as both the foil and card had adhesive backing. 


PRODUCTS USED: