Showing posts with label printable patterns. Show all posts

Saturday, 11 August 2018

How to Print Edge-to-Edge on Silhouette Printable Cotton

How to print edge-to-edge on Silhouette Printable Cotton (or any other printable media). Tutorial by Janet Packer (Crafting Quine) https://craftingquine.blogspot.co.uk for the GraphtecGB and the SilhouetteUK Blog


Hello, Janet here with a quick tutorial for printing edge-to-edge on the Silhouette Printable Cotton Fabric. The Silhouette fabric is a smooth cotton with stabiliser, and a paper backing. It comes in a pack of eight Letter-sized sheets and is perfect for Print & Cut projects as it has an inkjet printable surface. However, for my little sewing project I wanted the largest possible printed area, so printed a pattern edge-to-edge onto the sheet. Using a simple paper pattern, designed in the Silhouette Studio software, I cut the pattern and printed out the fabric.

How to print edge-to-edge on Silhouette Printable Cotton (or any other printable media). Tutorial by Janet Packer (Crafting Quine) https://craftingquine.blogspot.co.uk for the GraphtecGB and the SilhouetteUK Blog


This was a great opportunity to use one of the printable patterns that I'd bought from the Silhouette Design Store in one of their recent sales. This colourful design with sun-glassed, smiley faces by Renee Jablow (#206783, Color Emoji Pattern) was perfect.

In this post I show how to print on the fabric edge-to-edge. There will be a separate post on how to design the pattern for the sunglasses case in the Silhouette Studio Software, and instructions for the sewing part can be found on my Crafting Quine Blog.

How to print edge-to-edge on Silhouette Printable Cotton (or any other printable media). Tutorial by Janet Packer (Crafting Quine) https://craftingquine.blogspot.co.uk for the GraphtecGB and the SilhouetteUK Blog


STEP 1: Edge-to-Edge Page Setup

Set up the page in the Silhouette software for Letter-sized media, and turn on the grey print border (Page Setup panel, Page Size tab, adjust Size, tick 'Show Print Border').

The grey border indicates that any printing will only extend to that line. The print area is extended using the Printer Print Setup.


How to print edge-to-edge on Silhouette Printable Cotton (or any other printable media). Tutorial by Janet Packer (Crafting Quine) https://craftingquine.blogspot.co.uk for the GraphtecGB and the SilhouetteUK Blog


STEP 2: Edge-to-Edge Print Setup

NOTE: This is only possible if your printer has borderless printing capability; not all printers have it.
From the top menu access the Print Page Setup.

How to print edge-to-edge on Silhouette Printable Cotton (or any other printable media). Tutorial by Janet Packer (Crafting Quine) https://craftingquine.blogspot.co.uk for the GraphtecGB and the SilhouetteUK Blog

Select your printer and then the correct media size, i.e. US Letter, and Borderless. You may not have the same options, as what appears here is based on the options available from the printer selected.


How to print edge-to-edge on Silhouette Printable Cotton (or any other printable media). Tutorial by Janet Packer (Crafting Quine) https://craftingquine.blogspot.co.uk for the GraphtecGB and the SilhouetteUK Blog


The grey line on the virtual mat should now align with the outline of the page.


STEP 3: Fill the Page with a Pattern

Draw a rectangle the exact size of the page using the rectangle shape from the drawing tools. Fill it with any pattern that has previously been installed in your Silhouette software (select the rectangle, Fill panel, Fill Pattern tab, scroll through and select a pattern). Adjust the scale of the pattern by expanding the display to include Advanced Options. For this pattern I increased the percentage to 112.

How to print edge-to-edge on Silhouette Printable Cotton (or any other printable media). Tutorial by Janet Packer (Crafting Quine) https://craftingquine.blogspot.co.uk for the GraphtecGB and the SilhouetteUK Blog


STEP 4: Printing the Fabric

Select File and Print, increasing the print quality if the option is available.

Note: When printed, the colours can be a little subdued. If you find this to be the case just increase the saturation of the colours of the fill prior to printing (open Image Effects panel, select Contrast, Brightness & Saturation tab, increase the value on the Saturation slider). I increased my value to 26.


How to print edge-to-edge on Silhouette Printable Cotton (or any other printable media). Tutorial by Janet Packer (Crafting Quine) https://craftingquine.blogspot.co.uk for the GraphtecGB and the SilhouetteUK Blog


This picture shows the difference - the left had one was printed without the adjustment, and the one on the right was printed with the saturation increased to 26.


How to print edge-to-edge on Silhouette Printable Cotton (or any other printable media). Tutorial by Janet Packer (Crafting Quine) https://craftingquine.blogspot.co.uk for the GraphtecGB and the SilhouetteUK Blog


Once your fabric is printed, it cuts beautifully with the backing on (you can draw on the backing too). The backing easily peels off and the fabric is then ready for sewing. The reverse of the fabric still has a stabilised backing which allows the fabric to be ironed on to other media (other fabric or even paper and cardstock). The strength of this bond is perfect to use in place of tacking, but doesn't form a permanent, washable bond.

The post on how to design the pattern for the sunglasses case in the Silhouette Studio Software is here.

I hope that you have found this tutorial useful - of course, edge-to-edge printing can be used on other printable media, as well as paper and card, so do try it out.

Bye for now,

  Crafting Quine BlogInstagram @CraftingQuine


DESIGNS USED:


PRODUCTS USED:

Wednesday, 18 July 2018

FREE Design of the Week - It’s a Wrap with Printable Patterns - 17th July 2018


Make gift wrap with the FREE Tropical Leaves file on your Silhouette. Tutorial by Janet Packer Crafting Quine http://craftingquine.blogspot.co.uk for GraphtecGB Silhouette UK.


Hello, It’s Janet here using this week’s free file in the Silhouette Design Store - a lovely Tropical Leaf Printable Pattern.

Printable patterns are very versatile, and I’ve chosen to make some sheets of gift wrap for this week’s project. I’ve printed the pattern onto the largest paper that my printer can handle and used it to wrap a special gift. I’ll show you how to set this up in the Silhouette software to prepare it for printing. The actual print options available will differ from printer to printer. I used a large format,  A3+ Inkjet printer, and printed onto A3, 120 gsm, smooth, ultra white document paper. You can use a regular sized printer and join several sheets together if you don't have access to a larger one.

Make gift wrap with the FREE Tropical Leaves file on your Silhouette. Tutorial by Janet Packer Crafting Quine http://craftingquine.blogspot.co.uk for GraphtecGB Silhouette UK.


STEP 1: Adjust Paper Size in Silhouette Studio

Firstly set your page size to reflect the size of your paper (Page Setup window, Page Size tab, Size). My paper was A3 (297 x 420 mm, approx. 11.7" x 16.5"). If you are using paper of a non-standard size, enter the dimensions in the Width and Height boxes and press Enter. Turn on Show Print Border, and your see the current print page setting for your printer displayed as a grey line.


STEP 2: Adjust Printer Settings

From the top menu change your printer page settings to match your paper (File > Print Page Setup). Select your printer and the new paper size. Select Borderless if your printer has that option and you want the pattern to print right to the edge. The grey line will now be aligned with the paper edge on your virtual mat, and is barely visible.


STEP 3: Prepare the Paper

Using the Drawing Tools, draw a rectangle to match the size of the paper.  Select the rectangle, open the Fill Panel (artist palette icon) and click on the Fill Pattern tab (dotted square). Scan through the pattern thumbnails and select the Tropical Leaf pattern. The rectangle will then be filled with the leaf pattern. Click on the Advanced Options arrow to reveal more options. You can adjust the pattern scale using the Scale Pattern slider. The picture below shows the pattern at 100%.


This picture shows the pattern at 20%, and a grid is now visible, showing the edges of the pattern 'tiles'. There is no visible grid if the pattern is a seamless design, and in other tiled designs the grid can be less obvious. Choose a setting which you find attractive, I chose to print the paper at 100% and 50% to see which I liked the best.


STEP 4: Print the Paper

Send your paper to print (from the top menu, File > Print). The larger scaled paper is on the left, and the smaller one has been used to wrap the parcel.

Make gift wrap with the FREE Tropical Leaves file on your Silhouette. Tutorial by Janet Packer Crafting Quine http://craftingquine.blogspot.co.uk for GraphtecGB Silhouette UK.


STEP 5: Additional Decoration

I used the decorative elements from the Hawaii Bag by Daniela Moscone (#197821), layered with double-sided adhesive foam tape, and finished them off with drops of pink dimensional paint (Nuvo Crystal Drops).

Make gift wrap with the FREE Tropical Leaves file on your Silhouette. Tutorial by Janet Packer Crafting Quine http://craftingquine.blogspot.co.uk for GraphtecGB Silhouette UK.


If you haven't printed your own wrapping paper before I urge you to to try it. Imagine the variety of gift wrap you could make (there are currently around 3500 printable patterns available in the Silhouette Design Store).

The Tropical Leaves Pattern (#269750) is available for free until the 23/07/2108, after that it will revert to the regular price.


Bye for now,

  Crafting Quine BlogInstagram @CraftingQuine


DESIGNS USED:


PRODUCTS USED:

Monday, 14 August 2017

Filling text with design store patterns

Hello Silhouette friends!

It's Maria here with you today with a scrapbook layout.

The photo that I want to scrapbook today is of my kids on a recent trip to Marwell Zoo. They were looking at the site map so attentively that I had to steal a pic. But when it came to scrapbooking it, I realised that I didn't have any Zoo/Animals papers that I could use on my layout. And that's when the Silhouette Design Store's Printable Patterns come in so handy!


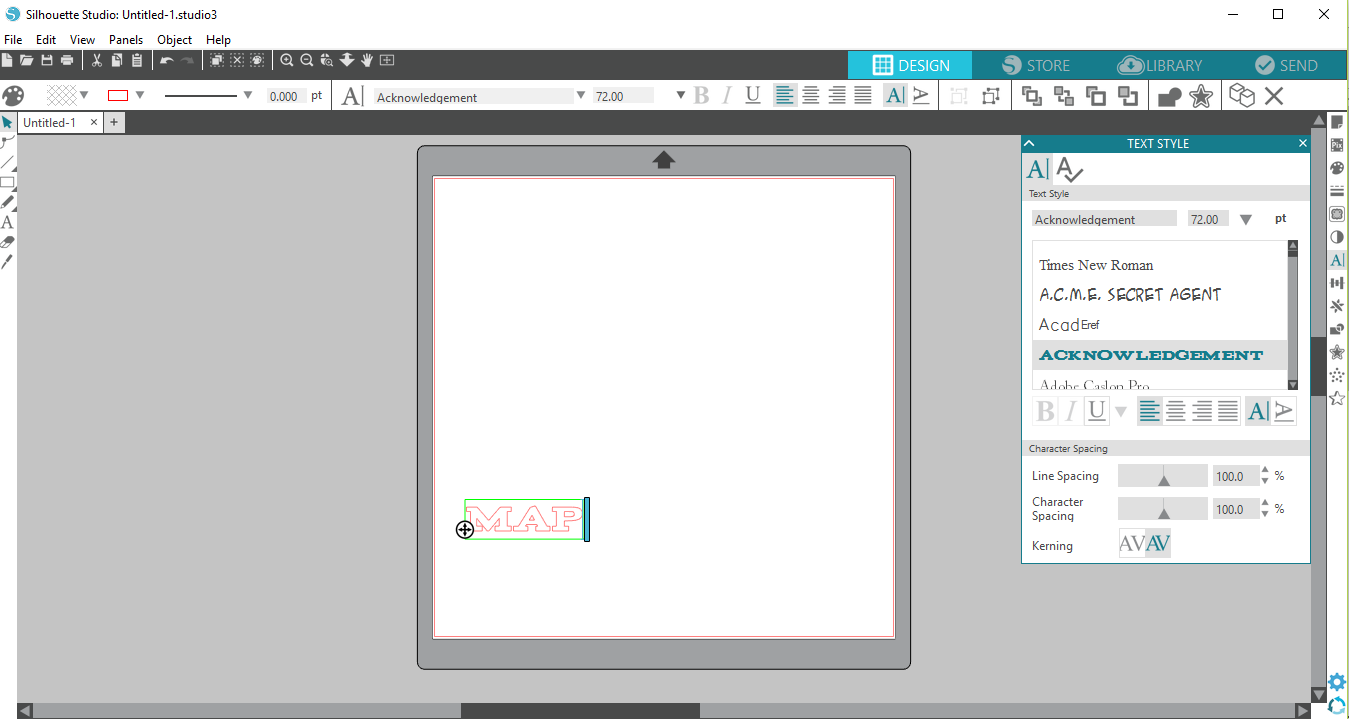
I started my design by choosing a suitable font. You want a font that is quite "fat" so your pattern will really show.


Then I realise that I will be using the Print and Cut facility and the white cardstock that I am going to be using is A4, so I go the the Page Set Up tab and change the page size to A4.


I am using A4 cardstock for the Print and Cut, however, I know that I want my letters to be as wide as 12 inches (or as close as I can get). So I resize my letters using the background grid as a guide, and then ungroup them so I can move them on my A4 page.


Your Silhouette Studio should come with a few patterns that you can use. However, I find that these are very basic. Fortunately, you can purchase lots of patterns from the Silhouette Design Store. I applied the "printable pattern" filter and searched for "Zoo" and this very cute zebra design popped up and I knew it was the one!

Once you've paid for it, it will automatically download and it will appear on your "Fill Pattern" tab.


Now it's time to send it to print. Once it's printed, but the cardstock on your mat and load into your Silhouette Machine.

Make sure the cut settings are correct. You may or may not want to offset the lines in your letters and get the Silhouette cut the outerlines, rather than directly on the printed letters. I chose to cut without a border, but it's completely your decision.


I believe that you can upload your own patterns to the Silhouette if you have the Design Edition, but I only have the Basic Edition. However, downloading the patterns from the Store is simple enough!

Here is the layout that I made with the letters:


As you can see, I ended up using a pen to outline the letters, so perhaps cutting them with an offset would have been better! I know for next time!! :) (By the way, my ink is running out on my printer, that's why the colours are a bit washed off, I think. The design is a bit more orange I believe)

I hope you have found this tutorial useful! x


PRODUCTS USED