Showing posts with label Chipboard. Show all posts

Friday, 17 May 2019

Chipboard Favour Boxes

Hi everyone, 😊 My name is Jordy, and this is my first ever blog post for Silhouette UK. 

May is a one of the best times for wedding season and nothing says wedding like gift boxes for your guests.


Materials Used:

Silhouette UK chipboard.
Your favourite type of adhesive, I like my tape roller as it’s easy to use.
Paper of your choice, I used white paper.
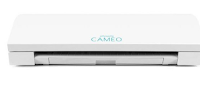
Silhouette CAMEO® 3 machine

Adhesive pearls for decoration.

Silhouette files:

Cage Box #89363.

Now onto the design...


Step 1: Open the file in Silhouette Studio: 


Once I decided on the designs I wanted to make, and purchased from the Silhouette Design Store. I opened then up. I did also make the box a little bit bigger, but not too big that it goes outside of the red cutting line.

Step 2: Cutting the design:

I don't want to do anything fancy with my design, as I love the rustic look of the kraft colour chipboard. I will be adding some accents once the design is cut, but I'm not going to do anything fancy within the software.


Now the best thing about this design is its super easy to cut on the chipboard. Load the chipboard onto the strong hold mat and run the designs through. I tweaked my cut setting in the software, because I know my machine cuts better with a little bit force. But as with everything, it is best that you start with the Silhouette Studio softwares default settings and find what works best for you! Because Chipboard cuts on a speed of 1, its best you grab a cup of tea coz we're gonna be here a while. (It's totally worth it though!)

Step 3: Put the design together:


Now all your parts are cut – we can put them together and have fun. I used a bone folder to get a smooth crisp fold on the chipboard. I used some tacky glue to glue it all down, usually I would opt for a tape gun but sadly my tape gun is out of tape! One little tip I have for using glue on projects, use mini pegs to hold the bits in place whilst they dry.


 I felt the design still looked a little bit boring - which is one of my biggest problems with crafting. I always feel projects need that little extra something. 


I cut a little bit of  vellum that would fit behind the cage bars and adhered it on the back. It just adds a little extra to the box.  Now the fun part (in my opinion) the adhesive pearls and crystals! I opted for a mix of both crystals and pearls, because it just made the box look so pretty.


And now, to put all the pieces together. I used coordinating yellow ribbon to match the theme of the box. I also decided not to use the heart, it didn't look right when I put it on but that is down to personal preference.  Obviously if it looks a little plain, you can jazz it up with some ink but I don't have access to any of that so I left mine as it is. Sometimes I love the look of items with no fancy extras.


I hope you all enjoyed this tutorial and I can’t wait until the next one. Happy crafting.
Xo Jordy


Wednesday, 15 May 2019

Bird House Wedding Table Setting - Using Silhouette Chipboard


Hello, hello Karen here with a new Wednesday post.  This week the DT are focussing on using Silhouette Chipboard with a wedding theme.


Now, the chipboard is not as thick as standard chipboard but more like Kraft card.  With this in mind I decided to make a cute little bird house favour box and then was inspired to make a co-ordinating place card


which then led to making a napkin ring!

I started with the bird house cut file and resized it to 7.5 ins wide so I could to get two onto one piece of 12 x 12 chipboard.


I then copied it and used the knife tool to remove all but the front of the bird house.
To this I added a name using Sisters Sketch font and placed on my design with the two bird house boxes.  


The last thing to do was to make the napkin ring.  I used the place card and reduced it to 66 percent.  I did the same for the roof and added these to my design along with a 1 inch strip for the ring.


Next I laid out my flowers, leaves and two easel's to stand the place cards on. 


I added four pieces of different coloured card to my mat along with a piece of chipboard and cut them out in one go.

All that remained was to glue my items together and ink all the edges before adding the flowers and some silver glittery stickers.


I thought it would be fun to fill the little bird house favour box with eggs - and it was!


DESIGNS USED


PRODUCTS USED


Monday, 7 January 2019

Card storage and organiser


Hi everyone. It's Verity here from Pretty Little Button bringing you another project. For this week's project I wanted to make something 3D but at the same time something useful for my craft room. I stumbled across this card storage and organiser from Sweet Afton and thought this would be great. It will help me keep my cards organised so I can easily find a card to suit the occasion. Whatsmore the chipboard from Silhouette was perfect for this. This cut file was originally for A2 (American) style cards, but I often design cards larger than this, so I increased the size to fit cards 6" wide. 

Card storage and organiser details: 

To start off, I needed to adjust the size of the cut file to my size of choice, 6 inches wide. To make sure all the pieces were proportionate to one another, adjust the size of the cut file with all the items grouped together. 

Using the vertical gridlines (pull these from the right-hand rule bar into your design space), I marked out 6 inches. As I was increasing the size of the group file, I made sure the width of the back panel span the two ruler markers. This will give me a 6" wide storage container.

As I had adjusted the size of the cut file, you can see below that I can no longer cut out the larger piece out on a 12" sheet of chipboard as it is wider than 12". However, just a little deconstruction of the file to separate pieces will allow you to cut out bits individually and fit on a cutting mat. 


To do this, I right clicked the large piece and pressed ungroup. Then to detach the front panel, you can select the front panel shape and this will be separate from the remainder of the shape. 

Some shapes when ungrouped and detached from the main shape may be missing a side or a tab. You can easily draw these in with the line tool. To convert a line to a score line, select the line menu next to the line thickness window, and select the dotted line of choice. 


To make sure all the lines in the shape and connected and now small openings present from draw tabs etc, select all the lines in the shape and right click to make a compound path. Next, right click and select edit points. If notice any red circle points, this means there are openings within the path. To close the openings, move one circle over the next circle present to close it (these are usually a few mm apart - if they are cms apart, check the shape first). 

To speed up the process, as often two tabs are needed but as mirror images of themselves, copy the shape and right click. Select flip horizontally and you have a mirrored shape. 


When you separate the pieces to your liking you are ready to cut out. I wanted to show that you can even cut this pattern on an A4 sheet of paper if you are using alternative media to the chipboard from Silhouette. 


When ready, cut all the pieces out of heavyweight card or using the chipboard from Silhouette. 

Here were my cut settings for Chipboard when I selected the material. 


However, after three test cuts, I had to change the blade depth to 7 for my machine and blade to cut through the chipboard. Remember to always test cut as your machine and blade can vary the cut settings!


When all items are cut out, as well as the side/front panel decoration from patterned paper, use a strong adhesive to tabs to build your card storage and organiser. 


I have organised my cards in occasions, but you may also want to organise your cards with months of the year for birthdays. Therefore each month you can go an see what cards need to be sent to who!


If this has inspired you to try this out, please post below. I would love to see it!

Until next time,

Verity


Profile Pretty Little Button Blog | Instagram | Facebook

DESIGNS USED:

A2 card holder by Sweet Afton, Design ID#137390

PRODUCTS USED:


Saturday, 7 July 2018

Make Dimensional Cake Toppers with Silhouette Chipboard

Make dimensional cake toppers (for large cakes or cupcakes) with Silhouette Chipboard Sheets. Project instructions and blog post by Janet Packer  https://craftingquine.blogspot.co.uk for the Silhouette UK Blog GraphtecGB. Princess themed crown decor. Designs from the Silhouette Design Store by Lori Whitlock and Scrap n Fonts.


Hello, Janet here with a new Chipboard project. The Silhouette Chipboard Sheets cut and layer beautifully to make stronger items, and this week I have used them to make a set of co-ordinating cake toppers for a special occasion.


Make dimensional cake toppers (for large cakes or cupcakes) with Silhouette Chipboard Sheets. Project instructions and blog post by Janet Packer  https://craftingquine.blogspot.co.uk for the Silhouette UK Blog GraphtecGB. Princess themed crown decor. Designs from the Silhouette Design Store by Lori Whitlock and Scrap n Fonts.


The layered chipboard can be decorated with all kinds of media: paint, decorative papers, vinyl, and more. I wanted my toppers to be glittery, but I didn’t want to risk getting glitter on the cakes. The perfect solution was to fuse glitter heat transfer vinyl onto the toppers to give a neat, flake-free finish. I used the Silhouette Glitter Heat Transfer in a rich copper.


Large Cake Topper

Make dimensional cake toppers (for large cakes or cupcakes) with Silhouette Chipboard Sheets. Project instructions and blog post by Janet Packer  https://craftingquine.blogspot.co.uk for the Silhouette UK Blog GraphtecGB. Princess themed crown decor. Designs from the Silhouette Design Store by Lori Whitlock and Scrap n Fonts.


I used the crown from the 'Crown Me Phrase' by Lori Whitlock (#215545) for the large, double-sided, dimensional topper.  The phrase was ungrouped and the crown reduced in size to about 14 cm (5.5-inches). Two rounded rectangles were subtracted from the crown to make slits to accommodate two bamboo skewers.

Make dimensional cake toppers (for large cakes or cupcakes) with Silhouette Chipboard Sheets. Project instructions and blog post by Janet Packer  https://craftingquine.blogspot.co.uk for the Silhouette UK Blog GraphtecGB. Princess themed crown decor. Designs from the Silhouette Design Store by Lori Whitlock and Scrap n Fonts.

I cut five crowns with slits, and one with no slits, from the Silhouette Chipboard.


Make dimensional cake toppers (for large cakes or cupcakes) with Silhouette Chipboard Sheets. Project instructions and blog post by Janet Packer  https://craftingquine.blogspot.co.uk for the Silhouette UK Blog GraphtecGB. Princess themed crown decor. Designs from the Silhouette Design Store by Lori Whitlock and Scrap n Fonts.


I also cut two crowns in mint textured cardstock and one crown in copper glitter heat transfer with a little princess's name cutout in PN Peanut Butter & Honey Font (#143690).

The topper was constructed by adhering all the crowns with slits together with liquid craft adhesive. The plain one was then adhered to the back. The bamboo skewers were aligned within the slits and stuck with more liquid adhesive to the back piece, and the mint cardstock crowns adhered to both back and front.

Make dimensional cake toppers (for large cakes or cupcakes) with Silhouette Chipboard Sheets. Project instructions and blog post by Janet Packer  https://craftingquine.blogspot.co.uk for the Silhouette UK Blog GraphtecGB. Princess themed crown decor. Designs from the Silhouette Design Store by Lori Whitlock and Scrap n Fonts.


The heat transfer was then applied on top with a domestic iron, protecting the heat transfer media with a silicon sheet.

HINT: The negative lettering was easy to apply to the reverse of the topper using the used backing sheet from the positive piece.

Make dimensional cake toppers (for large cakes or cupcakes) with Silhouette Chipboard Sheets. Project instructions and blog post by Janet Packer  https://craftingquine.blogspot.co.uk for the Silhouette UK Blog GraphtecGB. Princess themed crown decor. Designs from the Silhouette Design Store by Lori Whitlock and Scrap n Fonts.


Cupcake Toppers

Make dimensional cake toppers (for large cakes or cupcakes) with Silhouette Chipboard Sheets. Project instructions and blog post by Janet Packer  https://craftingquine.blogspot.co.uk for the Silhouette UK Blog GraphtecGB. Princess themed crown decor. Designs from the Silhouette Design Store by Lori Whitlock and Scrap n Fonts.


I made a matching set of cupcake toppers using the Princess Wands/Cake Toppers by Lori Whitlock (#63758). In addition to the pieces in the file (scalloped circles in cardstock, and decorations in heat transfer) I added:
  • a circle with a slit (cut from chipboard, one per topper), 
  • a circular frame to fit (cut from heat transfer, two per topper), and
  • a letter 'm' using the PN Font (#143690) (cut from heat transfer).
A cocktail stick was sandwiched between layers of heat transfer either side of the chipboard piece, and the cardstock-decorated shapes adhered to both sides of the toppers.

Make dimensional cake toppers (for large cakes or cupcakes) with Silhouette Chipboard Sheets. Project instructions and blog post by Janet Packer  https://craftingquine.blogspot.co.uk for the Silhouette UK Blog GraphtecGB. Princess themed crown decor. Designs from the Silhouette Design Store by Lori Whitlock and Scrap n Fonts.


Confetti 

Table confetti was easy and cheap to create by cutting circles utilising the spaces around the scalloped  circles. The waste stars from the heat transfer can be utilised too.

Make dimensional cake toppers (for large cakes or cupcakes) with Silhouette Chipboard Sheets. Project instructions and blog post by Janet Packer  https://craftingquine.blogspot.co.uk for the Silhouette UK Blog GraphtecGB. Princess themed crown decor. Designs from the Silhouette Design Store by Lori Whitlock and Scrap n Fonts.


The chipboard was the perfect base for all these glittery decorations. I do hope you'll try it. Here are some links to some other chipboard project tutorials. Just click on the photo to visit each one.

How to Layer Chipboard - Arrows
Layering Chipboard
Chipboard 3D Marquee Letters
3D Marquee Letters
Using Chipboard to make Curio Jigs
Jigs for the Curio
Make Jigsaws of drawings and photos from chipboard
Custom Jigsaws


Bye for now,


  Crafting Quine BlogInstagram @CraftingQuine


DESIGNS USED:


PRODUCTS USED: