I'm feeling quite sad today thinking of all those Silhouette machines locked up in their boxes. So I have got my hands on a brand new Cameo 3 and I'm asking you all to take your machine out and go through this project with me. This run through is starting at the very beginning of getting the machine out of the box.
First thing...take it out of the box!
In the box you will find a cardboard wedge in here you will find all the leads you need, remove this and underneath is your Cameo.
Remove the Cameo from the box and remove the outer protective packaging.

On the lid of the cutter there are some instructions on where to go to set up your machine. Copy the address into your web browser and you will be taken straight to the setup page. The instructions are very clear and you are guided one step at a time throughout the process.
The firmware on your machine will most likely need updating and I would encourage you to follow the set process completely at this point. when you have registered your machine you will get an email to you chosen email account with a code giving you a free month subscription giving you credit to use to buy designs. Following through this process also guides you to download the software you will use with your machine.
Be aware your machine screen will change color throughout the process of firmware update.
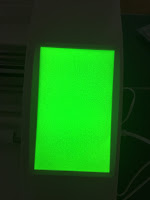
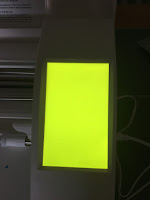
While your computer is downloading and updating the firmware you can continue with the unpacking and set up of the machine itself.
Before you continue you must remove the blue tape from the machine, this is there to keep your cutter safe during shipping.
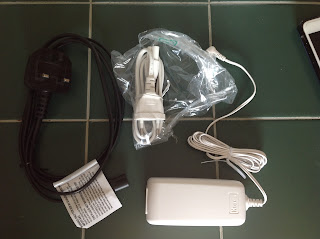
Next, take the leads from the cardboard wedge the machine is supplied with two plugs as we are Silhouette UK we will be using the lead with the 3 pin plug. (You can keep the other lead safe in case you want to bring you Cameo on holiday to the USA)
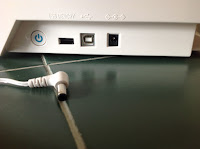
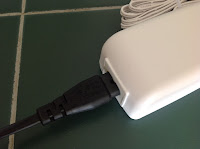
Insert the black lead into the white power block and the white lead into the round hole at the end of the machine on the right. Plug the plug into an outlet and switch on. press the power on button on the end of the machine and your cameo will spring to life.
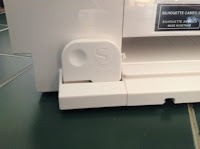
The Cameo has lots of little features that make life that little bit better. from the handy little cutter that zips along a groove on the back to cut media on a roll, unique springs to hold the media in place and not forgetting the onboard storage for all the tools, which also houses some handy flip out guides to help load your different media straight.
At this point, we can put the blade into the machine. A cameo 3 comes with an auto blade included.
 |
1. Pull out the tab
on the left tool holder |
 |
2, Insert the blade, it will only
fit one way
with the number view window to the front |
 |
3, Make sure the blade housing is all the way down
and then push the tab back to lock into place.
|
Now, what will we cut?
Double click the silhouette studio icon on your desktop to open the software
The clever software will recognize the machine you have and guide you through downloading your free files to your library just follow the on screen instructions.
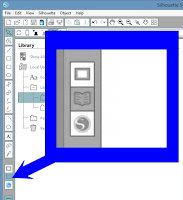 You can access the files in your library at any time by clicking on the box with the open book icon on it located in the lower left of software screen, show in the picture to the left.
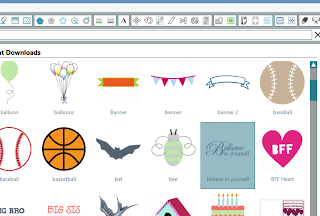
From the free files, I have chosen an inspirational quote, to use a file from the library simply double click on it.
having double-clicked a file the library will close and the software will revert back to the main window and the chosen file will automatically appear in your workspace.
Within the panel to the right (Design page settings panel), we have a few changes to make. We want to make full use of our sheet of vinyl and make a large decal so we will change the paper setting to landscape in the design page settings this will change the virtual page on our workspace.
click on anywhere on the words to select it and a box will appear around it. Use one of the squares in the corners click and drag the box until the words fill the white virtual page. Now we will separate the words so we can cut them in different colors of vinyl. locate the ungroup button at the bottom left of the screen and click. the letters will all have their own box now and can be moved independently of each other.

click anywhere away from the letters and all the boxes will disappear. To select the word Believe, with the mouse positioned above and to the left of the letter B,click down on your mouse and move the mouse across the screen until all of the letters of the word have boxes around them let go of the mouse and locate the group button to the left of the ungroup button we just used by clicking the group button we are telling the software these letters are one word or object and it can them be moved as one piece. Repeat this process with the remaining words to make them one object.
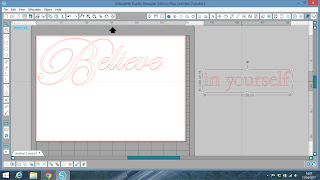 Decide which word you would like to cut first, click and drag the other word of the virtual paper and mat.
Now here's a bit they don't tell you!
Your new mat is sticky, very sticky remove the protective blue sheet to reveal the sticky layer underneath. Take a clean lint free cloth like a cotton pillow case and lay it flat on the mat sweep over the pillow case with your hand gently and then remove the cloth this is often referred to as de-tacking the mat.
(we do this so we can remove our media after cutting, without ripping it)
take you chosen vinyl and line the edge up with the outside edge of the sticky square on the mat making sure the long side is across the top so it looks like the set up of the virtual mat and paper. With the mat loaded offer the mat up to the rollers on the Cameo. The edge of the mat should be tucked in ready to go under the rollers.

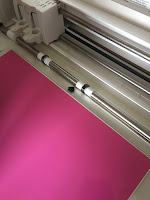
Press the load button on the LCD screen. The rollers on the Cameo will turn and grip the mat and roll it into the machine the ready for the next part of the process.
This bit is something you should do before you sent a full project to your Cameo getting this bit right will ensure you have a perfectly cut project every time. In the Silhouette studio find the cut settings button and click it. this will change the panel from the design page options to a view of the cut settings. the word "believe" will change to a thicker red line, anything that is this style of line when you have selected the cut settings panel will cut when you send to the cameo.
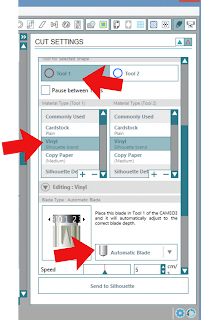
In the cut setting panel, you need to check a few things make sure that tool 1 is selected. Next Select Vinyl as your media type. The cameo will revert back to default settings so it is important that you tell your machine that you have an auto blade. This is easily done click the box that says "ratchet blade" and a menu will drop down, simply click on the automatic blade option.
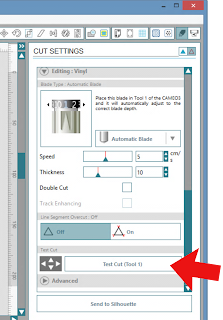
move down the settings page until you can see the button that says "test cut tool 1", click this button. The cameo will now test your settings to ensure you are going to get a clean cut. The blade housing will move back and forward and click the blade to match your software settings. then it will cut a square with a triangle in it.
When the machine stops press the unload button this will release the mat from the cameo.

Check that the vinyl has cut through just the vinyl and not the backing and that the pieces can be removed easily. If it's necessary, increase
if it hasn't cut through the vinyl or decrease
if its cut through the backing as well the thickness setting slightly reload your mat into your machine. use the arrows next to the test cut button to move your blade away from where you just cut and click the "test cut tool 1" button continue with this process until your machine gives you a clean cut.
Now you have the perfect settings, with the mat loaded click the send to silhouette button and the Cameo will start to cut the word you have on your virtual mat out on your vinyl placed on the physical mat.
You can leave the machine to cut while you do something else, but I don't think anyone does. We just like watching it do its thing.
when you remove the vinyl from the mat you will see that there will be a mark on your mat where the blade was this is normal. it is similar to the dent left in a page when you were writing on the page above it.
Congratulations you have completed cutting your first vinyl decal!
Back on your computer select the word on your mat and drag it off the mat. Select the other words and bring them onto the mat as shown in the picture on right.
you do not need to change any settings this time just add your second color of vinyl to your mat and load it into the Cameo as before. Click the send to silhouette button in the cut settings window. when the cutting is finished unload the mat and remove the vinyl from the mat.
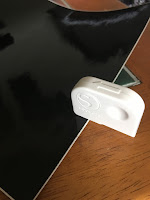
you can trim around the words you have cut with the supplied cutter and save the unused vinyl for another project. Peel the waste vinyl from the backing sheet leaving the words in place.if you fold the vinyl back as I have in the photo you will find it easier as the waste vinyl is less likely to stick to your cut letters. once the outer waste is removed you will need to "weed" the bits from the center of the letters
For years I used masking tape to transfer my decals, but I have to say the transfer tape from silhouette is fantastic and providing you remember to store it back on the backing sheet it can be used over and over again. Lay down the transfer tape over the word "Believe" using the grid to ensure it is straight then peel away the backing paper from the vinyl. As the transfer tape is transparent it is easy to line up the other words beneath the first word.remove the backing from this piece and you are ready to apply your decal to your Cameo lid
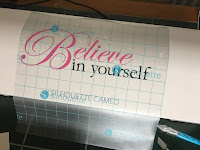
Before you add a decal to any surface it is a good idea to wipe it down with an alcohol wipe to remove any grease that may stop the vinyl sticking correctly, allow sufficient time for the alcohol to evaporate before continuing. Use the grid on the transfer paper to line up your decal and smooth the vinyl down.
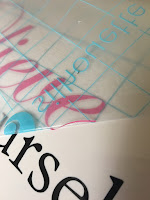
It is important you rub over the edges of your design to avoid lifting when you pull back the transfer tape. If, when you are removing the transfer tape any of the vinyl remains on the transfer tape, roll back the transfer tape and rub over the problem area and try again.
Remember to put you transfer tape back on its backing sheet ready for your next project.
Congratulations! you did a fantastic job what are you going to cut next?
Designs used: