Showing posts with label Halloween craft. 3D craft. Show all posts

Monday, 23 October 2017

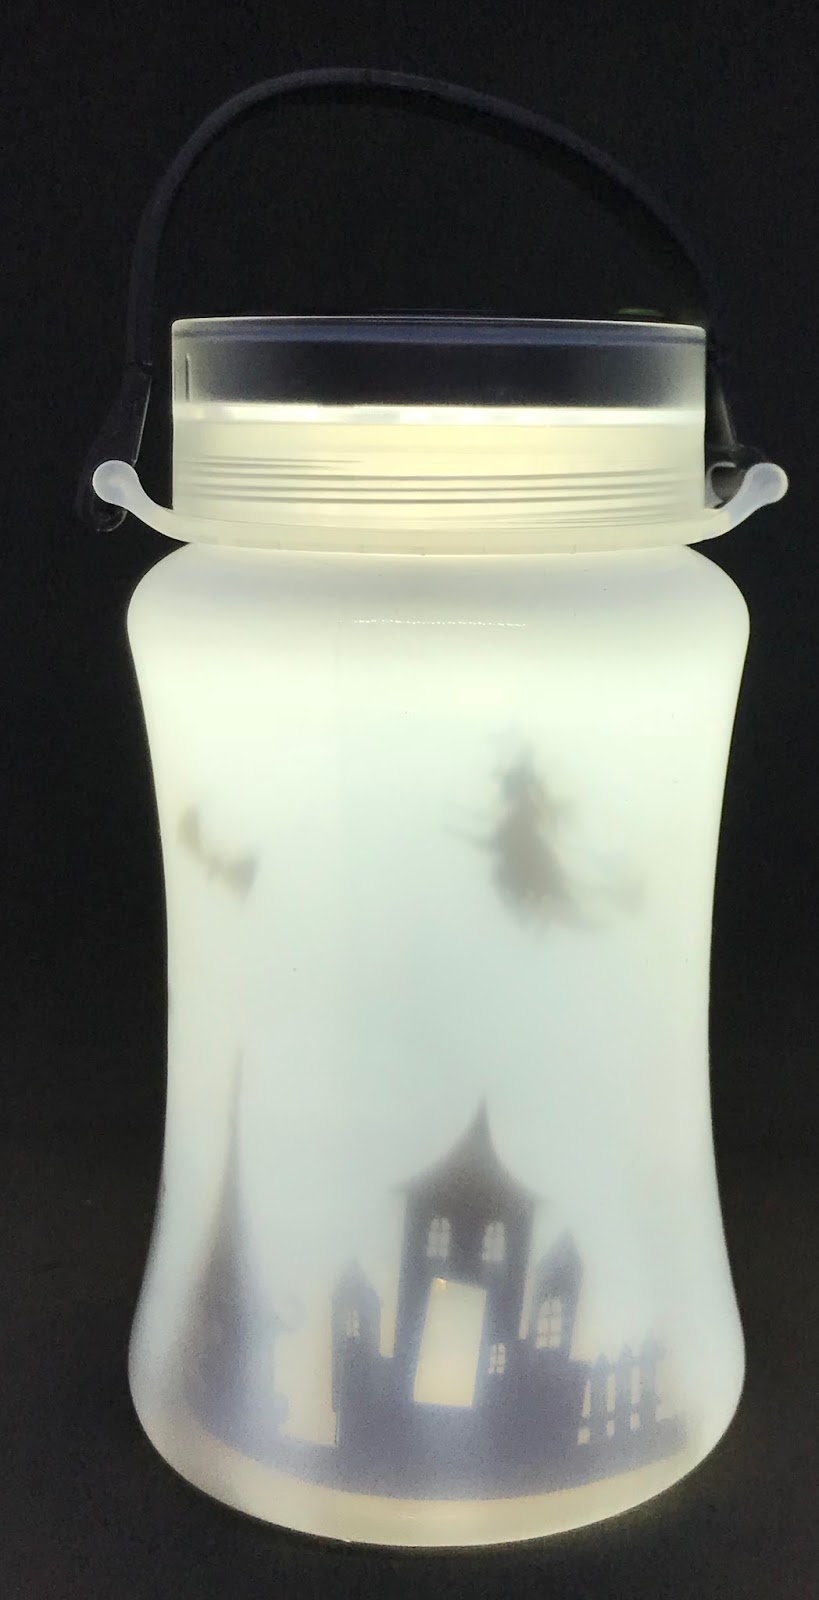
Trick or Treat safety lantern.

With Trick or Treating just around the corner and the nights getting darker, use this little trick to help keep your little one safe while out and about this Halloween!


Turn any storm lantern into a temporary spooky Halloween lamp.


Open a new project in Silhouette studio and select some spooky silhouettes from your library (or from the Silhouette store).


Trim a sheet of paper to the correct height to fit within your lantern. Measure the inside of your lantern by rolling up the sheet of paper and placing it inside the lantern. Allow the paper to unroll until it touches the sides, mark the paper where it overlaps. Remove the sheet from the lantern and trim off the access. Measure the sheet of paper and create a rectangle the same size on your virtual workspace.
 Use the scale tool located in the top toolbar to easily get the correct measurements. This rectangle gives you a guideline to keep your design within. I have turned this line blue as I will cut it separately from the main design.

Arrange your silhouettes within the guidelines.


Tip: Remember that the left edge will meet with the right edge when curled around inside the Lantern, make sure they will match up. You can check this easily by copying your design and placing the copys next to each other. Remember to delete the copy before sending to the cutter.

Load a sheet of acetate onto the cutting mat and load into your machine. click "send" in the software.

When the send window opens choose cut by "line" and ensure that only the blue line will cut.

Tip: Active cut lines are bold and inactive lines that will not cut on this pass are faded. 

Choose the correct cut settings for your media and remember to carry out test cuts to ensure a clean cut.  Send the project to your cutter and allow the job to complete. unload the mat and remover the media.
Place some dark coloured vinyl on the cutting mat and load into the machine.

 In the send window unselect the blue line cut and select the red line to active cut.


Select the correct media in the material list and carry out test cuts to ensure a clean cut. Send the project to the cutter and allow the job to complete.  Unload the mat and remove the media from the mat.
Remove all the unwanted pieces of vinyl leaving only the design on the backing sheet. Lift the design from the backing sheet with some transfer tape and apply to design to the piece of acetate.


Roll the acetate so it fits into the lantern. Lower into place and allow to unroll to the inside edges of the lantern. Replace the lid in the lantern and enjoy some safe trick or treating.


After all the fun, simply remove the sheet and store for next years fun.


Desing used:

haunted house border.studio by PHOTOPLAY

PRODUCTS USED:

Light hold cutting mat for Cameo


Saturday, 30 September 2017

Halloween Treat bag

With Halloween fast approaching, why not try this project to create a personalized treat bag. If you're hosting a monster mash movie marathon what better place to store the treats for those zombie's fingers to grab into.


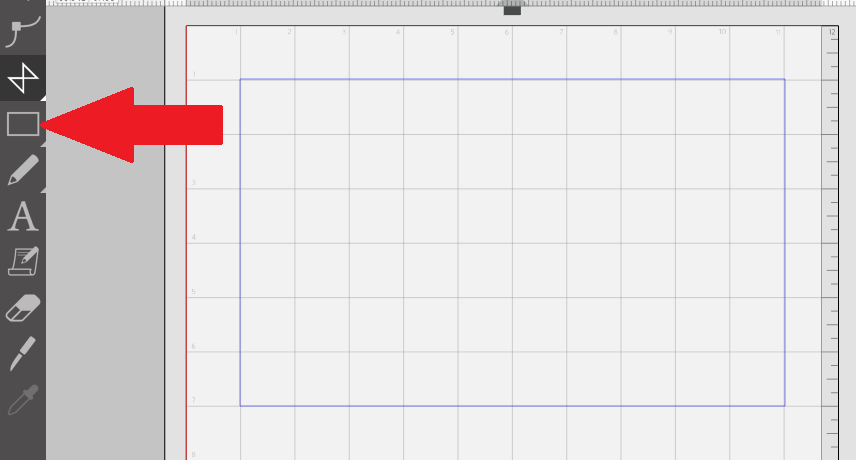
Open a new page in silhouette studio and select your page sizes from the page size setup panel. Using the shape tool, create a rectangle on the page.
 This will be the main body of your bag, this will not be a cut line so I have changed the line colour to blue.


This project will be easier if
you have your grid switched on 

Using the line tool, create tabs around the rectangle where the edges of the bag will be glued.

 Next, create a base for our bag. The base must exceed half the width of the side panel to create an overlap so both base pieces may be glued together.
If you are not happy with the position of your tabs adjust them using the edit points tool. Simply click on any point and drag it to the new position.
Continue using the line tool to complete the outer edge of your bag, using the rectangle as a guide.

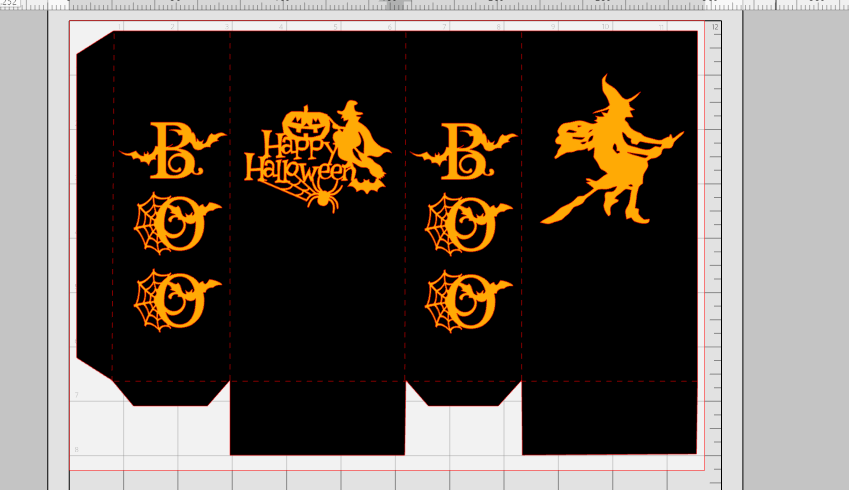
Open the line style panel and change the line style to a dashed line, again using the line tool add score lines to your project as shown in the photo.

Holding tab on your keyboard will help you maintain a straight line


Select your blue rectangle and delete it, as it is no longer needed. You have now created the net shape for your bag. Select everything on your page and group them together.
This net shape can be saved to your hard drive or library and can be used for many other projects where a box or bag is the base.

Go to the silhouette store and select some fun Halloween shapes to decorate your treat bag. Proceed through the checkout process to download your files.


Load the card you wish to use for your bag onto the cutting mat and load the mat into your cutting machine.

Click send in Studio and select the appropriate material in the drop-down menu, carry out a test cut to assure a clean cut and adjust if necessary. Click send and allow your project to complete cutting. Unload the mat and remove the media from the mat.

Locate your designs in your library and open them onto your work area by double-clicking on them. Decide on a layout for your design. Use the net of the box to size the pieces appropriately .

I have used fill to make my bag black and my
embellishments orange,
so I can see clearly how my design will look


Load your chosen media for your embellishments onto the cut mat and load the mat into the machine. Ensure your page setup matches the size of your media, I am using an A4 sheet of vinyl.
Use copy and paste to create enough pieces to decorate all the bags you need. Arrange your embellishments to make the best use of your media


Click on send and choose the correct media from the materials list, carry out a test cut to ensure a clean cut and adjust your settings if necessary, click send in the send panel and allow the project to cut.


For added personalisation use the Font tool or a pre-designed font from the silhouette store, to create initials to personalise each of the bags.


Fold along the perforated lines on your treat bag, apply glue or red liner tape to the long tab on your treat bag, Align and secure to the corresponding side of the bag. Use a strong glue or red liner tape to secure the tabs at the base of the treat bag.


 Now you can ensure everyone gets the treats they like in their bag. Just remember to slip a food bag in as a liner if any of your treats are unwrapped.


Designs used:

halloween monograms a-l
(Design #49168)
halloween monograms m-z
(Design #49167)

PRODUCTS USED: