Showing posts with label Flock Heat Transfer. Show all posts

Monday, 11 February 2019

Flocked HTV baby grows


Hello, it's Verity here from Pretty Little Button. Today's post features flocked HTV from Silhouette and using the weld feature to create text knockout from a shape. Don't these baby grows look cute? And the flocked HTV is lovely and soft for the baby to feel too.

Flocked HTV baby grows process: 

To start I loaded the baby elephant design in my design space from the Silhouette store and re-sized to my desired end size for cutting out.  Next I typed the word I wanted to add to the design, 'cute', changed the font to Clara by Lori Whitlock and changed the size so it fit within the elephant.


When you zoom in on the word as below, you can see that the letters are not connected. You can leave it like this if you prefer the word this way - the knockout design will work with disconnected letters. However, I wanted my letters to be joined up. 


To over come this, you need to right click and un-group the word. All letters not joined will have their own box around them when clicked. Clicking each letter individually you can now move the letter with your keyboard arrow keys until the letters overlap.

In the modify panel select the weld option when you have all the letters highlighted. Any areas where you letters overlap, the lines will weld creating one continuous word outline.

I planned to cut out two designs at the same time and to use two colours of flock. To do this, I positioned all the designs I wish to cut out of grey flock to one side and the design I wish to cut out from orange flock in another area on my mat in my design space.


To ensure I was cutting the designs where my flock was positioned on my cutting mat, I used the reveal option in the 'Page setup' window. This allows you to change how much the grid of the mat shows through in your design space. Doing this can allow you to determine where on the mat you should position your vinyl to cut from.  


I sent the design to cut using the HTV flocked settings in the material drop down menu in the send window. Remember to always do a test cut, I found the settings I have left HT flocked on from previous cutting in the past still worked well for my current blade and didn't need to make any adjustments. 


Now when you go to 'send' you design to cut with HTV you get asked whether you wish to send mirrored or send as-is. If I had cut at this point on either setting, my design would have been back to front or would not have cut out of my vinyl on the mat. Remember if you send as mirrored, it will flip you mat horizontally and the elephant would have cut out on the right hand side of my mat - where no vinyl is. 

If you select send as-is the design would have cut out in the right areas, but it would be back to front. Not such a problem with shapes but the words would be back to front. If you plan to send as-is always have your design flipped horizontally before you enter your send window. 

Flocked HTV baby grows photos:

To adhered my designs I used an iron to press the HTV onto the baby grows. I find it is best to iron these on a firm surface such as a table - I find my ironing board has to much give to allow me to get good pressure. I place a folded towel down on my table to protect. 


Whilst applying heat and pressure with my iron, I place a piece of backing parchment over the top to reduced the chance or scorching the vinyl or fabric. Once pressed, I found it best to let the flocked HTV to cool before peeling.


After I have peeled the backing off, I cover once more with baking parchment and iron over the top again to get a good seal to ensure the vinyl will stay on well following washing etc.


If this has inspired you to try this out, please post below. I would love to see it!

Until next time,

Verity


Profile | Pretty Little Button Blog | Instagram | Facebook

DESIGNS USED:

Baby elephant by Pebbles in my Pocket, Design ID#11921
Dream big little one by Lori Whitlock, Design ID#148172

FONTS USED:

Clara Font by Lori Whitlock, Design ID #226470

PRODUCTS USED:


Saturday, 22 September 2018

Foxy Baby gift set


Hello, Janet here with a variety of projects using the Silhouette Flocked Heat Transfer Vinyl. I love the velvety texture and have found it doesn't need to be used exclusively on fabrics - it works great on other surfaces too!

I've used the flocked media in orange and white to make a baby gift set using some of the cute fox themed files by Amy Robison (#37332, #40840, #40570). The media and the files are so versatile that I was able to make a range of themed items, and really only touched the surface - there are so many more possibilities for a complete fox-themed baby shower, or child's birthday party. There are other cute animals too, so a complete woodland theme is another possibility.


Baby Vests

My first project was the vest with the complete fox on it (information on the one with the tail comes later). I used the fox file (#37332), and aside from re-sizing, cut it straight from the file in white, orange and black flocked heat transfer (not forgetting to MIRROR BEFORE CUTTING, of course). I applied the single orange piece first and then the white pieces, finishing with the black. There is more information on applying Flocked Heat Transfer in this post.


I made two further vests using Amy's Fox Cupcake Wrapper file (#40840). Yes, you did read that correctly - I used the cupcake file. At first glance I'd thought that the head and tail were separate from the wrapper, but they were actually joined up to the rest of the wrapper, so I used the knife tool to cut them apart. I love, love, LOVE the tail and think it will look SO cute on a baby.


Fox Greeting Card

For this project I used the original Fox file (#37332) and the Print & Cut Woodland Party Invitation file (#40570). The card file is made up from a number of separate Print & Cut elements (thank you for providing all the elements separately Amy, it makes the file SO versatile).

I changed the dimensions to make a square card and just printed the backgrounds (grey on the front, and woodland on the back), together with the oval and the banner, adding the word 'congratulations'.

The word was curved to the shape of the banner by dragging the typed word to the top edge of a copy of the banner shape by the transform handle, then ungrouped, and moved it onto the other copy of the banner. It was filled with white before being sent to print onto heavy-weight white cardstock.


The fox was cut from orange flock, and regular smooth black and white heat transfer from the original fox file, reduced in size to fit the card. I activated the adhesive on the pieces in turn using my heat press, but an iron on a non-steam setting would work too.

I love the velvety texture of the fox on the card. You'll find details of applying flocked heat transfer to card here and here.


Fox Wall Art

This is a plain canvas with a piece of printable cotton canvas adhered to the top and sides, and the flocked fox applied on top. For this project I also used the original Fox file (#37332) and the Print & Cut Party Invitation file (#40570).

The fox was cut as for the original version of the baby vest and applied to the background BEFORE it was attached to the canvas. This order of work makes it so much easier than trying to apply the heat transfer direct to the canvas.

The woodland background was printed with the grey background (taken from the invitation file) onto a piece of Silhouette Printable Cotton Fabric. You can read all about printing on the printable cotton here. A piece of regular patterned fabric could be substituted, but I was unable to find anything suitable locally, this is where the printable cotton really comes into its own.

After applying the fox to the woodland background, I ironed the whole piece onto the canvas. I then used fabric adhesive around the edges to secure the background to the canvas.


If you haven't already tried flocked heat transfer I hope you'll try it. I love its feel and versatility, and I hope you do to.


Bye for now,


  Crafting Quine Blog | Instagram @CraftingQuine


DESIGNS USED:


PRODUCTS USED:

Wednesday, 19 September 2018

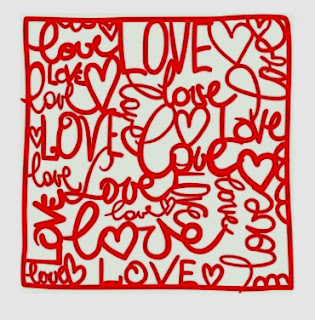
Design of the Week - Focus on Love - 18th September 2018


Hello, hello - Karen here with a scrapbook page I have made using this week's free design - Focus on Love.


I made the design the largest I could to fit a piece of A4 card and then sent it to print.  Once printed I loaded it into my Cameo and cut it out.


I was inspired by Verity's post earlier in the week when she used Flocked HTV on a card and decided to try it on a scrapbook page. 

I chose a design and resized it to 8.75 wide (my vinyl was only 9 ins wide) and cut this from the flock vinyl - this cut really nicely using the recommended settings.


I decided that I wanted the 'Focus on Love' to be flocked also and used the TRACE feature to trace the letters.


I then chose the TRACE option and deleted everything but the traced area.


Next I released the compound path and removed all the areas I didn't want.

This left me with just the letters which were the perfect size to cut and lay on the top of the printed ones.  I also cut a small photo mat from flocked HTV. 


I love the texture this has given to my page and will certainly think of ways to incorporate this media into my crafting projects in the future.


PRODUCTS USED:


Monday, 17 September 2018

Alternative texture on cards


Hi everyone. It's Verity here from Pretty Little Button bringing you another project. Today's project features the flock heat transfer vinyl.  Flock HTV has a great texture, perfect for soft furnishings and clothing related projects. However, I thought it would also make a fun texture for cards! I used it to create an autumn inspired card and used a fabulous design from the Design store.  

Alternative texture on card details: 

To start, load the Fall Mandala design and load into your design space. When I am creating cards, I like to draw a template in my design space to represent the size of my card panel. This way I know how much I need to scale items too and I won't create something that won't fit onto my card. 


I always change the line colour of my template to anything other than red. This means when I come to cut, I can use cut my line option. When in the send options, I untick the blue line colour and only the mandala design will cut out.


 The flock HTV I was using measured 9 inches wide and I planned to cut this without a mat. In order to do this, I had to change the position of the white gripper on the bar (I am unsure of its proper name!). To do this, you need to push the white leaver on the right into the down position. This lifts the roll bar up and will allow you to move the white gripper. Before you move the white gripper, you need to get its 'feet' out of the groves; to do this, old the white grip and rotate until it pops out of the grove. Be careful you don't rotate it too much, as it will eventually pop back in!


When the feet are out of the groves, you can slide the white gripper down to another set of grooves. Select a set of grooves that is as wide, but not wider than the material width. Reinsert the feet into these groves and remember to push the white leave back up into the up position to lower the roll bar back down. If you don't do this, it won't grip your material properly and will slide around when you try to cut.


Alternative texture on card assembly:

Before adhering the flock HTV to the card, I decorated the card panel. I used a selection of distress oxides and stencil brushes to gently ink blend onto the panel create an ombre effect. Next, I added a few splatters of clear water, allowing this to sit for 10-15 seconds before sopping up with a dry paper towel. I also added a few red paint splatters for added texture. 

To adhere the vinyl, I removed all the excess flock HTV from the backing sheet and positioned the design onto the card panel. This was covered with a sheet of baking parchment paper and I used my iron to press and apply heat. I found with the Flock HTV, it was better to heat gently as the higher the heat, the more the backing sheet warped affecting the design. 

To finish the card I added some glossy accents into some of the design for added interest, along with adding a die cut and embossed sentiments. Lastly, I added a few colour corresponding gems for some shine!

Alternative texture on card Photos:


If this has inspired you to try this out, please post below. I would love to see it!

Until next time,

Verity


Profile | Pretty Little Button Blog | Instagram | Facebook

DESIGNS USED:

Fall Mandala by Sweet Afton, Design ID #275655

PRODUCTS USED: