Showing posts with label Fabric Paint. Show all posts

Monday, 25 March 2019

Silkscreen printed cushion - Create Happiness


Hello, it's Verity here from Pretty Little Button. This week is Silkscreen week, so I have another post for you using the Silkscreen starter kit from Silhouette. I have done two previous posts on using the kit, one the unboxing showing you what comes with the kit and also how to cut and print your first design. Check the links at the end of the post to both of these posts for more details. Now I had in mind to create a cushion, however, I knew the design I wanted would be a one of design - I wasn't going to be printing this more than once. Instead of using heat transfer vinyl to create a permanent screen I have used regular adhesive vinyl for a temporary screen which is removable. This allows you to apply another design to the screen and print through that as well. Now, bear in mind, you will get ghosting, which I have pictures below, but the screen is still usable.  If it stretches your supplies, there's no harm!


Silkscreen printed cushion - Create Happiness process:


To start off, add your design in your design space. I use the Antelope font for 'create'. The aperture of the screen measures a US letter size, so select this in the paper size drop down menu in the Page stupe window. 


As I wanted my text as large as I could, I wanted to orientate my page in the landscape orientation which is in the same Page Setup window.  


The beautiful of making these adjustments to the page size allows you to position your design within the centre of the page using the transform window. 


Now I decided, I wanted my text even bigger and therefore separated the two bits of text from one another. The using the rotate feature (little green circle above the text), I could rotate the word at a diagonal across the design space. This gives more room to enlarge the design. 


Now I recently did a mini screen printing workshop and notice that they use adhesive vinyl for their screens but placed the vinyl on the underside of the screen - so it is positioned between your fabric and screen. This allowed for a much smoother pull of the paint over the screen without your scraper catching on any vinyl edges. 

Therefore I flipped my design horizontally so I could adhere the design onto the back of the screen and for the word to print the correct way round. If you design to adhere your design to the top of the screen you do not need to do this. 

Once cut, weed out the positive aspect of the design as seen below. 


I then adhere this down to the underside of my screen. I had a few areas where there was no vinyl cover the screen around the edges. To prevent pain accidentally going through where it isn't wanted added non-porous wash tape around the edge to seel the screen. 


Once flipped over, you can see the vinyl through the screen and the phrase reads correctly. My wooden slats were a little loose on the edges, so I kept them in place with some micropore tape. 


Once I had printed the first design, I removed the screen from the frame and removed the adhesive vinyl. Next, I washed the screen and dried it. As you can see below, you can see a 'ghost' of the screen I just did. The screen is coloured but this does not add affect the screens ability to print in those areas as long as you wash your screen straight away. 


Below I adhered my second design to the screen - you can see the ghost of the previous screen but you are able to see the newer design over this. 


Silkscreen printed cushion - Create Happiness photos:


The gold fabric paint printed beautifully and is such a strong opaque gold. I had a little slippage with my screen when printing and unfortunately got a double printed 's'. Oh well, it's just for my craft room anyway!

 Unboxing and assembling silkscreen started kit      

 Cutting and printing a design


If this has inspired you to try this out, please post below. I would love to see it!

Until next time,

Verity


Profile | Pretty Little Button Blog | Instagram | Facebook

FONTS USED:

ANTELOPE by Polem, Design ID#251515

PRODUCTS USED:
     

Sunday, 5 February 2017

Valentine Bear Felt Bags with Detailed Cuts


Add Details To Felt Bear with HTV by Janet Packer for Silhuette UK Blog

Hello Janet here again.  Today I'm sharing a technique for adding small details to felt items made on the Silhouette Cameo® 3. In this post I'll demonstrate how in a felt project, turning a paper pocket file into a cute felt bag, and enhancing it with small fun details.


Add Details To Felt Bear with HTV by Janet Packer for Silhuette UK Blog


Many of the files in the Silhouette Design Store, designed to be made from paper, can be made into felt projects. If the felt is backed with Silhouette Fusible Fabric Stabiliser it will cut on the Silhouette CAMEO®3 or Silhouette Curio™.  For this project I'd recommend using Clean Cut Stabiliser, rather than Cut and Sew, as it doesn't require any machine sewing.

In order to make the smaller and more detailed pieces I have used my favourite cheat - Flocked Heat Transfer Material. Once incorporated into the the project its velvety texture looks like felt, but more intricate cuts can be made with a level of detail not possible from felt.


What You'll Need
  • Felt Sheets in Brown Shades (preferably a  30% wool, 70% viscose blend)
  • Cotton Fabric for Lining  
  • Fusible Fabric Stabiliser (Clean Cut)
  • Black Flocked Heat Transfer Material 
  • Iron (on a non-steam setting)
  • Pressing Cloth or Non-Stick Sheet
  • Fabric Adhesive
  • Ribbon or Cord (for a strap)
  • Craft Knife
  • Fabric Paint (for the eyes)
  • Downloaded Bear Hug Candy Pocket by J M Rush (#172324)
  • Downloaded Bow File (eg #16778 by Alaa' K)
  • Downloaded Bear File (eg #84654 by Studioilustrado)

The file's designer, J M Rush, gives full instructions on how to make the pocket. These instructions can be accessed from the file details in the Silhouette Design Store,  and also by using the Show Properties facility in your Downloads Library. If you are uncertain how to find Show Properties, you can find out how in the Preview Files in Silhouette Studio post. Today I'll show you the steps which differ from the designer's instructions. They are:-
  • how to cut the bear from the stabiliser-backed felt, 
  • make a lining to hide the stabiliser, 
  • add a handle, and 
  • make and add the extra details.


FELT PIECES

Detailed instructions on how to cut felt backed with the stabiliser can be found in my recent post Cutting Felt with Cameo®3.  I also recommend using a wool/viscose felt mix, rather than a completely synthetic felt. Not only does it cut more easily, but it also retains more of its softness and dimension.


I cut the body, and only the solid head and paw pieces from one colour of felt, and the nose from another. In the photos you'll see two bears in different colours (I just swapped their noses). I cut them from felt backed with the fusible stabiliser. For most of the pieces I removed the backing before placing the felt on the cutting mat. I left the backing on one of the heads as an experiment (see comments in the next section).


LINING

The lining was trimmed by hand. I just ironed lining material on to the stabilised pieces and then trimmed them with sharp scissors. Because the two pieces were stuck firmly, trimming the lining material neatly was easy. I also made slots in the lining of the bear's pocket with a sharp craft knife.

Note that I didn't place the lining right to the top of the bear's head, this was so an area of adhesive remained to iron the head on later (don't let your iron touch this part).


I ironed the lining to the paws and trimmed them in a similar way.

I was undecided as to whether to add lining to the head. I did one bear with lining (which, after features were applied, needed to be stuck to the body with fabric adhesive) and left one with no lining, using the stabiliser to adhere it (I cut this piece with the backing paper on, and left it there while I applied the nose and the heat transfer). Both looked much the same when finished so I'll leave the choice up to you.


NOSE

I ironed the nose to the head before applying the heat transfer material, using a similar heat setting. Using pressure can flatten the felt fibres, so I used a gentle touch to maintain some dimension between the pieces. Heavier pressure causes the two felt pieces to flatten and fuse. I tried light and heavy pressure and liked both looks; you might just be able to make out the difference on the two finished bears.


FEATURES  AND PAWS

The features and paw prints were cut from black Flocked Heat Transfer Material using the detailed elements. The outlines of the head and paws were also cut to give a convenient weeding border.


I used the AutoBlade in the Tool 1 slot, chose Heat Transfer Material Flocked, and reduced the pressure/thickness to 30. The editing options are displayed when you click on the material in the list. It is wise to do this to check that the AutoBlade is selected (Ratchet Blade is the default).  If you haven't used the material before I recommend that you carry out a test cut first.


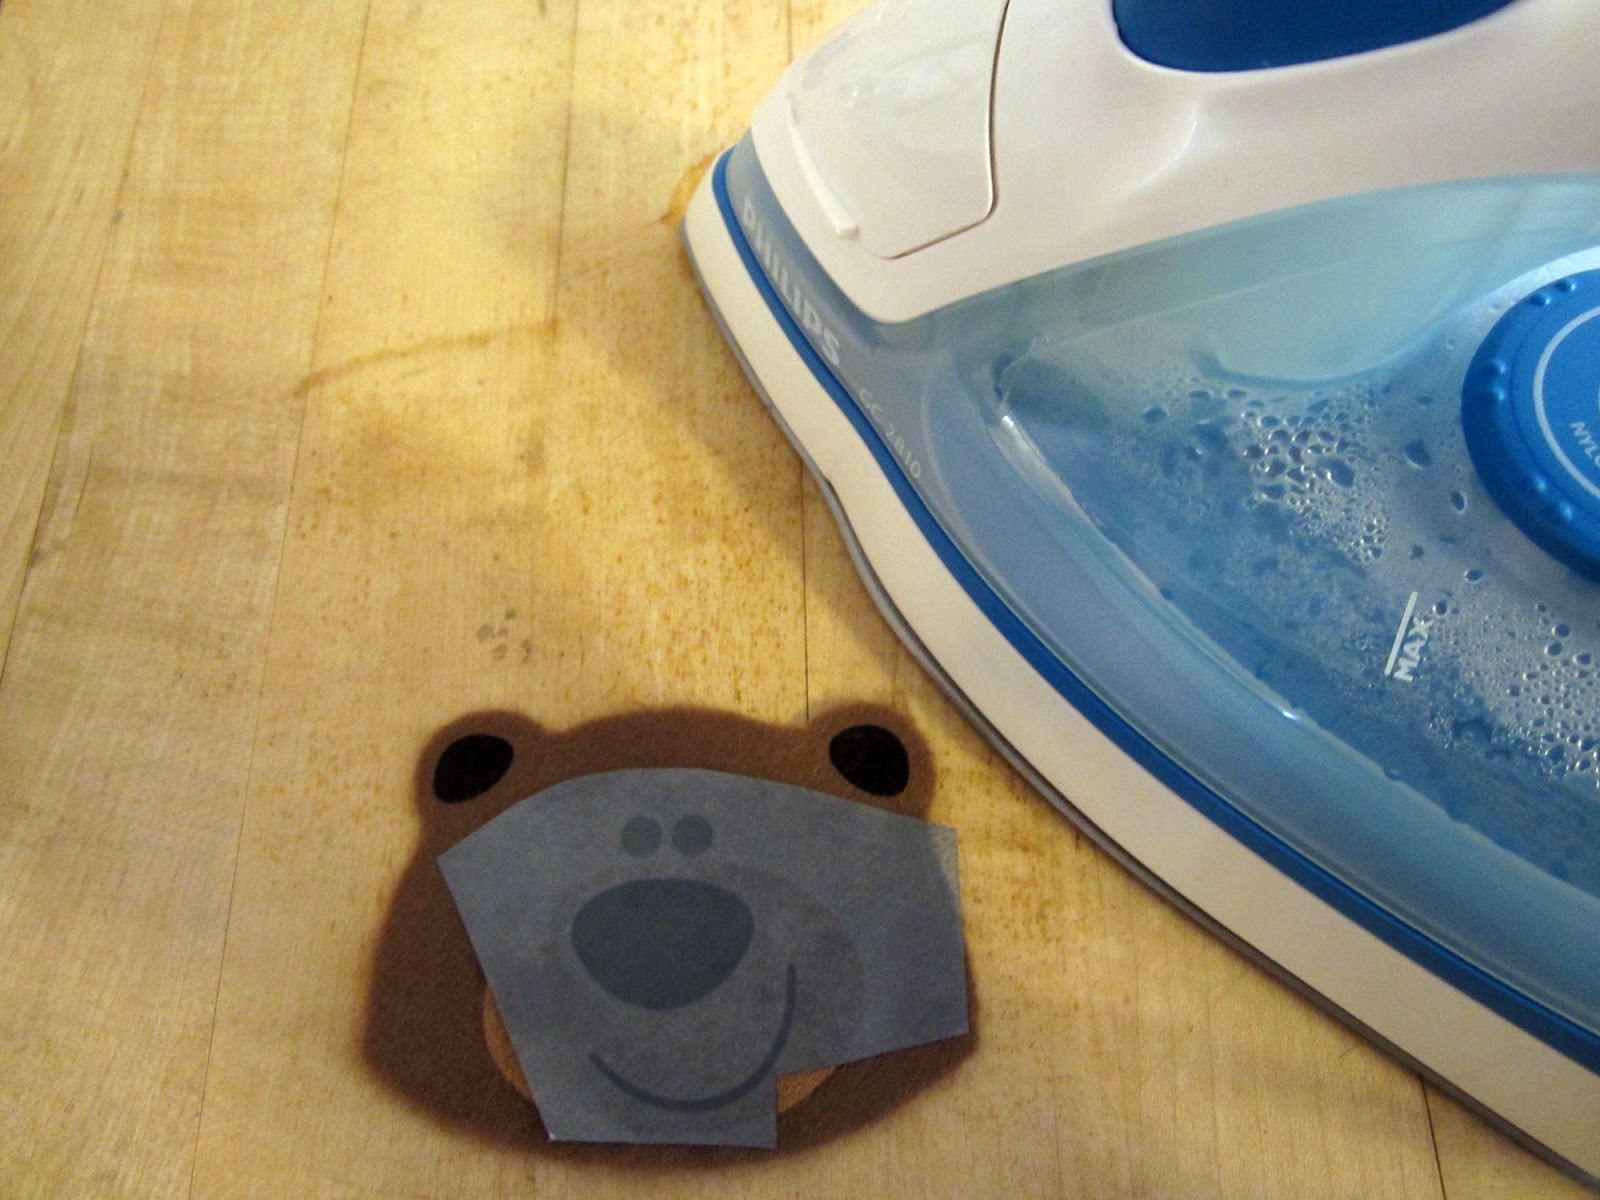
Once the elements were cut, I trimmed the pieces and pulled away the unwanted parts. I then ironed the heat transfer onto the felt using an iron setting appropriate to the felt, protecting the piece with a non-stick sheet or pressing cloth.  Just a few seconds of pressure were required, the transfer allowed to cool slightly, and then the backing peeled slowly away. It may be necessary to ease the edge of any stubborn pieces away from the backing using your finger nail.


MAKING UP THE BAG

To make up the bag I followed the instructions provided by the designer, pressing the crease lines with the iron, rather than pre folding them.


I used fabric adhesive to adhere the pocket edges to the bear's body and then the paws (backing paper was used to prevent any stray glue sticking the pocket closed).


ADDING A HANDLE

I cut a length of ribbon (mine was a piece of re-purposed suede belt) and then made short slots for the handle with a craft knife, level with the top of the pocket.  I fed the ribbon through from the back and adhered it to the inside with fabric glue.  Rivets could be used for an even firmer hold.


BOW AND HEART

I cut bows, hearts and teddy from felt backed with the stabiliser. The teddy and bows were so tiny that a further stabilising layer was required on top of the felt surface. I cover this technique in my Needle Case post.


I constructed the bows with fabric adhesive, trimming off the trailing ends. I adhered the hearts to some stiffener (I used faux leather paper, but card would work too). Then I ironed the tiny teddy onto one of the hearts. I also added Heat Transfer features to the teddy, an optional step. For an alternative decoration the heart could have a name, an initial, or some other simple shape applied.


FINISHING TOUCHES

I added some small drops of fabric paint for the bear's eyes and then completed the bags by folding and adhering the arms and adding the heart.


There you have it - a cute Valentine's gift for a bear-loving child or a 'Silhouette-ing' friend.


Bye for now,
   Profile | My Blog | Pinterest | Twitter | Instagram


DESIGNS USED:


PRODUCTS USED:

 Black Flocked Heat Transfer

Thursday, 19 May 2016

Decorating your totebag with fabric paint and vinyl

Now that we finally have some sunny days here in the UK, I thought a tutorial of how to design a bright and summer inspired bag would be a nice way of welcoming summer.


Supplies needed:

Totebag
Fabric paint
Vinyl
Heat transfer vinyl in black
Iron or heatpress
Silhouette Cameo/Portrait/Curio
PINEAPPLE Design ID ID #89517
LW CLASSIC FONT ID #50328


1. PREPARING YOUR DESIGN:

A. The pineapple design:


When you add the pineapple design to your page, ungroup and remove the colored design. 


I wanted to have four pineapples on my tote bag so I scaled the design down to 11 cm tall and duplicated it three times. Leave some space between them so its easier for you to paint without getting stains on the totebag.


Set your cut settings to vinyl and cut your file.

B. The text:


In a new page, using the LW CLASSIC font write your text and centre text.
Resize the text so its on 65 pt, and add more line space between them to 200%.


Mirror the text, move the text to the corner so when it cuts you don't waste too much vinyl.
Set your cut settings to heat transfer material: smooth. Your text is now ready to be cut.

2. DESIGNING YOUR TOTEBAG:

Using your weeding tool, weed your vinyl so you have only the outer part of the pineapple design.


Cut the vinyl shapes and place them on your totebag where you would like to have the pineapple painted.


Using a foam paint brush, dab a bit of yellow and green color to the pineapple.


When you have painted all four, let it dry for a couple of minutes and you'll be able to remove the vinyl.


Once the pineapples are completely dry, place your text in the middle. 


Using either an iron or a heat press to attach it to the totebag (follow the instructions that came along with the heat transfer material!). 

Finished look:


Perfect for picnics and sunny summer days!


DESIGNS USED:


PRODUCTS USED: