Showing posts with label Christmas. Show all posts

Tuesday, 18 December 2018

Naughty, Nice, I Tried | NIki Rowland | Adding a Sketch Pen Offset


Hiya, Niki here today sharing this fun Christmas Layout. I loved this cut file when I saw it in the store. I wanted to cut it from different patterned papers but I was worried that I would lose the definition of the letters amongst the patterns, so I thought I would put a sketch pen offset onto them.

I started off by opening my design on screen:


I ungrouped and removed the pieces I wanted to cut from black cardstock without an offset. I just put these to one side. I then selected the parts of the designs that I wanted to apply an offset to. I opened the 'offset' window and clicked on 'internal offset'.

This added a large offset but I turned it right down to 0.010. This puts such a small tiny offset on my design that it can't really be seen on screen!
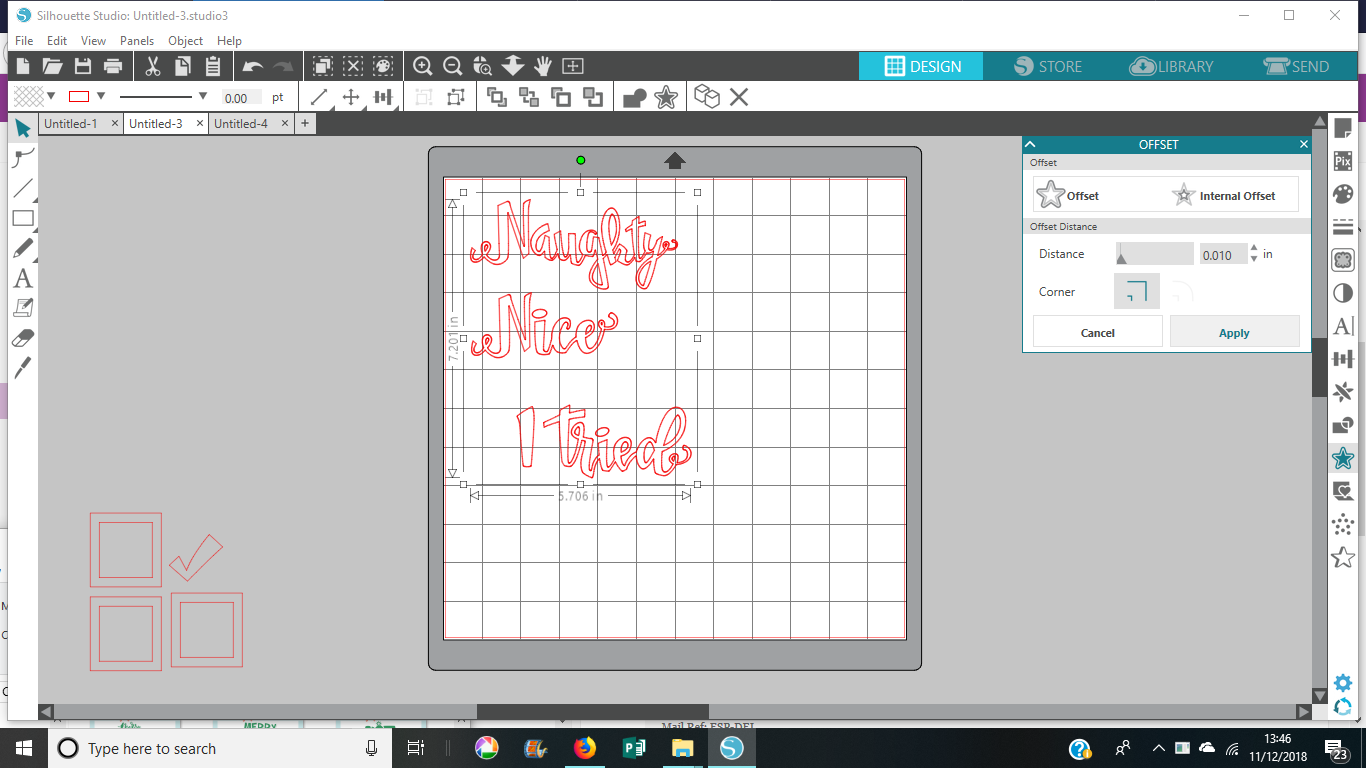
I ungrouped the offsets and then moved the offsets (the lines I wanted sketched) over to the right side of the screen. I needed them to be separate from the lines I wanted to cut.

At this point I realised that the middle parts of the letters also needed offsets. So I ungrouped and moved the little bits out the way of the rest of the files. I created an offset (not an internal offset) for these and set them to the same size (0.010). I then left the offsets over on the right side and moved the original cut lines back onto the words so they were in the right position.

In the 'send' screen, I could then select all the offset pieces and on 'tool 2' I selected 'sketch'. They then went blue. So the red lines will be cut by Tool1 and the blue lines will be sketched by Tool2.

Back in the Design screen I could then move the offsets back onto the original files. To do this accurately I zoomed right in so I could make sure my offsets sat perfectly inside my cut lines. As you can see from the screenshot below, you can hardly see the difference!

Once all files were back together and in the right place I was ready to send to my Silhouette.

Here they are in the 'send' screen. The red cut lines aren't visable other than the tiny loops (I realised I'd missed creating offsets for these but decided not to bother!!) I then sent my file to cut and sketch at the same time.

You can see the effect here: The sketched offset is so extremely close to the edge of the design, it's given the patterned paper a great outline so that the design has definition on the edges and the words show up beautifully.

I then put together the rest of my layout. I wanted the words to show up well so I kept the rest of the layout fairly simple.


I've used a few embellishments from a mixture of this year's Christmas collections, a gorgeous sequin mix and finished off by splattering with some paint.

Thanks for joining me today. Give this technique a try, it's a really great way to make your cut files pop off the page.

 Happy scrapping xx 


 DESIGNS USED: Naughty Nice I Tried Christmas Phrase Design ID: 231114

Monday, 17 December 2018

Christmas tree table topper scratch of cards


Hi everyone. It's Verity here from Pretty Little Button bringing you another project. Today I have a quick project to whip up to add to your table for the kids to play and win a prize whilst waiting for dinner to arrive. The prize is completely up to you and this standing tree card leaves you plenty of space inside to let them know. The scratch-off sticker sheets are great for making a run game and allow the kids to scratch off to see if they have 3 matching red stars to win (well you can choose what number and colours are needed to win). These are so quick to make you can even make one for the adults too!

Christmas tree table topper scratch of card details: 

Add your designs from the design store into your design space. I find it easier to change the colour of the designs to the colour of cardstock I plan to cut out off. 

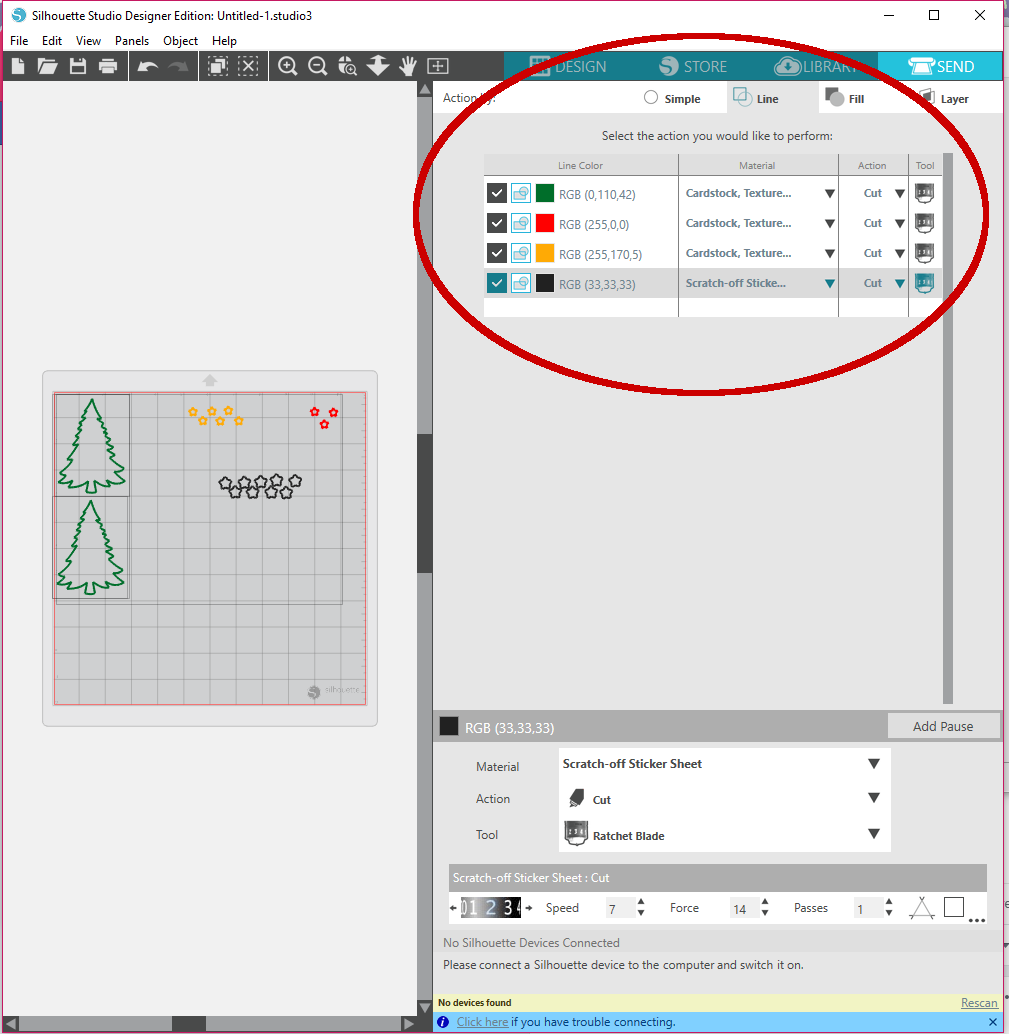
The black stars represent the starts I want to cut out of the scratch off sticker sheets. However, I needed to make these slightly larger than the stars to cover them up. Offset tool to the rescue!


For these stars, I added a 0.06-inch offset and deleted the original black stars from the design to make sure they wouldn't cut later on.


To make it easier to see where to put the different colours of cardstock on my mat so I only had to load it up once, I changed the 'reveal' of my cut mat from 0% to 100%.


The line colour also makes it easier to see the different shapes to cut out of different materials. If you have the cameo 3 you can also set this to cut from either blade holder 1 or 2, however, I have the cameo 2. So I initially cut the cardstock and before it cut the scratch off sticker sheets I changed the blade number for the cut settings. 


Christmas tree table topper scratch of card assembly: 

To assemble, add a little shading to the trees with green ink and a blending tool. Next, score a line at the top of the tree that will make the back of the card. Add adhesive above this scoreline and adhere the two trees together. This creates a hinge at the top of your trees to open and form the card. 


Next, peel the scratch-off stars from the backing and adhere on top of the cardstock stars. The adhered the star layer to the card, using a bit of liquid adhesive to the back of the card stars to ensure they stay in place. 


If this has inspired you to try this out, please post below. I would love to see it!

Until next time,

Verity


Profile | Pretty Little Button Blog | Instagram | Facebook

DESIGNS USED:

Christmas tree by Sophie Gallo, Design ID#32030

PRODUCTS USED:


Thursday, 13 December 2018

Make Glitter Paper in Any Colour

Using Silhouette Glitter Sticker Sheets to make your own glitter paper and card. Designed by Janet Packer for GraphtecGB Silhouette UK at https://www.craftingquine.blogspot.co.uk. Uses the Polar Bear Card by Jennifer Rush from the Silhouette Design Store.

Hello, Janet here again from the Crafting Quine blog. This week the design team have been using the Silhouette Glitter Sheets. It is one of my favourite Silhouette media as it is so versatile. It can be used for Print & Cut, but here I've simply printed it all over in a couple of colours and then cut out my shapes. I guess you could call this Print THEN Cut!

What I Used
Silhouette Glitter Printable Sticker Paper
Medium-Weight White Cardstock
Patterned Paper
Pale Blue Vellum
Square Card Blank
Liquid Craft Adhesive
Clear Glaze
Silhouette CAMEO® 3 or Portrait
Silhouette Cutting Mat
Colour Inkjet Printer


Using Silhouette Glitter Sticker Sheets to make your own glitter paper and card. Designed by Janet Packer for GraphtecGB Silhouette UK at https://www.craftingquine.blogspot.co.uk. Uses the Polar Bear Card by Jennifer Rush from the Silhouette Design Store.


For this week's project I printed out two shades of brown to transform the Stacked Polar Bear Card, by Jennifer Rush, into a cute a cuddly brown bear. I expect you can buy brown glitter card from somewhere, but you'd be unlikely to find the two shades you'd need for this card. I love that I can print my own glitter paper in any colour and then make glitter card by backing the cut shapes with a similar shape cut from plain card.

Using Silhouette Glitter Sticker Sheets to make your own glitter paper and card. Designed by Janet Packer for GraphtecGB Silhouette UK at https://www.craftingquine.blogspot.co.uk. Uses the Polar Bear Card by Jennifer Rush from the Silhouette Design Store.


For this card the bear is cut out and then stacked onto a patterned paper covered card front using dimensional foam pads. I added shiny eyes and nose with clear glaze.

Using Silhouette Glitter Sticker Sheets to make your own glitter paper and card. Designed by Janet Packer for GraphtecGB Silhouette UK at https://www.craftingquine.blogspot.co.uk. Uses the Polar Bear Card by Jennifer Rush from the Silhouette Design Store.


Then I added a sentiment banner printed in red onto pale blue velum and attached it behind the card front.

Using Silhouette Glitter Sticker Sheets to make your own glitter paper and card. Designed by Janet Packer for GraphtecGB Silhouette UK at https://www.craftingquine.blogspot.co.uk. Uses the Polar Bear Card by Jennifer Rush from the Silhouette Design Store.


The falling snowflakes on the backing paper were enhanced with more clear glaze.

Using Silhouette Glitter Sticker Sheets to make your own glitter paper and card. Designed by Janet Packer for GraphtecGB Silhouette UK at https://www.craftingquine.blogspot.co.uk. Uses the Polar Bear Card by Jennifer Rush from the Silhouette Design Store.


Once the glaze was dry, the whole card front was adhered to a square card blank.

Using Silhouette Glitter Sticker Sheets to make your own glitter paper and card. Designed by Janet Packer for GraphtecGB Silhouette UK at https://www.craftingquine.blogspot.co.uk. Uses the Polar Bear Card by Jennifer Rush from the Silhouette Design Store.


I'm rather fond of this little bear - his expression is so friendly.


Bye for now,


  Crafting Quine Blog | @CraftingQuine


DESIGNS USED:

PRODUCTS USED:

Wednesday, 12 December 2018

Design of the Week 'Joy To The World' - 11th December 2018 (A Beginner's Tutorial)


Hello, hello - it's Wednesday so it must be DOTW day!


Today we have a very usable design - you could cut it from htv and use it on a t-shirt or a baby onsie, use it for a card or scrapbook title but today I have decided to use it for a simple, but effective, parcel tag.


I started by opening a tag shape from my library, I used this one but you could use any one you have. This one is on sale at the moment and is only £0.39!


I removed everything but one of the tag shapes by ungrouping the design and deselecting one tag then using my delete key to remove everything else. 


Next I resized the tag to 4.75 tall and 3 ins wide.
1. Chose 'Transfer Panel'.
2. Select 'Scale'
3. Lock the padlock by clicking on it (this will keep the ratio the same) and change the width dimension to 2.5ins,


Add to your tag. 

(1) I then choose a font called Curly Tail as this was one that I already had and looked quite similar to the other writing.


I wrote the words 'love and' and changed the font size to 100.(2) Finally, I welded the letters together (3)


Add this to your tag also.


Next, you are going to differentiate the cut areas from the sketch pen areas.

Ungroup your 'Joy to the World'


Select just the J Christmas Tree and Y and and the tag 'hole' - use ctrl x to cut them from the design.
Change all the remaining design to a blue line.


Add an offset to just the tag by selecting the tag and using the offset button.


Before deselecting the offset change the line colour to red.

ctrl v will paste back the word JOY.  Drag the Christmas tree off your canvas and you will then have all the cut lines in red and all the sketch lines in blue. 


Group all the blue lines together and all the red lines together. Then ctrl x and remove the red lines.
Put a sketch pen in your machine and using the correct settings for sketching sketch the blue lines.  DO NOT REMOVE THE MAT FROM YOUR MACHINE.  ctrl v to return the red lines, select the blue lines and ctrl x to remove them. Cut the red lines.  You can now backfill the J and Y with red paper/card.

The final step I took was to make the Christmas trees. Copy the tree ctrl c and paste onto a new canvas ctrl p ready to cut from green card.  I decided that I wanted to add gems to my tree so ungrouped it and removed the little circles so that only the tree was cut out.  Once cut I added the tree to my tag with foam pads  and added the gems.

I hope this very long tutorial has been helpful and given you lots of tips and tricks.

See you again next week x