Showing posts with label 12 x 12. Show all posts

Wednesday, 17 April 2019

Design of the Week - Bunny Ears Props - 16th April 2019


Hello, hello - Karen here with my Wednesday post.  This week the free design is called Bunny Ears Props and I think it is meant to be printed out and sticks added so that you can use them as photo props.  I thought I would add them to a photo of my lovely Kiera as props!


I didn't have any gray or pink card to cut them out so decided to make the design into a print and cut.  I set the cut lines to 'No Cut' and added a 0.05 offset.  I then found a title in my library and decided to make that into a Print and Cut design too.  Again I set the cut lines to 'no cut' added an offset and filled the design with pink.


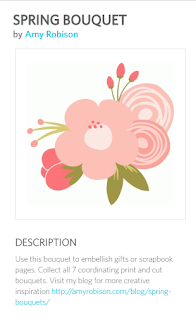
As I was going to print out the props and title I had a look in my library for a print and cut embellishment to add to my page and chose this one.
 https://www.silhouettedesignstore.com/designs/58728

I like to have a border on my page and we all know how much I love my sketch pens so chose this bunny card as the basis of my border.

I removed the dotted line and resized it to .75in tall and then replicated it and moved it so that there was a slight overlap, and repeated until I had six groups of rabbits.


I then made them into a compound path and merged them.  I replicated this around all sides of my page, merging them once I was satisfied with their position. Next  this design (x3), was added above and below where I planned on putting my title.


I printed all my elements onto a piece of A4 card and cut them out.


Once everything was prepared I cut a slit around Kiera's head in the photo to enable me to slip the bunny ears behind her head so that she appears to be wearing them. 


I then placed the nose onto hers and my 'Funny Bunny' was ready to add to my page. 


PRODUCTS USED:


Wednesday, 3 April 2019

Design of the Week - Sketched Foliage - 2nd April 2019 - Manipulating Sketch Files


Hello, hello - Karen here with my Wednesday post.  This week the free file is called Sketched Foliage.  My little heart jumped for joy when I saw it as, more than anything, I do love a sketch file.


I decided to challenge myself to make a scrapbook page only using sketch pens and sketch files!  If you haven't used sketch pens before I would really recommend you give it a try.  There is a huge selection here. I must have every Silhouette pen available and use them all the time.

I will start by saying this is a fairly long blog post!

I started by manipulating the Sketched Foliage file by ungrouping it.


Next I rearranged three of the sprigs of foliage to form a plant shape. I simply dragged the far left and far right sprigs to meet the bottom of the second from left and deleted the one that was next to that. 


Now I had my 'plant' for the bottom of my page I reduced it to 2ins tall and used the little green circle to turn it slightly to the left.
 I drew an 11 inch square and centred this to my design space. I then replicated my 'plant' four more times and evenly spaced them at the bottom of my square.


I then decided that I wanted to make my page into a scene and choose three more sketch designs to add.

I started with the grass border and replicated it along the bottom of my page just below the plants.


I then  used the Eraser tool to remove the section where the grass joined the square, on both sides and deleted the bottom of the square so that the grass now formed the bottom border. 


I added the tree to the left and the border to the top right (to represent the sun) I ungrouped the circle border and removed the circles.

I then used the knife tool to cut along the sections on the left and right and top right where the designs overlapped the border. 


I added this frame and used this sketch fonts to write my title and journaling.


The final step was to change all the sketch lines to the colours I wanted to use - quite a big task but well worth the time it took.


On the Send panel I choose 'Line' which then bought up all the colours I had chosen.  I was then able to select each colour and insert the appropriate pen.  You will see that I set my speed to 1 when using sketch pens - this is so the pen has a longer contact time with the cardstock and you get a better drawn line. 


Because I already had the design made I reduced it to 5 ins square, removed the journaling and title and added a sentiment and then had the makings of a really quick Birthday Card.


I hope this inspires you to have a go at using sketch pens.  


Wednesday, 20 February 2019

Design of the Week - You're A Lovely Human - 19th February 2019 - Doming Kit


This week's design is a phrase 'You're A Lovely Human' - useful for both scrapbook pages or cards.

I didn't want to use it as a title for my page so decided to pull out the Silhouette Doming Kit that I was fortunate enough to have been sent to try out.


I will say that this is not a quick process as it takes 12 hours for the resin to cure so not an option if you want to make something in a hurry. 


Inside the kit are the two solutions that you mix together to make the epoxy (A & B) a mixing syringe three nozzles, cocktail sticks and a download card with 10 designs.

Also three sheets of clear and three sheets of white sticker sheets with three laminating sheets for the white sticker sheets.


There are very comprehensive instructions on using the kit here. 

For my project I decided to use a photo of my daughter in scrubs and build the embelishments around it.

I chose several designs from the Silhouette Design Store which would be in keeping with my theme.  After resizing them I printed them onto a clear sticker sheet and then domed them.  I made my designs various sizes from large, for my title, to small for the heart, to see how well the kit worked on large and small stickers.


Unfortunately, I was too impatient and dabbed my finger onto the title and heart to see if they had set and ended up smudging them - be warned the old adage 'Patience is a virtue' does apply here. 


I used a stethoscope and heartbeat pattern, with a sketch pen for a border on my page and finished off with a heart/Stethoscope/doctor cut shape.


DESIGNS USED:

  
PRODUCTS USED: