Hello.
Janet here from the Crafting Quine blog, with a project to help organise all those invaluable Silhouette bits and pieces that accumulate when you use your machine. I've used the
Two Compartment Candy Box by Lori Whitlock, added some custom-designed accessory trays, and decorated the outside with panels cut from
Silhouette Wood Effect Vinyl. The lid is also decorated with a vinyl design. I'll show you how to do all this and have included a FREE accessory tray file too.
The wood effect vinyl comes on a roll in one of three colours: Ebony, Maple and Walnut. The rolls measure 9 in. x 6 ft. (229 mm x 1.80 m). They have a matte wood texture and appearance and have a strong self adhesive backing. They cut like other premium vinyl although the vinyl feels a little thicker.
I used the maple colour vinyl on the base and for the decoration, and the walnut colour on the lid. The lid is decorated with a design made by welding a split design (
#67270, Split Tulip Damask by Emily Dyer) to some custom wording using a decorative font (
#239683, CG Bon Bon Font by Carina Gardner). The box itself is made up in dark brown cardstock.
SUPPLIES REQUIRED:
Silhouette Wood Effect Vinyl in Maple and Walnut
Dark Brown Cardstock
Weeding/Hook Tool
Scraper or Burnishing Tool
Strong Liquid Craft Adhesive
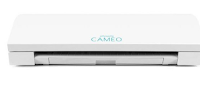
Silhouette Cameo® 3
HOW TO MAKE THE BOX
Step 1: Prepare the Files
Open the file for the box in the Silhouette Studio software. Ungroup the pieces and arrange them into cut groups for the types and colours of media.
Step 2: Cut the Cardstock
Place all the cardstock pieces (all parts except the panels) onto the virtual mat and cut them out. Remove them from the mat and fold along the crease lines then flatten the pieces out again.
Step 3: Cut the Vinyl
Separate the pieces to be cut from each colour of vinyl. Place pieces for each colour onto the virtual mat in turn. Click the Send tab and choose the default setting "Vinyl, Wood" as a starting point. Load your Vinyl into the cutter, either on a mat, or directly into the machine. If you do not use a mat you'll need to adjust the right hand roller inwards as the media is 9-inches wide. I find it easier to use a cutting mat, but this vinyl is quite springy and may require some extra tape at the edges to hold it flat. Carry out a test cut and reduce the Force to where it will still cut through the vinyl. The ideal is to achieve a 'Kiss-cut'; cutting through the vinyl but not the backing sheet.
Step 4: Prepare the Media
Remove (weed) the excess vinyl from around the cut pieces. The vinyl will easily pull away from around the panels. Ease the vinyl gently from around the decorative elements and use a weeding tool to remove the small interior pieces.
Step 5: Part Construct the Box
Construct the box following the designer's instructions. Follow the link on the design's entry in the Silhouette Design Store to the tutorial page on the designer's website. Lori Whitlock has video instructions for a similar box which can be accessed by clinking on the "2 Compartment Cookie Box" link.
Step 6: Apply the Vinyl
Where possible, apply the vinyl before adhering their backing pieces to the box. Peel the panels away from the backing paper and align them carefully onto the cardstock pieces. Press them into position. Protect the vinyl with a scrap of backing paper, or clean copy paper, and rub firmly with a scraper/burnishing tool.
See details below on designing the decorative elements*. Once cut from maple vinyl, peel the backing paper away from the top third of one of the designs and place it in position on the vinyl covered lid. Peel away the remainder of the backing paper. Repeat for the other design.
Step 7: Complete Construction
Adhere the outside panels and construct the lid. Cut out and assemble the accessory trays** and place them inside the box.
The lid just drops on to the box and your storage box is complete.
*CUSTOMISE THE DECORATION
Open the
Split Tulip design and resize it to fit the lid (select design, grab one of the corner sizing handles, hold down Shift, and move the handle toward the centre of the design until the desired size is reached). Type the words in
CG Bonbon Font and resize them to fit too (click the Text tool, type a word, click away from the word, reselect it, open the text Style Panel, select your chosen font, select 72pt, resize the width only, if necessary, using the side handle). Make the design become one piece (select all three parts, right mouse click, and select weld).
**USE THE FREE ACCESSORY TRAYS
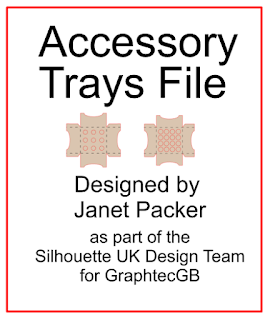
Download the FREE
Accessory Trays cut file. The file is in .GSD format which can be opened with any edition of the Silhouette Studio software. From the Silhouette program select File > Open, then navigate to the downloaded file and click OK. There are two versions. You can mix and match the holes, just Ungroup each version, and duplicate or swap the sets of holes.
 |
| Download the FREE file here |
I used the Wood Effect Vinyl to make these cute decorative gift boxes in an earlier post. You can read about how to make them
here. They use some of Lori Whitlock's fabulous
Polygon boxes.
You can get great results by adding vinyl to cardboard. The wood effect vinyl gives a great wood look finish, and intricate decorative designs are easy to cut from the vinyl. I hope you'll try it.
Bye for now,
DESIGNS USED:
PRODUCTS USED: