Showing posts with label software update. Show all posts

Monday, 25 September 2017

Finding your way in Silhouette Studio (right click, keyboard shortcuts, user manual, search and quick access)


Hello Janet here to help you navigate around Silhouette® Studio. Have you updated your  software recently? Can't find favourite tools and actions in the new version?  Here are some ideas to help you if you lose your way.

  1. Right click menu
  2. Keyboard shortcuts
  3. User manual
  4. Interactive search
  5. Quick Access tool bar


1. Using Right Click

Using the right click with your mouse when a shape is selected brings up a menu of useful shortcuts which can be a huge time-saver, bypassing the menus and panels.


2. Using Keyboard Shortcuts

For alternative speedy access you can use keyboard shortcuts. There is comprehensive list in the manual on page 116.  You'll find much more than just Copy and Paste.  I've printed it in A4 to keep next to my laptop, and in A3 to wall mount next to my desktop computer.


3. Locating the User Manual

The user manual will show you where things are and is accessible from within the Silhouette® Studio software.

To find the manual, click on Help in the top Menu bar and select User Manual. 


It will open in the default PDF Reader on your computer, most probably Adobe Reader.


You might find it easier to navigate if you display Page Thumbnails.


Then it will look like this, and its a whole lot easier to find what you're looking for.


Page 2 has a useful Table of Contents.


The Find feature is useful to locate specifics.


You can print some or all of the pages (although there are currently 118 pages). New features are added to the Manual but it may be useful to know what version of the manual you are looking at.   This information is on page 115.


4. Using Interactive Search

Another way of navigating around the tools and actions is to use the interactive search feature.  This will actually guide you to the actions available from the Main Menu. Click on Help and then type the function in the search box. Here I've typed in 'zoom' and selected 'zoom - fit to window' it shows how to navigate to the action, and clicking on it carries out that action.


5. Quick Access Tool Bar

The Top white menu bar is now dynamic, displaying frequently used tools. Another time-saver when repeating actions.


I hope you find these tips useful. If you have any others to suggest please mention them in the comments to this post.


Bye for now,


   Profile | My Blog | Instagram


PRODUCTS USED:


Thursday, 18 May 2017

Make the Leap! How to Update to V4

Hi! Marie-Clare here. Like the others on the Design Team I've just made the leap to Version 4, and thought I'd do a speedy step-by-step guide on making the big update!

Step 1


Go to the Silhouette homepage at www.silhouetteamerica.com - you'll see a handy big button in the top right hand corner of the page saying "Update Software".


When you have clicked on this, you'll see the following table. Select the appropriate download link for Silhouette Studio for either Mac or Windows.


The file will start to download and will save to your usual downloads location. It is a 183MB file, which took around three minutes to download on my laptop.

Step 2


Either select the downloaded file from your browser's toolbar, or navigate to your usual Downloads folder on your computer. The file is called silhouette-studio_v4.0.623.exe and the icon is the recognisable Silhouette logo.


Open the file. The installation wizard will begin, and in three simple clicks your software will start to install!


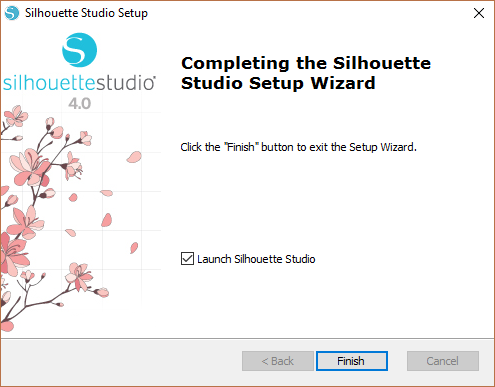
After approximately four minutes, you'll see the following screen:


And there you have it! Your rather beautiful new launch screen and new user interface will appear straight away!


Enjoy the update, and don't forget to check out the lovely Thelma's guide to her first impressions of the new features!

Marie-Clare x

Sunday, 14 May 2017

Whats new? v4

Well, I have updated, have you? I am not usually one for jumping in on newly released software as there are often things that may still cause issues, but I was intrigued to find out what was going to be so new in this version. So I took the leap and I don't regret it.

Well isn't it pretty!


The first thing that's new is the loading screen with a new graphic. 


 If you're updating when your software loads, you will notice a window on the right with your recovered files, this isn't in itself new but now you can move this panel anywhere on your screen that suits you.

At first look, there is not a great deal different with the software, however, there are some things that have been added to improve the usability, We can now make the buttons bigger which I for one greatly appreciate. This is done by clicking Edit then selecting Preferences. A new window will appear allowing you to change various things, like choosing cm or inches much like in the previous versions, but now if we look in the Display section, not only can we change the colour theme but we can also change the size of the buttons.
There is also a handy interactive Tutorial feature which is accessed through the help button on the top toolbar. This feature offers instruction in the format of a short animation to guide you through starting off with your machine.

Switching between Design, Store, Library and sending to your silhouette are all done in the top right of your screen as shown below.
 
A new project screen will look like this with a window open with options to select your page size, the mat your using and the orientation. By selecting different tools, new windows will pop up on your screen, these screens can be simply closed down again or if it's a tool you use often leave it open and move it around the screen to a position that suits you best.

The next big thing is the trace feature has been updated. 
we now have trace by colour and magnet trace which will be a whole blog in itself.


The updated process for sending your files to be cut is a much more linear process which should mean we make fewer mistakes by forgetting to change little things. Options for your blades are now beneath your virtual mat and the first screen to appear on the left is a comprehensive list of media types, simply select your media type (or add a new one) for each of your blade housings. At this point, I recommend using the test cut function for each of your media types, we can now use the arrows to position the blade over each different media before clicking on the test cut button.   

It is now easy to load different media onto the mat to cut at the same time while telling the software how to treat different media in the same pass. 
I highly recommend this upgrade, I've been using it for some time now and find it a much smoother process with less opening and closing of tools.
 Well, there are further updated features if you have DE or above but for now, have some fun playing and get a feel for the layout. If you use other graphic programs you will find the new version very familiar and will be flying in no time. 
Crafty hugs X


DESIGNS USED:


PRODUCTS USED: