Showing posts with label font. Show all posts

Wednesday, 4 October 2017

For Real Life??? Filling Letters Using Sketch Pens


Hey there, Niki here today with a tutorial on how to fill letters using your Silhouette Sketch Pens. I only have the Basic Edition Software and am always a little jealous of the sketch fill function on the Designer Edition. I therefore attempted to create my own fill effect.

I began by typing my title in my chosen font using the Text tool.


I then ungrouped the letters, nudged them together so they overlapped slightly and then welded them all together. I repeated for each word.


I then re-sized and re-positioned the words on to my background.

Now for the fill effect - I selected the words and then created an internal offset from the Offset menu. I played around with the Distance. I started off with 0.050. I continued to create more and more offsets, each time playing with the Distance.

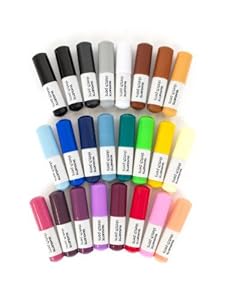
I continued to crete offsets until the letters looked mostly filled. Then I sent the design to the Silhouette with my pink glittery sketch pen loaded.

I really like the effect and it's a great option to use even if you don't have the Designer Edition like me and it was really easy to create.


Thank you so much for stopping by to see my layout, happy scrapping xx


DESIGNS USED:


PRODUCTS USED:


Sunday, 17 September 2017

Star of the Day: Creating an Open Alpha with a shape too


Hey there, Niki here today with a tutorial how to make the title above. I wanted to create the word 'star' as an open alphabet font that I could backfill but to also replace the A with a star shape, also open-style so it could be filled like the letters.

I started off by typing the word STAR using a font called Playful. It is already an open style alphabet so I didn't need to create offsets - the Silhouette store made it easy for me.

I have several stars in my library but my favourites are within this star background. I ungrouped it and chose a star to use. I deleted the rest of the stars I didn't need.

I positioned my star in place and re-sized.

I then selected the star and created an offset.

Then this next step is very important. I selected both the star and the offset and created a compound path. The reason this is important is, if it were only grouped together it would not weld correctly to the letters either side. Creating the compound path means it will weld correctly with other things.

Once the compound path was made I could then move my other letters into position so they all overlaped and then weld them all together.


Once cut out of white card, I backfilled my letters and my star with different coloured papers. Once my title was finished I then built the rest of my layout around my title.


Thanks so much for joining me and I hope you enjoy making your own titles.

Happy scrapping xx 

Find me designing for Freckled Fawn, Just Nick, Hey Little Magpie, GoGo Getaway, Silhouette UK, Stick it Down, and UK Scrap Addicts. Also on my own blog: Being Scrappy and on Instagram as @nikiclaire

DESIGNS USED 

PRODUCTS USED:


Thursday, 7 September 2017

Pilot Max: Creating a Negative Block Title


Hi! Niki here today with a little tutorial on how to make this negative block title.

I started off by typing my desired letters. I used a font called Smarty Pants.


I ungrouped the letters and moved them around to give myself some more space around each letter.


I then drew a box around my letter using the rectangle tool.


 Then I opened up the Point Editing and moved some of the points of the boxes around to make them wonky. I love how this is so easy to do - literally pick up the point you want to move and drag it to where you want it.

I repeated for all letters until I had wonky boxes around each one.

I then arranged my letters next to each other - firstly so I could see how they would fit together on the layout, but also so they were close together ready to cut. I then sent to Silhouette.

Once cut I then backfilled each letter so that a different colour / pattern showed through each block and then attached to my layout.


I've super happy with the result, this was so fun to make and I loved how it turned out - give it a go!

Happy scrapping


Find me designing for Freckled Fawn, Just Nick, Hey Little Magpie, GoGo Getaway, Silhouette UK, Stick it Down, and UK Scrap Addicts. Also on my own blog: Being Scrappy and on Instagram as @nikiclaire


DESIGNS USED


PRODUCTS USED:


Wednesday, 6 September 2017

Free Design of the Week - Arrow Font


Hello, hello - Karen here and I have to tell you that the DOTW this week is absolutely gorgeous, as soon as I saw it I had to download it and use it immediately!

It is here but you have to download it on or before 12th September as it will then be £1.96 - not extortionate but not as good as free (I spent up on the sale last week so am on a design buying ban).

As always, I used a sketch pen to write my border and title, giving the title a small offset to cut out with a white border.  I also used a pen to write my journaling.  The arrow frame was also drawn and given a small offset.  As it looked quite plain I decided to hand colour the border, title and frame with a turquoise pen.

All that was left was to add a couple of squares of patterned paper behind my photo and some die cut elements at the bottom left and top right - finished!


I personally feel that this font lends itself more to being used with a sketch pen as it is so fine but gorgeous too.