Showing posts with label Printable Vinyl. Show all posts

Saturday, 1 July 2017

Customised Gift Box Inserts


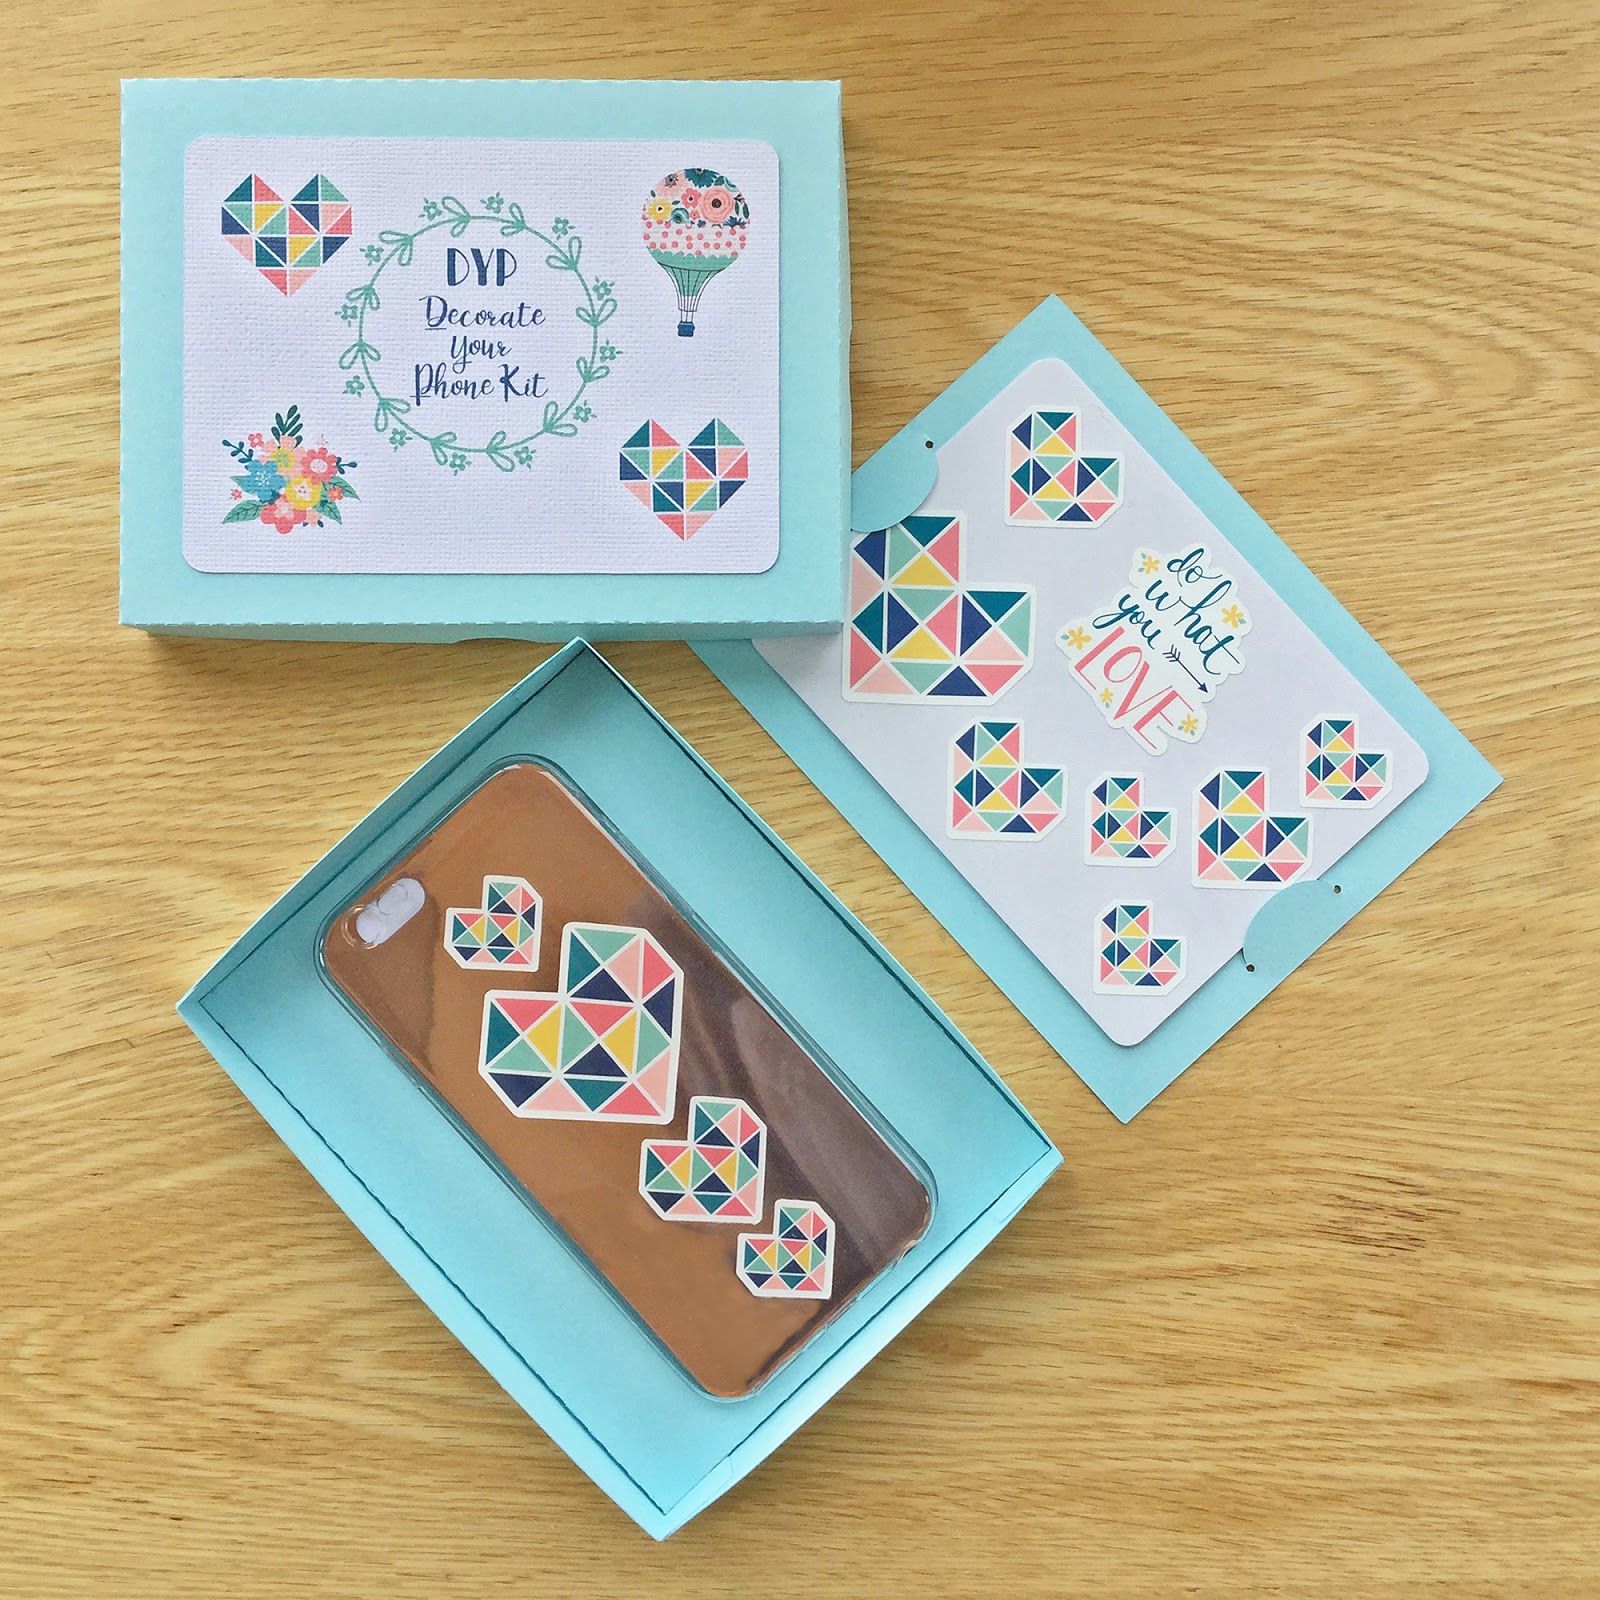
Hello Janet here again.  Last week I shared a tutorial on making small decal sheets as part of a 'Decorate Your Phone Kit'. Today I have 3 mini tutorials, completing the gift box, showing how to;
  1. make a custom box insert,
  2. make a gift card or sheet holder, and
  3. scan the gift (to use in customising the box insert and making phone cover sheets).

What You'll Need
Silhouette® Cameo
Silhouette Studio® Designer Edition (or above)
3D Foam Tape
Cardstock
Scanner


(1) Make Box Inserts

With the Scale function it is quick and easy to make a custom insert for your gift box.


Open the file for the gift box. Ungroup and delete the decorative panels.

Duplicate the base and move the lid and one base aside.

Make a smaller copy of the remaining base - Select base > Open Transform panel > Scale tab > reduce Scale to 99% > click Apply.


Bring in an outline of the item you want to hold and display in the box. I used the phone cover outline from (3) below.

Centre it to the base - Select both, open Transform Panel > Align Tab > Centralize


Make the holder so that it comes half way up the sides of the item by trimming the sides to half the height of the cover. Either trim the sides by hand, or do the following:
  • Draw a rectangle to exactly fit the top. 
  • Copy it, and Paste In Front. 
  • In the Transform Panel, Scale tab, add the height of the cover to the rectangle dimensions.
  • Click Apply.
  • Select the new rectangle and the outer shape (ungrouped) and in Modify panel select Crop. 


Delete the excess score lines, cut and fold the new insert, adding double-sided foam tape alongside the opening and place inside the gift box.


(2) Make Sheet or Gift Card Holder

 Make a cutout element to hold small sticker sheets or a gift card.

To make a pair of cutouts to hold sheets or a card (almost anything flat), just draw the element below (shown in the pink rectangle) and resize it to fit your project. Once made, save it as a file in your library to use again.
 

Draw an ellipse and cut it in half horizontally with the knife tool.  The options in the current version (v 4.0.1014) are displayed below the main menu items at the top left of the screen. Ensure the open knife path is selected (DE and above).


Delete one of the resulting shapes.


Draw a small circle (hold down shift to keep it round).


Duplicate the circle and place it at the other end. Then group it all.


Add it to a rectangle slightly smaller than the box lid.  Mirror the shape and align it to fit the sheet/gift card.


Once cut, place the edges of the sheet/gift card under the flaps and adhere the whole thing to the inside of the box lid.


(3) Make Phone Inserts

Make a number of inserts in rose gold foil to go inside the phone cover.


Scan your phone cover. Save as a jpeg.


N.B. I was able to scan the white liner paper from the phone cover's packaging. Firstly, I drew the holes on it using the phone as a guide, then placed a piece of black paper over the top of the liner to provide contrast. If your cover doesn't have a liner you can draw around the phone and scan that, or you can measure it and reproduce it by using the drawing tools in the software.

Don't worry if it looks a bit ropey, it can be fixed. To trace the scan, open the Trace panel, select Trace, click Select Trace Area and draw a box around the scanned image. If necessary adjust the thresholds until the shape and holes have an outline, then click Select Trace.

Move the original away and release the compound path on the trace. Straighten the image using the rotation handle if necessary, grouping it first, and then aligning it with the corner of the mat.

Draw a rounded rectangle to cover both of the holes. Adjust the corners to fit better by moving one of the red dots.


Delete the original holes. Then Group the remainder, or make into a compound path. Change the page size to Letter (the size of the foil sheets) and fit as many as you want onto the sheet.


Cut from Silhouette Rose Gold Printable Foil, now called 'Foil Printable' in the materials list.  Carry out a test cut to cut right through (a kiss cut not required here). The Default is 5/5/33, I reduced the thickness/pressure setting as shown below.


The outline can also be used to make the customised insert in (1).


I hope you find these mini-tutorials useful. They are easily adapted for all sorts of presentation boxes and gifts.


Bye for now,


   Profile | My Blog | Pinterest | Twitter | Instagram


DESIGNS USED:


PRODUCTS USED:


Saturday, 24 June 2017

Make Phone Cover Decals with Printable Vinyl


Hello,
Have you used the Silhouette Printable Vinyl yet?  I tried it out with this little project; making vinyl decals to decorate a phone. More accurately, to decorate a phone case that I'd bought as a gift.  I couldn't decide just what designs the recipient would like so I chose a selection and made a set of three sheets of decals to give as part of the gift. I call it a DYP kit - a Decorate Your Phone kit!

I've done the entire kit in two posts. This one, Part One, shows how to make the decals. Part Two will show how to make cover inserts and a gift box with customised holders for the cover and decal sheets.


What you'll need
Silhouette Printable Vinyl
Clear Phone Cover
Various Designs from the Silhouette Store (listed at the bottom of this post)
Printer


STEP 1: Prepare the Designs
 
Colour co-ordinate a selection of designs for the vinyl decals.

Open all your chosen files in one tab in the Silhouette software.   Roughly reduce them in size to fit on the virtual mat.


Ungroup the designs if necessary and delete any unwanted parts.  Decide on your colour scheme and start colouring the designs in matching colours (further ungrouping may be necessary). I used the colours of the heart design as a colour palette and 'picked' all the colours from it. The diagram below shows you how to use the colour picker.


Be aware that some Print and Cut files in the store can be re-coloured and others cannot.


STEP 2: Prepare the Print & Cut

Make a number of small decal sheets from one page of printable vinyl. 

Display Print & Cut marks by clicking on the Page Setup panel, select the Registration Mark tab, and select Type 1 in Style.


Click on Advanced and adjust the sliders to increase the Print & Cut area.


Change the paper size to match your media. The Silhouette Printable Vinyl comes in US Letter-sized sheets.

Hint: I also change the page orientation to landscape so the mat needs to travel less in the optical recognition process (uses less desk space).


Add cut lines for the decal sheets by drawing four rounded rectangles within the active cut area. Duplicate, resize, and re-orient the designs (Object > Mirror > Flip Horizontal) to fit within the new 'sheets'.

N.B. Avoid putting heavily coloured items in the hashed area, as this can interfere with the optical scanner.

Ensure that each separate decal is grouped. Select all the shapes that will be cut (I do this one sheet at a time), and make an offset to cut around the decal with a small margin. Open the Offset panel. Select [external] Offset, Distance of 0.050"/1.25mm, Corner as Rounded, then click Apply. This ensures all the decals have a similar sized margin.


Only the balloons proved difficult (possibly too intricate). A quick solution is to re-import the cut line from the original image and manually re-size it. For the Sunshine quote I just drew a rounded rectangle around the quote instead of using an offset.

Other fine-tuning required is to remove small cut holes by releasing the compound path on the offset and deleting the small cuts.


STEP 3: Print & Cut


Ensure that all the offsets/cut lines are set to zero thickness in the Line Style panel so that they do not print. Check that the Print Page Setup in the Main menu is set up for US Letter-sized printing. Then send the sheet to print.


Mount the printed sheet on the cutting mat.  The decals need to be "kiss-cut" (only cutting the top vinyl layer) and the sheets should be cut through to the mat (vinyl and backing sheet).

In Send, under the Cut by Line tab, select only the red and black lines to cut. Set the material of the red lines to Vinyl, Printable.


After carrying out a test cut, reduced the Thickness/pressure if necessary.


Set the black lines to a custom setting which is a little thicker. Again, a test cut is advisable.


STEP 4: Finishing Touches


Separate the sheets from the mat and remove the excess vinyl from around the decals.


I decided to put together a little gift package in a customised gift box. The fourth sheet, not shown in the photo above, will be used as a cover for the box. You'll find the tutorial for making the cover inserts and customising the gift box, with holders for the phone cover and decal sheets, in my next post. I hope you'll join me there!


Bye for now,


   Profile | My Blog | Pinterest | Twitter | Instagram


DESIGNS USED FOR THE DECALS:


DESIGNS USED FOR THE BOX LID:

PRODUCTS USED: