Monday 29 April 2019

How to create a bubble themed scrapbook pages using washi sheets

Hi everyone. Well after a great Easter Bank holiday playing outside with the kids, I decided I'd love to do a bubble themed scrapbook page with some of the lovely photos I took and the new washi sheets from Silhouette UK.


Here is how I created it.

Materials needed

Step one: Create the frame


To create the frame I used two different files to get the effect I wanted. First I opened the decorative frame file and the seaweed file. I used the bubbles from the seaweed file to create a few bubbles to decorate the frame with. I added interest to the frame by making the bubbles different sizes. Once I was happy with the placement of the bubbles on the frame I selected them all and used the 'weld' tool to join them all together as one object. 


Step two: Layout

When I am creating something like a scrapbook page I like to deign it on the canvas before I get everything ready for printing. To do this I increased the canvas size to 12 x 12 using the page settings menu. I then opened all of the leaf files that I had and ungrouped the leaves so that I can move them around the page separately. I then moved them into the positions I wanted them to be in on the finished page. I felt that the page needed some text so I used the bubble font to add the words 'blowing bubbles' to the page. 


Step three: Cutting out

To cut out the elements of the page I opened a new file so the I can position each element to get the best use of my cutting materials. For the washi sheets the different colours are separated into thirds on a 12 x 12 sheet. I wanted the leaves to be in separate colours of the washi sheets so I positioned them all in the top third of the canvas. I cut them on the washi sheet settings but I lowered the speed slightly so that it reduced the chance of the blade catching the material. 


I cut the leaves and the words out in the washi sheets and the frame using card stock on the plane cardstock setting. 

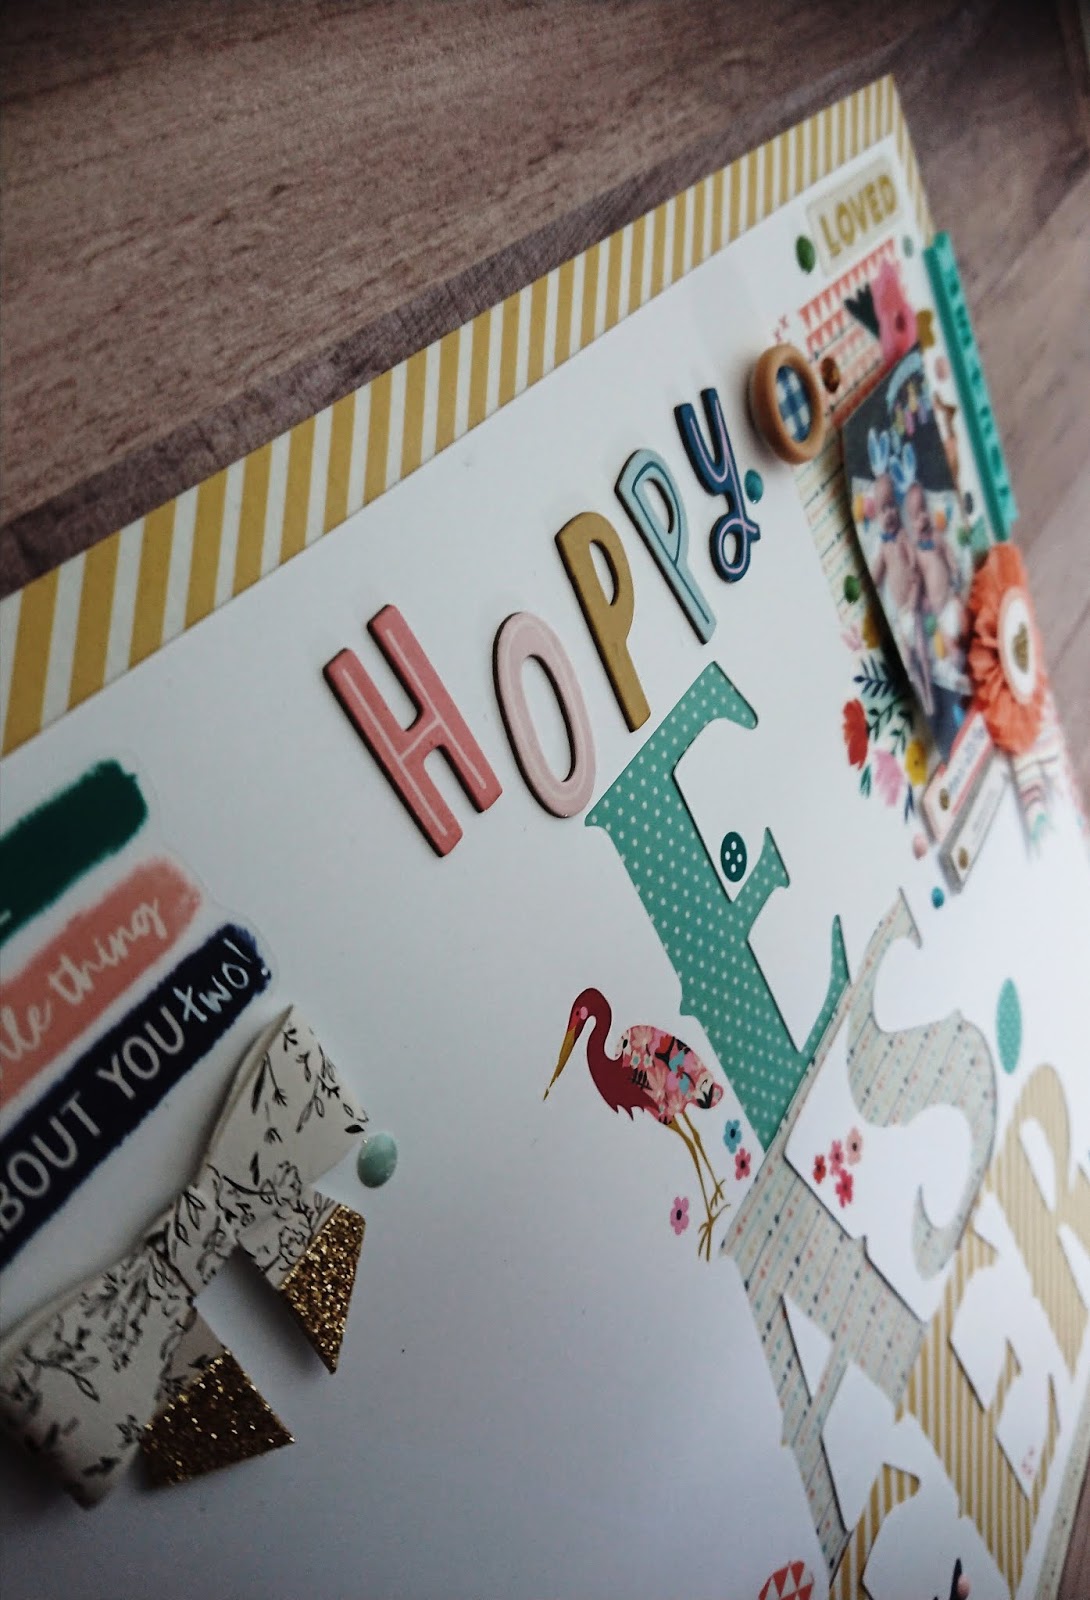
Step four: Assembling

To assemble the page I started out by adding a bit of distressed ink to the frame to give it a bit of depth and colour. I then placed it where I wanted it on the page and drew around the inside of the frame with a pencil so that I could place the leaves behind the frame. Using the pencil as a guide I placed the self adhesive washi leaves around the frame. 


Once I had added all the leaves I placed the frame over them to make sure that I was happy with how it looked. I will stick it down properly when I have the photograph behind it. Once I was happy with the placement of the frame and leaves I added the 'blowing bubbles' washi sheet word to the top and bottom of the page. 


Sunday 28 April 2019

Scrapbooking with Steph - Hoppy Easter 12 x 12 layout


Hello all crafters and welcome to this weeks blog post!

Soooo I started off with my product of the week....a washi tape sheet and then found this delightful cutfile in the store https://www.silhouettedesignstore.com/designs/120065?search=easter&sortby=relevance&submitted_search=true I cut the words out on flat white card stock and the bunny and the eggs out of the washi tape paper (ensuring I changed the material to the washi tape paper setting)

With the main body of washi tape paper I gutted it with a one inch border, I backfilled the letters with the leftover washi and finally cut two pieces of the wash tape to 2 x 3 inches to use as photo mounts.


When making this layout I started with the top right hand corner and clustered together my photo and the washi tape 2 x 3 cut outs, another 1/2 x 4 inch piece of the turquoise washi, some rub on embellishments, a sprinkling of glossy dots a rosette and a wooden button once I was happy with that I stuck it all down.


I then created another small embellishment cluster in the top left hand corner before adding the title "Hoppy" between the two clusters.


I felt the layout needed some more washi so I added the bunny to the bottom left and the eggs to the middle as well as some more rub-ons around the letters to complete the layout.


I hope you have enjoyed this weeks blog post......until next week and if you decide to scraplift this layout we'd love to see what you come up with, please share and tag us on the below Instagram addresses.

Steph xo
Instagram: silhouette_uk & stephanielouise123

Saturday 27 April 2019

Father's day card inspiration


Hello, it's Verity here from Pretty Little Button. It will soon be May, and then Father's day won't be that far away. So I have some early Father's day inspiration for you using a lovely cut file from Lori Whitlock and decorated with the Washi Tape pack from Silhouette. There are a whole host of shadow box card cut files on the design store that you can use the washi tape pack with, so the possibilities are endless.

Father's day card inspiration process: 

Download the cut file from the design store and load it up into your design space. Now, this requires you to cut out the pieces from a 12x12" sheets of card, however, I don't have card pieces that size. So, if like me you need to cut out from A4 card, you need to resize the file. 


Before you ungroup the cut file, click on the corner and whilst holding the shift button, drag the box inwards to make the file smaller. 

You may find it easier to change the size of your media size in the page set up to A4 size. You can then position the largest element of the sheet to ensure it fits within the size. 


Cut out all the pieces out of the colour of card of your choosing. Make sure you cut the individual boat and lighthouse shapes out of the sheet of washi tape.

For the sentiment, I used the Hello Sunshine font to write 'For you Dad' and added a rounded rectangle around it. This font works amazingly well with sketch pens. I made two sizes as I was unsure which size would look best until I assembled the card.  


When you come to 'sketch' your sentiment, make sure you have your action set to 'sketch' and your toolset to sketch pen unless you use the pen holder for a regular pen. 

In addition, make sure you only have the font set to sketch and not the shaped outline. If you have the Cameo 3 (I only have the 2), you can have it set up to cut your outline with your second tool. 

Father's day card inspiration cut pieces:

Lori Whitlock has a great video on how to assemble her shadow box scene cards, which you can find here. 

Front card with decorative coloured elements - frame for the front panel, two side panels and inner background panel. 


A coloured pouch to attach to the back of the card along with an insert to write your message on. 


Envelope panel. 


In addition, you get two white panels which you fold to create mountain folds. See Lori Whitlock's video as this explains and demonstrates this well - no point rehashing something when it's already done!

There will also be two scene panels cut - one with the lighthouse and one with the boat. Removed you lighthouse cutout from the washi tape sheet, and position over the corresponding card panel. Repeat this for your boat. These should be done before you assemble the card. 


Remember, to check out the video here to assemble the card!

Father's day card inspiration photos:


If this has inspired you to try this out, please post below. I would love to see it!

Until next time,

Verity


Profile Pretty Little Button Blog | Instagram | Facebook

FONTS USED:

HELLO SUNSHINE SKETCH FONT by Rivka Wilkins, design ID#77315

DESIGNS USED:

LIGHTHOUSE SHADOW BOX CARD by Lori Whitlock, Design ID #134630

PRODUCTS USED:
    

Friday 26 April 2019

Washi tape

This week the Design Team are showcasing  Silhouette Washi Sheets. I have friends staying over the Bank Holiday weekend who will be cooking in the kitchen. I was inspired to make some temporary signs labelling some of the cupboards and drawers.


Each sheet has 3 patterns and they all coordinate. I chose a couple of pictorial designs (coffee tea set, paper clips set ) and used Peabody Bold font to write (then welded  the letters together).


I carefully applied all the washi, ready for my guests to arrive...


I actually think the picture signs show up the best on the wood...


I might have to leave them up permanently!


I think I will use some of the washi for a scrapbook layout, so will share that on the future

Happy creating Silhouette buddies

Ruth
xxx

Wednesday 24 April 2019

Design of the Week - Watering Can - 23rd April 2019 - Turning a cut file into a backfill cut file.


Hello, hello - Karen here with my Wednesday post using the free Design of the Week.  This week it's a cut file of a watering can.


As this was quite a simple shape I decided to experiment and see if I could make it into a backfill file.  I have been using quite a number of Paige Evans' cut files lately with different techniques and thought I would have a go at making my own. 

Also, as I was given some lovely washi tape sheets to work with I am going to use those for the backfill.  


I started by reducing the size of the design 6ins tall, making sure I locked the padlock so that the ratio stayed the same. 


Then ungrouped the design and separated the shapes. 


I ungrouped the stripes on the watering can from the body of the watering can and made them into a compound path. 


The next step was to add an 0.1 offset to the watering can and to select the offset and the watering can and make into a compound path. 


Add an 0.1 offset to the stripes and make the stripes and offset into a compond path.
Now you need to select the stripes and the watering can and weld them together. Once welded your design will look like the one below.

Now you have to add an offset to the leaves in the same way and then make the leaves and the offset into a compound path.

It is a little more difficult to add the offset to the flowers but with an extra step managable.

Start by ungrouping all the shapes in the middle of each flower and stretch each one so that it extends beyond the edge of the flowers. 

Add an offset to these shapes and make the shape and offset into a compound path. 

Add an offset to the yellow flowers and make the offset and flower into a compound path. The final step is to merge the centres of the flowers and the flowers  and make into a compound path. 

All you have to do now is to realign each of the shapes to the original position, with a slight overlap, and merge all three.
And there you have your shape ready to backfill.  

I used a Paige Evens font called Back This Font for my title. 


This method can be applied to most cut files with lovely results.


PRODUCTS USED: