Showing posts with label HTV. Show all posts

Wednesday, 9 January 2019

Design of the Week - You Are Magic Font - 8th Jan 2019 - Using Font Glyphs


Hello, hello Karen here with my usual Wednesday post using the free Design of the Week.  I am absolutely thrilled with this week's offering a gorgeous font called You Are Magic.  This font has some amazing glyphs (some with phrases) and I have used it on two projects.  You really should snag this font as, for this week only, it is free - saving you over £3.00!

First, I used the font and one of the Glyphs on a t-shirt using glow in the dark HTV - I noticed too late that one of the little lines at the bottom is missing :0(.  


To access the glyphs is really easy.

On the text panel (1) choose Glyphs (2)


This will then give you access to all the different glyphs available to a font.  These can be curly swishes to add to letters or in the case of this font lots of little graphics - see below.  To add a glyph simply click on it and it will be added to your page.


As you can see, along with the graphics there are also phrases with this font.  I decided to use one of them on a scrapbook page as I was curious as to how it would look in a larger size and whether it would draw well with a sketch pen.  I chose the 'You Are Magic' title and also repeated the moon phase glyph as a border around my page.  I also added two moons, flipping one to face the other way.


I used a dark blue metallic sketch pen for the title and border and was delighted how nice they looked.


I absolutely love this font and the possibilities it gives me.


Wednesday, 17 October 2018

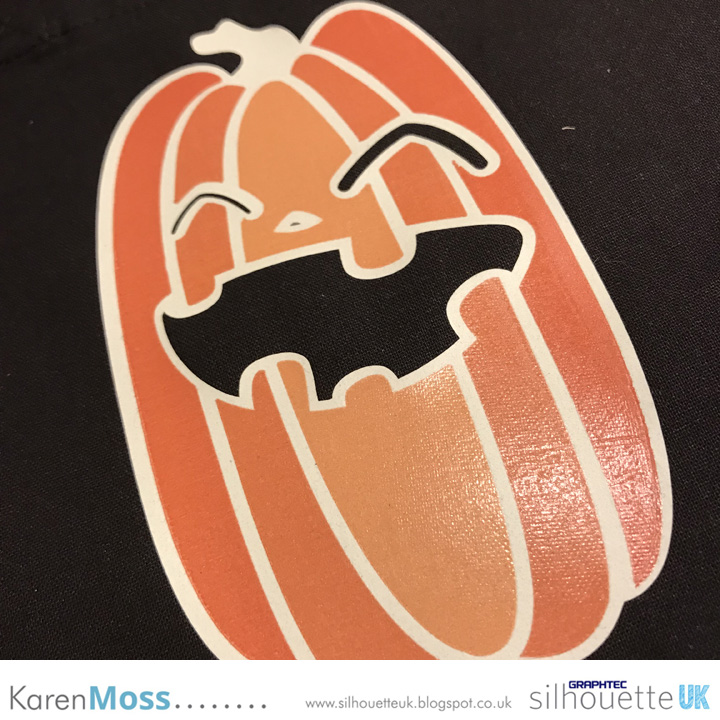
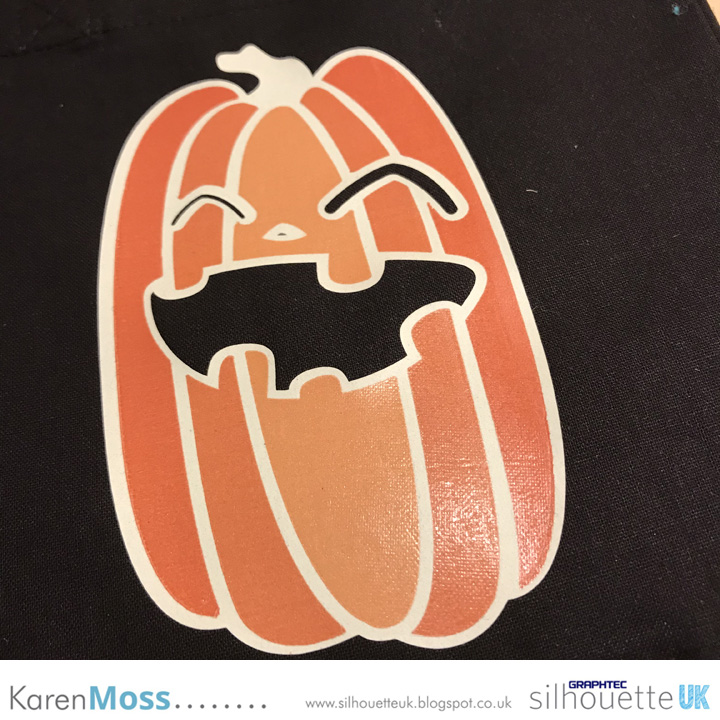
Design of the Week - Happy Jack 'O' Lantern - 16th October 2018


Hello, hello - it's Karen here with my Wednesday DOTW post and this week it is a cut file called Happy Jack 'O' Lantern.
I decided that I wanted to use it to decorate a little Halloween treat bag, incorporating glow in the dark HTV.


To begin I resized the pumpkin to 5 ins tall and then removed the brown part of the design.


The next step was to add the black features to the pumpkin made of sections and use Subtract All to remove the sections behind the black shapes.


I then alligned both the black features and the sectioned pumpkin onto the solid pumpkin shape.


The next step was to remove the sectioned pumpkin and add an internal offset to the black features, then remove the black features and Subtract All so you again have a section removed from the solid pumpkin


I printed the section pumpkin onto Printable Heat Transfer and cut the solid one from glow in the dark HTV.  I then added the glow in the dark pumpkin to my bag using my heat press and added the printed pumpkin on top of this - again fusing with my heat press.


I then added a 'Trick or Treat phrase underneath my pumpkin. 


Wednesday, 23 May 2018

Design of the Week - Welcome To Our Home - 22nd May 2018


Hello, it's Wednesday so that means my turn to blog what I have made with this week's free design.

When I first saw the design I thought I would make a canvas with it but I had made a canvas last week - Then I remembered that I had a black apron in my store of items that I use to decorate with HTV and decided that it would be ideal to put the design on.  Very appropriate for our house and perfect to wear when I am preparing meals, I am a very messy cook!


I resized the design to 7 ins wide and cut it from white HTV.  I then used my heat press to adhere the design to the apron.


I am thrilled with the result and in fact am wearing it now as I type this whilst waiting for dinner to cook!


Wednesday, 2 May 2018

I Got It From My Mama - Design of the Week - 1st May 2018 (with apologies for bad light photos)


Hello, it's Wednesday so it must be time for my DOTW post. 

This week I thought I would make something other than a layout for a change and thought the design would look perfect in gold on a little onsie.


The design was resized to 5 ins wide and cut it from gold HTV, and mirrored before cutting.  I also removed the three 'dashes' from each side as they were so tiny.

Then, because I loved the design so much I made a scrapbook page :0)

I had been to an art journalling class recently and loved the inked backgrounds we made.  I thought that if I made an ink background and cut the design from a piece of 12 by 12 the colours would show through the apertures.

Firstly, I inked a piece of 12 by 12 cardstock.


Then I dripped water onto it and dabbed it off with paper towel.


I resized the design in my design space and added an 11 inch square for my border. 


Then as there would be a large piece of the coloured background unused on another design area I used a sketch pen to draw some flowers and cut those out too.


The title was perfect for this photograph of me and our daughter as until she was 23 (this was at her birthday afternoon tea) I never thought she looked anything like me.  Once I saw this there was no denying how much she actually does.


Saturday, 28 April 2018

#Get Crafty - HTV Aprons


Ops! I have noticed that my e in pretty needs the centre taking out - I will put it back into the heatpress and rectify that. 


Hello, hello - Karen here to show you a little surprise project I made earlier in the month.

I go to a retreat, twice a year, with a group of friends.  All nine of us are there at the April retreat but usually only seven of us go to the October one.

As we were all going to be together I wanted to give all the girls a little surprise so I bought some black aprons and added decoration with pink sparkly htv.  We call our little group 'the Makers of Pretty thingS' (yes the capital letters are in the right place) and so I made a file with this on and added the cut file #getcrafty to the bottom.

You can see us all modelling the aprons in this photo


and in this photo they are all in use. 


I am so glad I made them as my one saved my new jeans from an epic spillage of gold texture past and Helen's saved hers from a Glossy Accents spillage!


Monday, 23 April 2018

Bullet journal pencil case HTV Decal


Hi everyone. It's Verity here from Pretty Little Button bringing you another project. This week the design team has been asked to use Heat Transfer Vinyl in a project. I decided this was a perfect time to decorate a burlap zipped pouch I had been given as an Xmas present and wanted to use this to store pencils in for my bullet journal. Now I have used HTV before, however, not the Silhouette brand, nor have I layered before. So this project had a few new experiences for me. I did find that the Matt white HTV to feel thinner than previous brands, however, I found it adhered very quickly with an iron, much better than previous brands I had used. Another new experience for me was Glitter HTV. When I first cut it, I didn't think it had cut, but when held at an angle in the light I could see it had. One thing to note, I found it more bothersome to weed than the matte white but it still gave a good end result. So read on to pick up any tips and pointers on my first try at layering HTV.


Bullet journal pencil case HTV Decal details:

To start off, draw a shape the same size as the area you wish to add your HTV too. Mine was a pencil case, so a fairly straightforward shape. To adjust the measurements accurately, you can use the aspect ratio button on the top bar (looks like a double ended diagonal arrow). To see this icon, you must have you shape selected.


Next, place your design inside the shape and adjust the size according. I wanted to layer a shadow outline of vinyl to my design, so I added an offset as seen below with the offset panel. This is the 'Double star' icon on the right-hand panel. You can adjust the size of your offset by changing the distance. When happy, click apply. 


Separate your two designs, the main text and the offset from one another and group individually. Now you can add a little box around your design as this may make it easier to weed, but you don't need it. At this point, you can also discard the blank shape you used at the beginning. From an old habbit before the feature was added to the programme, I always flip my design horizontally at this point. Remeber with HTV you need to mirror/ flip your design horizontally, as when the machine cuts, it will cut into the back of the design. This back will the be place down on to your item to HTV and your design will appear the correct way round. 


However, if you forget or don't mirror at this point, the programme will now remind you to mirror when your have HTV set as your material to cut . As you can see below when I press the send button, it asks 'Have you mirrored?'. I selected 'send as-is' as I have already flipped my design, but if you have press 'send mirrored' and it will cut it mirrored for you.


My tips on ironing with HTV:

I don't have a lovely heat press for HTV, I don't do enough to warrant buying such a machine, so I still use an Iron and it works well for me. However, I have learnt a few things to improve my press with an iron. I turn my iron on full heat and allow this to warm up for quite a few minutes before I even contemplating it. I use a hard surface to iron on, by ironing board has quite a bit of giving in it when you press down on it. Not ideal for pressing, as you want to press on a very solid surface for a good press. So I find a towel folded over several times on top of my table works very well.

I also like to press with a piece of baking parchment over the top. This means I won't melt the plastic backing onto my iron or project. When I can see the HTV has started to adhere, I peel the back off and then cover with the paper again to continue my heat press until I can see the grain of the fabric showing through the HTV. When I see this I know I have a good seal and the HTV has adhered.

As I was wanting to layer my items, it was important not to overheat and press the first layer - the white matte HTV. I pressed this just enough to see a little of the grain showing - only ever so slight. This was enough for me to remove the plastic backing from the HTV. Then before pressing the white again, I layered the gold glitter HTV over the top and pressed this like normal.


I hope this saying will remind me to continue to have a passion and my bullet journal is where the passion will have a purpose....if I make sure I use it!

 If this has inspired you to try this out, please post below. I would love to see it!

Until next time,

Verity


Profile | Pretty Little Button Blog | Instagram | Facebook

DESIGNS USED:

Purpose fuels passion by Sarah Hurley -Design ID #249316

PRODUCTS USED: