Showing posts with label design of the week. Show all posts

Wednesday, 10 April 2019

Design of the Week - Orange Waves - 10th April 2019 - Filling a Title with a Pattern


Hello, hello - Karen here with my usual Wednesday post.  The free design this week is a printable pattern called Orange Waves.

I have to confess that when I first saw this I didn't know what I was going to do but I went on to the Silhouette Design Store to download it and saw one of the suggestions of how to use it was to fill a shape - my idea of filling a title evolved.

I chose this Paige Evans title to use with a photo I took recently of my daughter and her 'fur baby' as I thought it summed her up perfectly.

It is really, really easy to fill a shape with pattern!

First open  your shape - in this case it was my title.

1. Open the Fill Panel
2. Choose Fill Pattern
3. Scroll down to the pattern you wish to use and click on the pattern.


Once you have done this your shape will be filled with the pattern.  I noticed on my one that because the 'o' from TO and the 'o' from HOME are joined the pattern was smaller in those but I don't mind as it gives the title a little extra detail.


Next I opened a new page and resized it to A4 as I only have an A4 printer, 


I turned on my registration marks and added the title to this page, gave it a 0.05 offset and resized it so that it fitted inside the red cut lines.


I printed and cut my title.

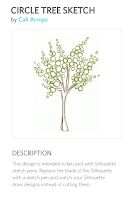
I then decided that I wanted to write a border with sketch pens and added this design, reduced and replicated around my page.  I chose this one as it fitted nicely with the theme of my page and would translate well to be used with a sketch pen.


Finally I used this design to print and cut some butterflies.  I printed the design out once as it is and once flipped horizontally to give me a verity of butterflies.  I chose the ones that had colours similar to those in my photo and the title. 


I hope I have inspired you to try filling shapes as it gives you a lot more scope for the designs you have.


PRODUCTS USED:
Wednesday, 3 April 2019

Design of the Week - Sketched Foliage - 2nd April 2019 - Manipulating Sketch Files


Hello, hello - Karen here with my Wednesday post.  This week the free file is called Sketched Foliage.  My little heart jumped for joy when I saw it as, more than anything, I do love a sketch file.


I decided to challenge myself to make a scrapbook page only using sketch pens and sketch files!  If you haven't used sketch pens before I would really recommend you give it a try.  There is a huge selection here. I must have every Silhouette pen available and use them all the time.

I will start by saying this is a fairly long blog post!

I started by manipulating the Sketched Foliage file by ungrouping it.


Next I rearranged three of the sprigs of foliage to form a plant shape. I simply dragged the far left and far right sprigs to meet the bottom of the second from left and deleted the one that was next to that. 


Now I had my 'plant' for the bottom of my page I reduced it to 2ins tall and used the little green circle to turn it slightly to the left.
 I drew an 11 inch square and centred this to my design space. I then replicated my 'plant' four more times and evenly spaced them at the bottom of my square.


I then decided that I wanted to make my page into a scene and choose three more sketch designs to add.

I started with the grass border and replicated it along the bottom of my page just below the plants.


I then  used the Eraser tool to remove the section where the grass joined the square, on both sides and deleted the bottom of the square so that the grass now formed the bottom border. 


I added the tree to the left and the border to the top right (to represent the sun) I ungrouped the circle border and removed the circles.

I then used the knife tool to cut along the sections on the left and right and top right where the designs overlapped the border. 


I added this frame and used this sketch fonts to write my title and journaling.


The final step was to change all the sketch lines to the colours I wanted to use - quite a big task but well worth the time it took.


On the Send panel I choose 'Line' which then bought up all the colours I had chosen.  I was then able to select each colour and insert the appropriate pen.  You will see that I set my speed to 1 when using sketch pens - this is so the pen has a longer contact time with the cardstock and you get a better drawn line. 


Because I already had the design made I reduced it to 5 ins square, removed the journaling and title and added a sentiment and then had the makings of a really quick Birthday Card.


I hope this inspires you to have a go at using sketch pens.  


Wednesday, 27 March 2019

Design of the Week - 3D Flower - 26th March 2019


Hello, hello - Karen here with my Wednesday DOTW post.

The DOTW is a really lovely 3D flower with leaves.


As you can see I constructed mine a little different to the one above as I wanted to use it on a layout and when I folded it how it was intended it was a little too bulky even for me!


When you open the file the flower is huge so I wonder if it is intended for home decor rather than for cards or scrapbook pages. 

I started by reducing the size of the design using the scale panel and then copied them and reduced them again to 80% for the smaller ones.


I also reduced the size of the leaves and added a line along the centre of each one which I set my Silhouette to score. 


I decided not to use the centre of the flower but to added a small cabochon to the middle of my flowers. 


I started constructing my page by firstly adding a sketch pen border to my page using this design and making it 11.5 ins square.


I also used this design form my title and photo frame.  


All that was left was to put my page together - I curled each layer of my flower


then I added some gems and rose gold splashes.