Showing posts with label Double Sided Adhesive Sheets. Show all posts

Saturday, 23 June 2018

Using Double-Sided Adhesive Sheets 3 Ways - with an Impossible Card

Using Silhouette Double-Sided Adhesive Sheets illustrated with an Impossible Card project by Janet Packer (http://craftingQuine-blogspot.co.uk)  for SilhouetteUk/GraphtecGB


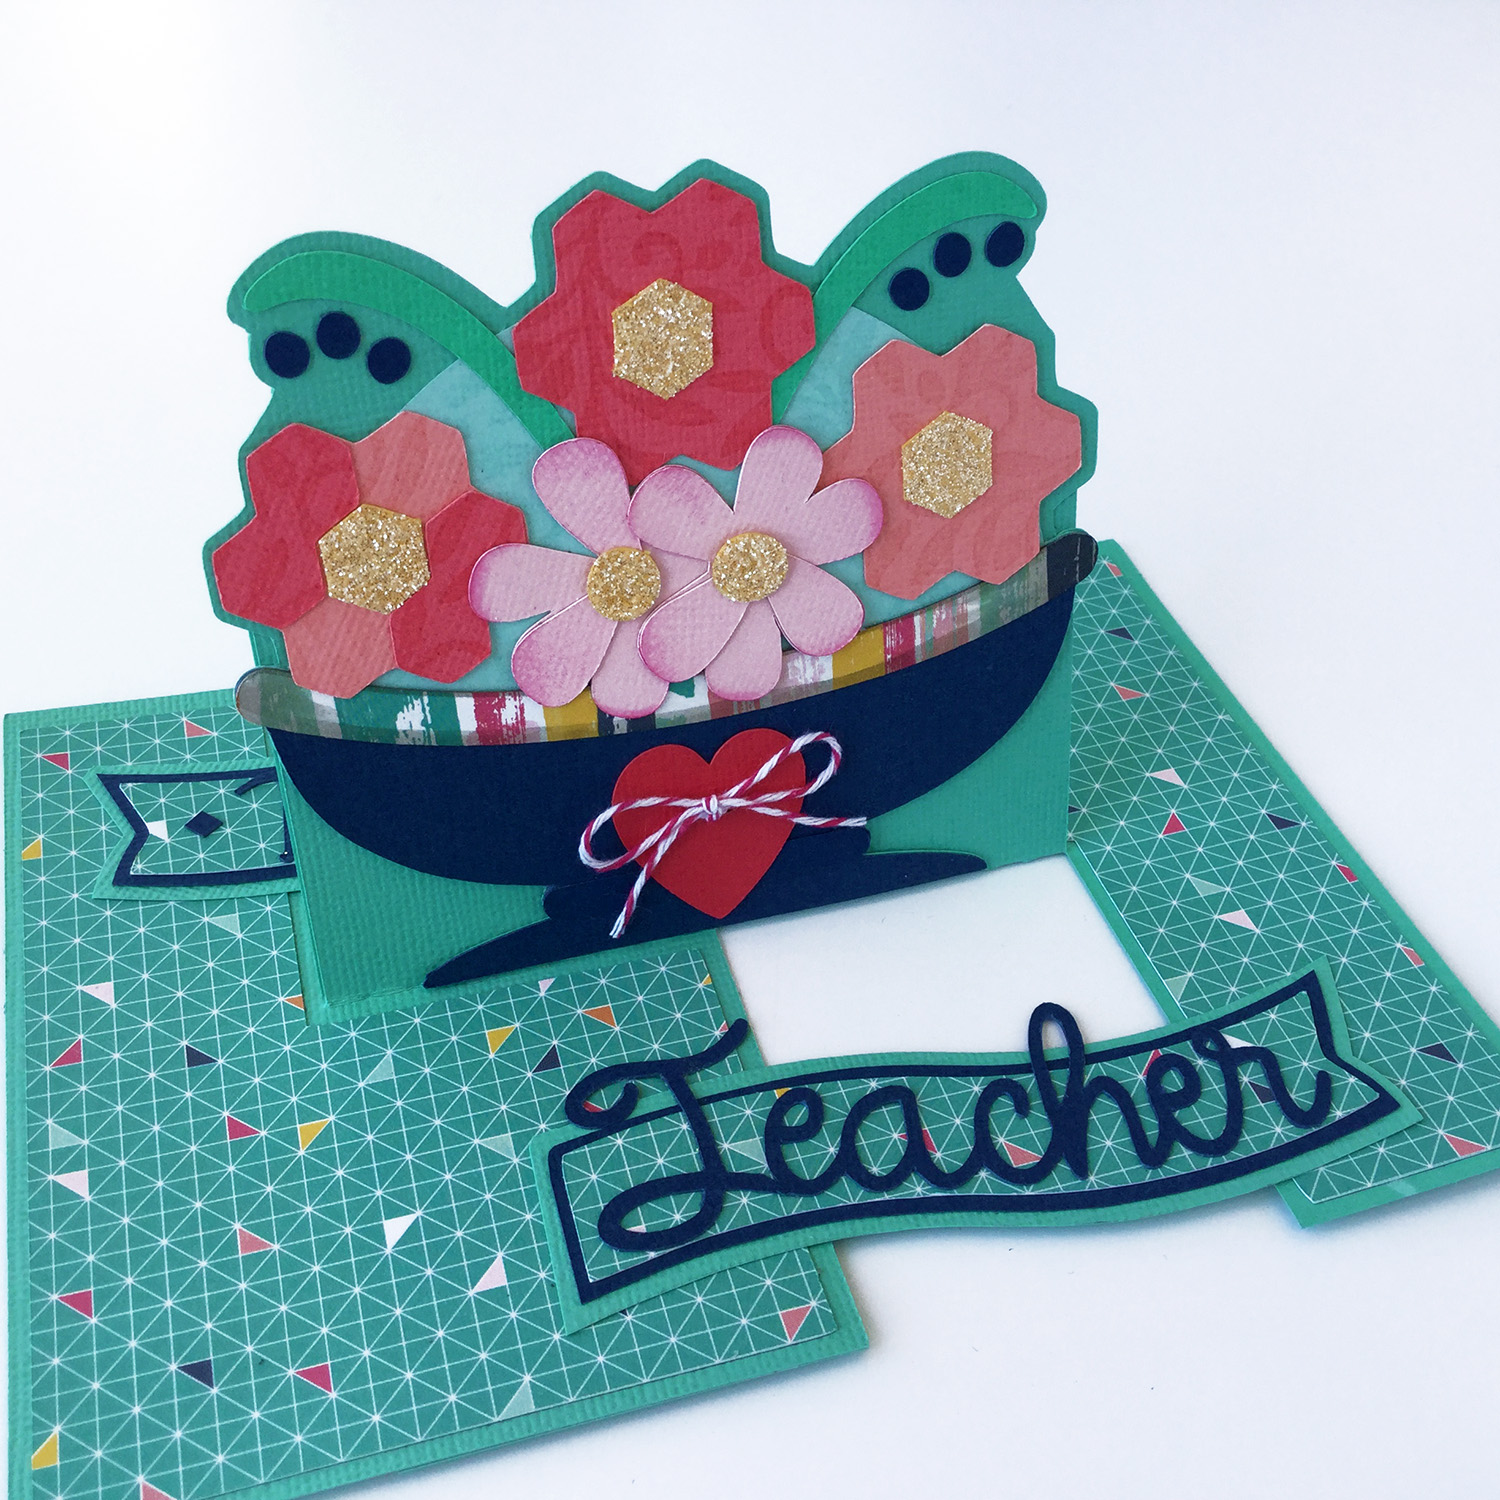
Hi, Janet here using the Silhouette Double-Sided adhesive Sheets with a new design from the Silhouette Design Store - an Impossible Card. If you haven't heard of impossible cards I urge you to go and have a look on YouTube or Pinterest - the Internet is ALIVE with them. Using the Silhouette Double-Sided Adhesive Sheets makes the job super simple, and not impossible at all!
Using Silhouette Double-Sided Adhesive Sheets illustrated with an Impossible Card project by Janet Packer (http://craftingQuine-blogspot.co.uk)  for SilhouetteUk/GraphtecGB


It's great that there is an impossible card design available in the design store so all that pencil and ruler work is eliminated (there may be even more designs by the time you read this). This one is called the Flower Urn Bouquet Impossible Card (#267289), and is designed by Snapdragon Snippets. If you search the store using the search term "impossible card" (with the double quotation marks), you'll see that there are optional banner tags available as well as a custom-shaped envelope. Although the card file does include basic bridging pieces, I used part of the teacher/thank you banner set (#267291) as I loved the lettering and the banner shape.

The designer has a full tutorial on how to put this card together - just follow the link from the item listing in the store. Here, I'll concentrate on how I used the double-sided adhesive in this project and include a few hints and tips along the way.

I used the double-sided adhesive sheets in three ways:
  1. to make double-sided patterned paper,
  2. to make double-sided textured cardstock, and
  3. to 'glitter-ize' coloured cardstock.

Now, although the packaging includes instructions on how to cut this media, and the software has default cut settings, the methods I'm showing here use the media somewhat differently, and the cut settings will be different for each one.


1. Making Double-Sided Patterned Paper

Using Silhouette Double-Sided Adhesive Sheets illustrated with an Impossible Card project by Janet Packer (http://craftingQuine-blogspot.co.uk)  for SilhouetteUk/GraphtecGB


The panels for the card base and bridging banners were cut from patterned paper backed with a double-sided adhesive sheet.

To do this, trim the adhesive sheet to just a little smaller than your paper (either the entire sheet, or just to cover the portion that you are going to use), then peel off the white backing sheet, leaving the yellow AND the sticky layer. Just peel a little at the corner initially, and if the sticky layer seems to lifting with the white layer smooth it down and try another corner.

Using Silhouette Double-Sided Adhesive Sheets illustrated with an Impossible Card project by Janet Packer (http://craftingQuine-blogspot.co.uk)  for SilhouetteUk/GraphtecGB


Align the sticky yellow part on the reverse of the patterned paper and smooth it down. It is then ready to cut.

Using Silhouette Double-Sided Adhesive Sheets illustrated with an Impossible Card project by Janet Packer (http://craftingQuine-blogspot.co.uk)  for SilhouetteUk/GraphtecGB

A 'Kiss' cut (cutting just the top patterned layer) is the ideal. The cut settings will be slightly higher than that of the patterned paper by itself, so the setting you use for patterned paper is a good starting point.  I used Blade 2, Speed 5, Force 29, 2 Passes, but I'd recommend a test cut to find your ideal setting.


2. Making Double-Sided Textured Cardstock

Most of the remaining pieces were cut from textured cardstock, but it is only really worthwhile adding an adhesive backing to the smaller or layered parts. It is cut and used in the same way as the patterned paper (above), although as the textured cardstock is thicker, the settings need to be higher. I used I used Blade 3, Speed 4, Force 29, 2 Passes and an overcut*, so that the corners didn't snag. Again, you'll need to play around to achieve the ideal setting for your media.

Using Silhouette Double-Sided Adhesive Sheets illustrated with an Impossible Card project by Janet Packer (http://craftingQuine-blogspot.co.uk)  for SilhouetteUk/GraphtecGB


I cut the petals a little deeper so that the backing cut too by increasing the force by 2. This made it easier to colour the petal tips individually.

Using Silhouette Double-Sided Adhesive Sheets illustrated with an Impossible Card project by Janet Packer (http://craftingQuine-blogspot.co.uk)  for SilhouetteUk/GraphtecGB


* Overcut Setting

I also cut the lettering in this way, but being more intricate, the pieces required additional hand trimming. I realised that I hadn't turned the overcut function on for these, and if I had, I think that they would have cut a lot better. To turn the overcut setting on just click in the empty box to add a tick mark as shown below (N.B. this is a custom setting I've saved for cutting adhesive-backed textured cardstock).  Read more about the Line Segment Overcut feature setting here.

Using Silhouette Double-Sided Adhesive Sheets illustrated with an Impossible Card project by Janet Packer (http://craftingQuine-blogspot.co.uk)  for SilhouetteUk/GraphtecGB


3. Glitter-izing Coloured Cardstock

To make the flower centres I added white Silhouette Glitter to yellow textured cardstock. Peel off the white layer from the adhesive sheet and this time smooth it onto the right/top side of your card then rub it well to adhere it firmly. Adjust the cut settings to cut all the way through both layers and use the overcut *feature (this works particularly well for the non-circular shapes).

To glitterize the cut shapes, peel off the yellow layer to reveal the sticky surface and pop the shapes back into the waste part if they have come out. Sprinkle glitter where you need it and rub it gently to ensure all the required surfaces are covered. Then cover with scrap paper (the white waste layer from previous sheets is perfect as it is non-stick) and burnish (rub) with a flat edge such as a bone folder.

Using Silhouette Double-Sided Adhesive Sheets illustrated with an Impossible Card project by Janet Packer (http://craftingQuine-blogspot.co.uk)  for SilhouetteUk/GraphtecGB


Then just pop the glittered shapes out and adhere them to your project (adhesive will be required for this).
Using Silhouette Double-Sided Adhesive Sheets illustrated with an Impossible Card project by Janet Packer (http://craftingQuine-blogspot.co.uk)  for SilhouetteUk/GraphtecGB


As you  can see, the Silhouette Double-sided Adhesive Sheets are very versatile, and the non-stick backing paper is easily removed from the cutting mat, unlike other brands I've tried.


Using Silhouette Double-Sided Adhesive Sheets illustrated with an Impossible Card project by Janet Packer (http://craftingQuine-blogspot.co.uk)  for SilhouetteUk/GraphtecGB


N.B. The eagle-eyed among you may notice that in an earlier tutorial on Making your own adhesive patterned paper I peeled off the yellow backing rather than the white one. Both work, but I've found that as the white backing sheet is so much thicker, the cut settings can be lower with the method described today. I'll leave the choice to you.

Bye for now,


   Profile | Crafting Quine Blog | Instagram @CraftingQuine


DESIGNS USED:


PRODUCTS USED:

Monday, 18 June 2018

Creating foiled elements for your cards - Double-sided adhesive sheets


Hi everyone. It's Verity here from Pretty Little Button bringing you another project. The project today using the Double-sided Adhesive sheets from Silhouette. I have used other adhesive sheets in projects before, but found they didn't cut so well, so it was interesting to see how these faired. I have to say that I learnt a few things with it. The more intricate your design is the poor the cut will be. This is because as your blade cuts the adhesive, it could pick up a small cut pieces which will then stick to the blade. As it sticks to your blade, it will then impair the rest of the cut. So solid, less intricate designs are better. Having said that, I did manage to reasonably cut the floral design on the second card with a little help from my craft knife afterwards in a few small areas. 

Creating foiled elements for your cards - Double-sided adhesive sheets detail:

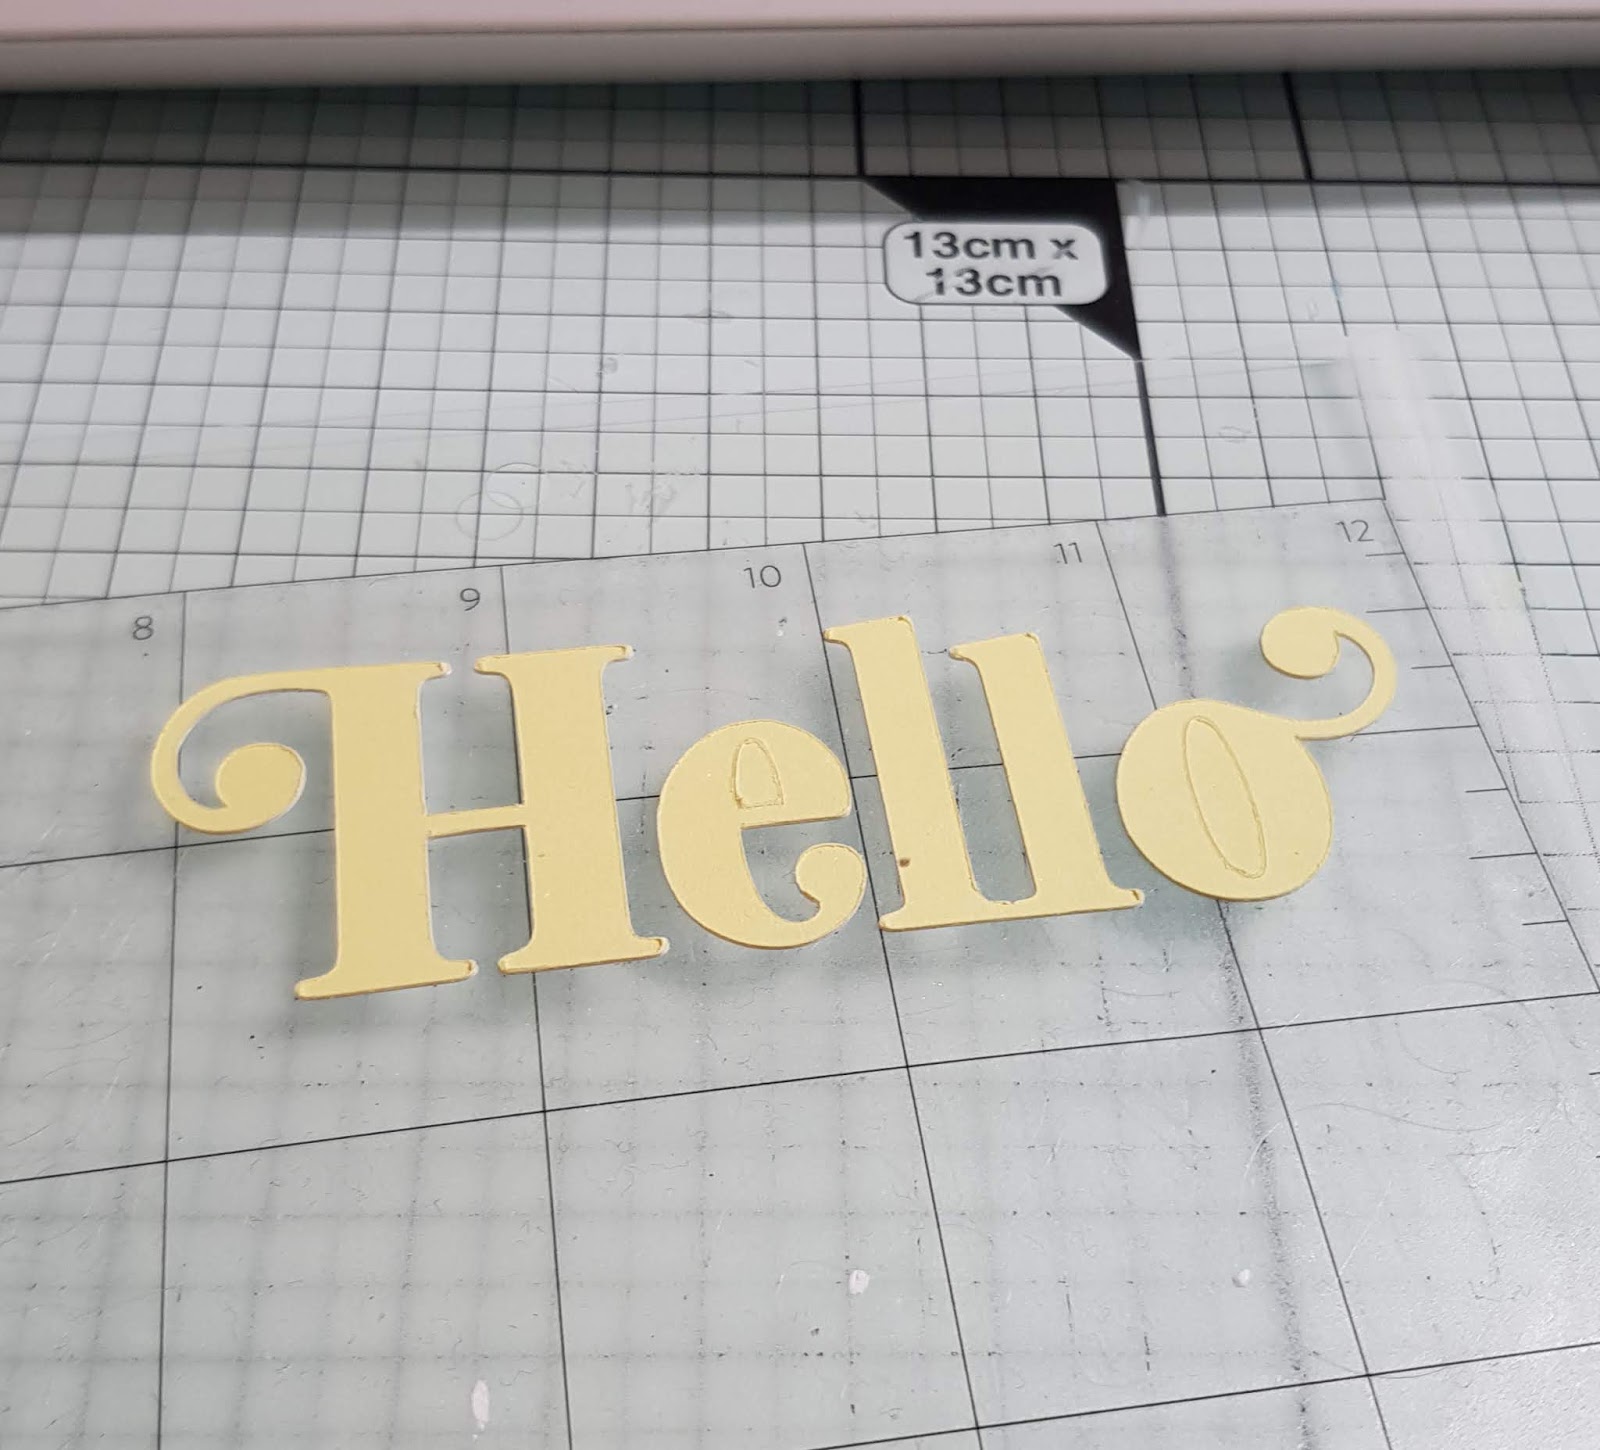
To start, place your design in your design space in Silhouette Studio. The first design I used 'Oh Hello' by Sophie Gallo. This design has quite a lot of plain shape/area to cut at isn't too intricate. I found that the cut settings on the machine worked fairly well, but I set it to pass 3 times. I wanted it to cut all the way through the backing sheet to make it easier to get the design of the mat before peeling and exposing the adhesive sheet.

There is a chance that I could have had my sheet facing the wrong side up, but as I didn't want the backing to come off either side until I had it off the mat it didn't matter as both sides once peeled are adhesive


Once I have removed the cut design from the mat, I peeled the backing off and positioned the design down onto my card. Then I removed the front release sheet to expose the adhesive. I place a piece of decofoil over the top, the colour side facing upwards.  Using my finger I burnished the foil into the adhesive and peeled the sheet away to reveal the foil left on top of the adhesive. 

To assembled the card, I added a stamped sentiment and some white Nuvo drops. 


The design on the card below was a little more intricate - I did get a fairly good overall cut however, there were a few areas where I had to just go over with my craft knife to release the areas.


I hope this has shown you that you don't need a laminator or laser printer to add foiled elements to your papercrafts!

If this has inspired you to try this out, please post below. I would love to see it!

Until next time,

Verity


Profile | Pretty Little Button Blog | Instagram | Facebook

DESIGNS USED:

Oh hello by  Sophie Gallo, Design ID #264524
Magnolia branch by Nic Squirrell - Design ID #190669

PRODUCTS USED:


Monday, 16 October 2017

BIG Birthday Card for a BIG birthday


Hello, Janet here with a post about a very versatile accordion card I found in the Silhouette Design Store recently; the Expanding Birthday Candle Card by Marji Roy. It is a fantastic design for important birthdays, as it can include a candle for every year of the birthday person's age. This is done by adding whole 'pages' of eleven candles, and then trimming away the flames of the surplus candles.


This was the perfect card to take along to a combined birthday party we've been invited to recently - a 130th Birthday. Perfect, that is, except for the number of candles required. This was the ideal time to use adhesive-backed cardstock, a real time-saver! The designer has an excellent tutorial on how to put the card together and how to calculate the number of pages needed (link in the file listing in Silhouette Design store). In this post I've shared some additional tips including how to further personalise this card design.


Using Self-Adhesive Cardstock

I used the Silhouette Adhesive Cardstock which comes in 12 inch square sheets. I didn't have any orange, so I made my own, using Silhouette's double sided adhesive sheet on the back of a piece of textured orange cardstock (that's why it has yellow backing in the picture below).


Assembly

I followed the designer's instructions, but found it easier to apply the red part of the flames BEFORE the white candles as the candles overlap the red part of the flame slightly.


Adding Ages

By way of explanation and to add more interest, I added the ages of the birthday couple.  The file comes with numbers, and I added a plus sign. To find a suitable font I typed the plus sign and then scrolled down my font list and stopped when I found one of similar thickness to the numbers (sorry, I didn't make a note of the font name).

Then I added an offset to the numbers and mounted the original and the offset on to the card front.


Amending the Sentiment

Although not strictly necessary, I liked the idea of making the 'Happy Birthday' sentiment plural.  I ungrouped the sentiment provided and added an 's' using the same technique as for the plus sign above.


This time 2 offsets were needed to match the original.


Adding a Greeting Panel

I made a greeting panel to attach onto the back of the card, with 3 coloured layers and one white layer.  On the white layer I added a quotation about candles and sharing, attributed to Buddha (incorrectly, according to some websites) which seemed appropriate for this occasion.


I used the Sweet Pea Sketch font and a green/blue glitter pen from the Silhouette® Sketch Pen Starter Set. The whole layered panel was then attached onto the back of the card.


The finished card is pretty BIG, but a fun card to take along to a BIG birthday party!


Do let me know in the comments if you've used this file. I'd love to know what 'extras' you added to it.

Bye for now,


   Profile | Crafting Quine Blog | Instagram @CraftingQuine


DESIGNS USED:


PRODUCTS USED:

Sunday, 20 August 2017

Make your own adhesive patterned paper (or cardstock)


Hello Janet here sharing a trick I use all the time for transforming favourite card and paper into adhesive backed media. The sheets can be used right away or kept for future projects; with the peel-off paper backing they store perfectly.

Using adhesive backed cardstock saves time, adhesive, and often a good bit of mess. They are great for unusual shapes and batch projects. I love the  Silhouette Adhesive-Backed Textured Cardstock which comes in a wide selection of lovely colours, but not in patterns. So today I'll show you how to make adhesive sheets from your own cardstock or designer papers.


I use the Silhouette Double Sided Adhesive sheets to make them. I've tried other brands, but they tend to have thinner backing paper and I've had them stick badly to my mat when cutting and have torn and taken an age to peel off.  The Silhouette brand peels off the mat easily and having a thicker backing has the bonus of giving the paper/card additional strength and rigidity. The Silhouette sheets come in a pack of eight 8.5″ x 11″ sheets.


What You'll Need

Paper or Cardstock
Silhouette Double Sided Adhesive


Making Adhesive Backed Sheets


Place your chosen paper face down on a clean, flat surface.


Peel the yellow backing half way down the adhesive sheet.


Carefully align the adhesive at one of the corners, smooth out and then press firmly.


Trim your paper if you wish, then use for a design or store for later use.


Cutting Adhesive Backed Sheets

Place the adhesive-backed paper/card on a cutting mat patterned side up.  As you only want to cut to the backing paper, and not all the way through, your cut settings will be similar to those when cutting the unbacked paper or card. Carry out a test cut to be certain.

When your settings are correct the pieces easily peel off the backing paper.


I used the patterned paper to decorate these 5-Sided Pillow Boxes by Carina Gardner from the Silhouette Design Store.

It was quick and easy to stick all 33 pieces on, and even the patterns matched correctly!


I hope you find this useful. Let me know in the comments below, or share a picture of your finished item over on the Silhouette UK Facebook page.


Bye for now,


   Profile | My Blog | Instagram


DESIGNS USED:


PRODUCTS USED: