Showing posts with label beginner. Show all posts

Wednesday, 12 December 2018

Design of the Week 'Joy To The World' - 11th December 2018 (A Beginner's Tutorial)


Hello, hello - it's Wednesday so it must be DOTW day!


Today we have a very usable design - you could cut it from htv and use it on a t-shirt or a baby onsie, use it for a card or scrapbook title but today I have decided to use it for a simple, but effective, parcel tag.


I started by opening a tag shape from my library, I used this one but you could use any one you have. This one is on sale at the moment and is only £0.39!


I removed everything but one of the tag shapes by ungrouping the design and deselecting one tag then using my delete key to remove everything else. 


Next I resized the tag to 4.75 tall and 3 ins wide.
1. Chose 'Transfer Panel'.
2. Select 'Scale'
3. Lock the padlock by clicking on it (this will keep the ratio the same) and change the width dimension to 2.5ins,


Add to your tag. 

(1) I then choose a font called Curly Tail as this was one that I already had and looked quite similar to the other writing.


I wrote the words 'love and' and changed the font size to 100.(2) Finally, I welded the letters together (3)


Add this to your tag also.


Next, you are going to differentiate the cut areas from the sketch pen areas.

Ungroup your 'Joy to the World'


Select just the J Christmas Tree and Y and and the tag 'hole' - use ctrl x to cut them from the design.
Change all the remaining design to a blue line.


Add an offset to just the tag by selecting the tag and using the offset button.


Before deselecting the offset change the line colour to red.

ctrl v will paste back the word JOY.  Drag the Christmas tree off your canvas and you will then have all the cut lines in red and all the sketch lines in blue. 


Group all the blue lines together and all the red lines together. Then ctrl x and remove the red lines.
Put a sketch pen in your machine and using the correct settings for sketching sketch the blue lines.  DO NOT REMOVE THE MAT FROM YOUR MACHINE.  ctrl v to return the red lines, select the blue lines and ctrl x to remove them. Cut the red lines.  You can now backfill the J and Y with red paper/card.

The final step I took was to make the Christmas trees. Copy the tree ctrl c and paste onto a new canvas ctrl p ready to cut from green card.  I decided that I wanted to add gems to my tree so ungrouped it and removed the little circles so that only the tree was cut out.  Once cut I added the tree to my tag with foam pads  and added the gems.

I hope this very long tutorial has been helpful and given you lots of tips and tricks.

See you again next week x


Monday, 23 October 2017

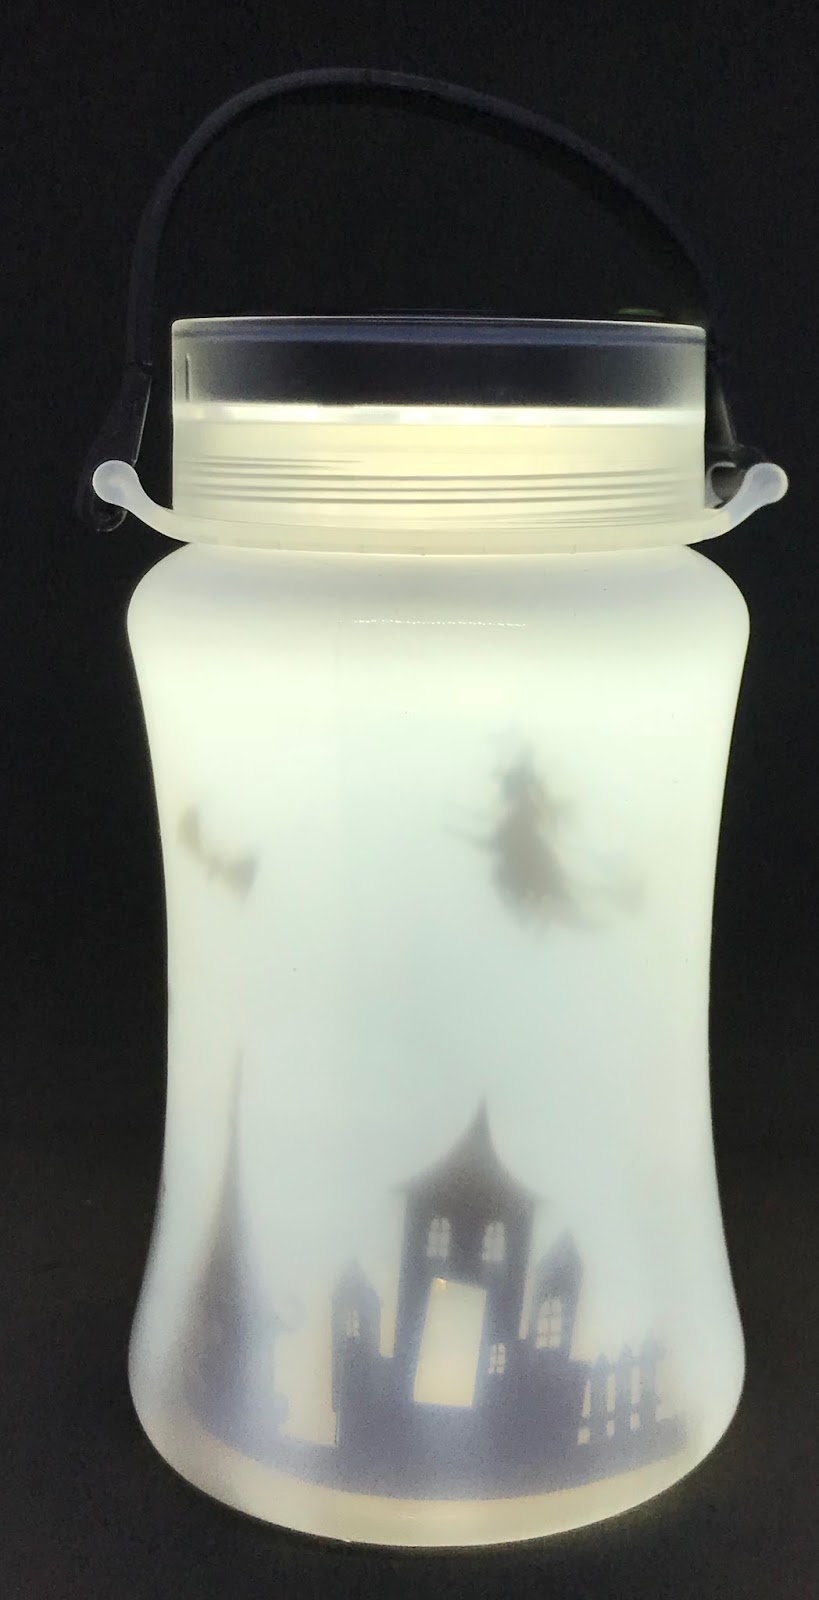
Trick or Treat safety lantern.

With Trick or Treating just around the corner and the nights getting darker, use this little trick to help keep your little one safe while out and about this Halloween!


Turn any storm lantern into a temporary spooky Halloween lamp.


Open a new project in Silhouette studio and select some spooky silhouettes from your library (or from the Silhouette store).


Trim a sheet of paper to the correct height to fit within your lantern. Measure the inside of your lantern by rolling up the sheet of paper and placing it inside the lantern. Allow the paper to unroll until it touches the sides, mark the paper where it overlaps. Remove the sheet from the lantern and trim off the access. Measure the sheet of paper and create a rectangle the same size on your virtual workspace.
 Use the scale tool located in the top toolbar to easily get the correct measurements. This rectangle gives you a guideline to keep your design within. I have turned this line blue as I will cut it separately from the main design.

Arrange your silhouettes within the guidelines.


Tip: Remember that the left edge will meet with the right edge when curled around inside the Lantern, make sure they will match up. You can check this easily by copying your design and placing the copys next to each other. Remember to delete the copy before sending to the cutter.

Load a sheet of acetate onto the cutting mat and load into your machine. click "send" in the software.

When the send window opens choose cut by "line" and ensure that only the blue line will cut.

Tip: Active cut lines are bold and inactive lines that will not cut on this pass are faded. 

Choose the correct cut settings for your media and remember to carry out test cuts to ensure a clean cut.  Send the project to your cutter and allow the job to complete. unload the mat and remover the media.
Place some dark coloured vinyl on the cutting mat and load into the machine.

 In the send window unselect the blue line cut and select the red line to active cut.


Select the correct media in the material list and carry out test cuts to ensure a clean cut. Send the project to the cutter and allow the job to complete.  Unload the mat and remove the media from the mat.
Remove all the unwanted pieces of vinyl leaving only the design on the backing sheet. Lift the design from the backing sheet with some transfer tape and apply to design to the piece of acetate.


Roll the acetate so it fits into the lantern. Lower into place and allow to unroll to the inside edges of the lantern. Replace the lid in the lantern and enjoy some safe trick or treating.


After all the fun, simply remove the sheet and store for next years fun.


Desing used:

haunted house border.studio by PHOTOPLAY

PRODUCTS USED:

Light hold cutting mat for Cameo


Saturday, 16 September 2017

Kids Craft personalised bookmark

With the start of a new school year, a whole new group of friends could be on the horizon. What better way to forge friendships than an after-school craft party. This little project will not only keep them busy expressing themselves but also gives you the chance to learn everyone's names, (I can never remember anyone's name but I can remember what they made) here's a fun little bookmark project suitable for all ages.

Open silhouette studio and type the intended participants names by clicking on the text tool and then on your virtual page, use your keyboard to add names.
 By opening the text panel you can choose any a font that is installed on your computer, simply select one from the drop-down menu. If you are unsure what your text will look like in a particular font simply type the word and select the word by clicking at one end and dragging the mouse to the other end, the word will become highlighted click on any font type in your menu and the word will change to that font ( you can scroll through all your fonts one by one using the arrow key on your keyboard .   Big blocky fonts work best for this project. I have chosen Accord Heavy SF, bear in mind the age group you are working with when making your choice.

Select a flag type file from your library (lots of different styles are available from the silhouette store if you do not have one). You will need a flag for each name. Resize each of the names to make it fit nicely inside one of the flags.

Arrange the flags and names to make the best use of your media. I am using silhouette chipboard as its sturdy but not too bulky to place inside a book.(ensure your page settings match the size of your media).

 Select some designs from your library or the store to use as embellishments. Resize the designs so they will fit onto the flags. This is done by clicking on one of the boxes in the corner of the design and dragging it inward.
Arrange the embellishments to make the best use of the media.use the rotate button located in the transform panel to rotate you pieces where necessary.
Send the project to your silhouette from the material menu select chipboard and carry out a test cut, adjust the settings if necessary. Click send to cut your project.

Give each child a flag and place all the letters and embellishments in the center of the table with some markers and/or paint, perhaps put out some glitter and gems.
Let the children's creativity flow.
For younger children, this project also works well if the letters and embellishments are cut from silhouette self-adhesive card  weed the unwanted card away leaving only the "stickers"


Designs used:

File: flags
Artist: Silhouette
File: brontosaurus dinosaur set.studio
Artist: Studio Ilustrado
File: car.gst
Artist: Silhouette
File: Heart.gst
Artist: Silhouette
File:flower
Artist: Silhouette

PRODUCTS USED:


Light hold cutting mat for Cameo

Wednesday, 13 September 2017

Faking foam and chipboard thickers

Hello friends!

It's Maria here with you today with a very quick tutorial to fake thick letters and alphas, also known as "thickers". In the scrapbooking world, thickers have become almost a "must have", but unfortunately they are not the cheapest and you are also quite limited with the words and phrases that the packs come with.

So I decided to fake my own thickers today, by just adding lots of layers of the same word one on top of the other.


What you will need:

- Silhouette Cameo or Portrait
- Cardstock (I've gone for white, but you can choose any colour you want. You could even make each layer a different colour, that would make it look quite cool!)
- Glossy accents or similar

Instructions

This is a very straight forward tutorial, so hopefully it will be easy to follow along!
I opened my Silhouette Studio and chose the font that I wanted to use. I knew I wanted it to be script, but not too thin as it needed to be easy enough to handle for gluing. My font is called "grassy meadow bold"


Don't forget to weld so all those extra lines go away!


Now I need to enlarge my word. There are several ways to do this, the most common being just dragging from one of the corners of the word. However, I wanted to try a different way today, so I went to the transform section and changing the scale to 150%, which is perfect for what I needed.


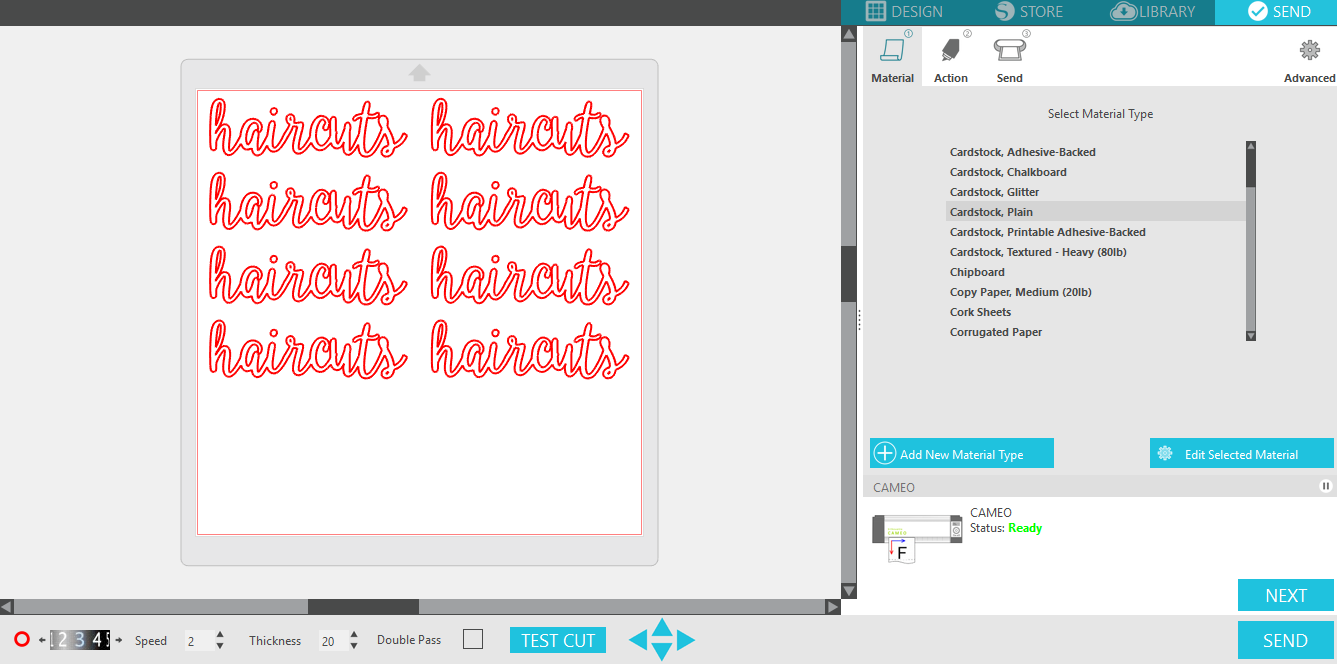
The next step is copying and pasting the word so I can cut it several times. The easiest way to do this is with the Duplicate function, and filling page. 


I got twelve repetitions of the word, which were too many, so I went ahead and deleted some of them.


And finally send to cut! I have slowed down the settings because some of the lines are still a bit thin in the words.


And here they are!


I carefully glue all the layers on top of each other (although not carefully enough!)


Once all the layers are glued (I used 6 in the end, as it was thick enough for me), I used glossy accents over the top. The nib of my glossy accents is a bit broken so I was spreading the glossy accents with a needle to make it reach the edges.


And this is the layout I've created with my "fake thicker"! 


Thanks for joining me today, and read you very soon!


PRODUCTS USED