Wednesday 31 August 2016

Whats Happening Wednesday

Hello Everyone, Welcome to another Whats Happening Wednesday post....


First of all thank you for everyone who joined me last week for the Launch of the Cameo 3 on Create and Craft TV - we had some really busy shows so what started the day as Cameo 3 Launch ended the day as a Curio show! 
I think by now most people have received their machines and I hope you are enjoying them, we are aware of some software issues and are working closely with Silhouette America to resolve these for you as soon as possible (more updates on this on our facebook page) if you do need to contact us with an issue please include as much information as possible in your email and send it to support@graphtecgb.co.uk


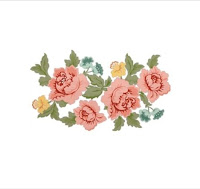
This weeks design is this trendy "You Rock" card, with the design you get all of the elements to cut the design and also the design to print and cut so you really get the best of both worlds this week, our lovely Design Team Member Janet has made this card, I love the colour combo! Visit her blog to see the full tutorial HERE


We also have a little bonus project for you :)
Those of you that have downloaded the Free Crafter Stitch font that Nadine made for us will be pleased to know she has added a tutorial on how to use it for a print and cut over on her own blog HERE
If you missed out on the free font, worry not as you can still get it via this blog post

That is it from us for this week, I am hoping to have a little competition for you for next weeks post so please stop by.
We also love to see what you guys make so if you do want to share any of your projects with us, we may even share them on here from time to time please feel free to share them by emailing marketing@graphtecgb.co.uk

See you next week


Tuesday 30 August 2016

Canvas Using Printable Heat Transfer Material.


Hello, Karen here with another use for your Printable Heat Transfer Material.  I wanted to make a canvas for my home and decided to try to add some extra detail using Printable Heat Transfer Material.  My canvas was 8in x 20 in so after adding the text I had ample room to add some pretty flowers at the top and bottom.

You will need:-
A canvas 8in x 20 in (I got mine from The Works for £3.00)
Printable Transfer Material for light coloured fabrics
Vinyl
Transfer Tape
Misting sprays
Printer
Cameo/Curio/Portrait
Universal Scraper

STEP 1 - Preparing your canvas.

  • First, I sprayed my canvas with coloured mists that I had mixed up for a previous project, making sure I only lightly misted the top and bottom of the canvas where I wanted to add my printed elements. 
  • I opened my design and, as luck would have it, it was the perfect size for my canvas so I didn't need to resize it. As I we are not a particularly 'loud' family but are very silly I wanted to swap out those two words.  I did this by ungrouping the words in the file, deleting 'loud' and writing 'silly' in Times New Roman 72pt and then moving the words around to accommodate the larger word. I then regrouped them ready for cutting. 

  • Next cut the vinyl using the suggested settings and then used transfer paper to remove it from it's backing and place it onto the canvas so that the dot of the 'i' was 4.5ins from the top of my canvas and .75 in from the left.
  • I used the Silhouette Universal Scraper to press down my letters so they were firmly adhered.

STEP 2 - Printing and Cutting your flowers.

  • After opening the print and cut file I realised that this too was the exact size I needed for my canvas. 
  • There are two ways to go about the next step 
    • you can either print your flowers with registration marks so that your machine can scan for them and work out where to cut your printed element or
    • You can use a PixScan mat which is what I did.  I tend to use a PixScan mat as I have poor light in my cottage and often have to shine a light into my Silhouette to get it to scan and recognise the registration marks.
  • If your printed design is directional you will have to flip it horizontally in the OBJECT menu under MIRROR then FLIP HORIZONTALLY.  As it doesn't really matter which way these flowers go I didn't do this.
  • I ironed the Heat Transfer Material onto my canvas
  • The final step in my process was to stand back and admire my beautiful canvas.


DESIGNS USED:


PRODUCTS USED:

Pixscan cutting mat for Cameo

Monday 29 August 2016

Bling Bling - Gorgeous Rhinestones


Lets talk Rhinestones. I LOVE a bit of bling and the rhinestone star design really appealed to me - I think becuase of the burst effect and that a lot of the holes were random rather than in straight lines. I cut this design onto a piece of white card. I then backed the holes with a piece of black card becuase I didn't have the largest rhinestones and I wanted some of the black to show through on those larger holes.

The design came up with a warning about not re-sizing. This is becuase the holes are set to be the exact size of the rhinestones so re-sizing would mess that up. I moved the design to where I wanted it on my background and ungrouped then removed the words of warning.


Then I spend a few hours setting all the rhinestones. I didn't have any of the big ones, so just used the medium ones in the large holes and some of the black therefore showed through which I wanted and I absolutely LOVE the effect!


Just gorgeous, I'll be getting my Rhinestone Setter out much more often now!

Happy scrapping xx 


Designs Used:
Star Inverted Rhinestones


PRODUCTS USED:


Sunday 28 August 2016

Pop Up Christmas Card


Hello, Karen here with a little Christmas project - I know Christmas is several months away but I love Christmas and am always eager to get started with little Christmas projects.

I was inspired by Hilary's shadow box tutorial here and thought 'hmmmmmmm I could make a Christmas card using vellum and a tea light'!

You will need:-
White Card
Vellum
Kraft Card
Cameo/Portrait/Curio
Sketch Pens
Battery Tealight.

STEP 1 - preparing your cut file.

  • I wanted to use a house for the inside of my card and the file I chose had far too many elements so I only used enough to make my house look cute but not so many it looked over complicated.
  • I ungrouped the file and deleted the parts I was sure I wouldn't use.  In the screenshot below I have left them in the position they are on the file so it will be easier to identify which ones I saved. 

  • I moved all my shapes closer together, grouped them, and in the SCALE increased the size to 150%.  
  • I selected the shape with the house front details on and in the MODIFY window chose RELEASE and removed everything but the three windows and the outside shape, regrouped them.  
  • Next I aligned this to the main house shape and deleted the outside shape so that I could cut my windows in the correct position. 
  • To get an idea of which pieces had to be cut in which colour I moved all the sections into place and coloured them using the FILL COLOUR WINDOW.  I also added a rectangle (although the one in the screen shot below is rounded I decided on a square cornered one as this covered all the 'pop up) at the bottom of my house measuring 3.5ins x .5in and resized the whole design to3ins high, 

  • The final step in this part of the tutorial is to separate all your pieces into the correct colours. 

  • NOTE at the last minute I decided to cut some holes in my Christmas trees so they looked like they had lights on them

STEP 2 - Making Your Pop Up Card Base

  • Draw a rectangle 5ins wide and 10 ins tall.  
  • To the bottom half of this rectangle I added some holly leaves, a sentiment and a faux stitched boarder.  Although I am using cut files for this I am drawing them with a sketch pen - see this post for how to convert cut files into sketch files.  I also ungrouped the holly file so that I could rotate one of the leaves to give a better corner shape. I used Ctrl X removed the rectangle and used sketch pens to draw the front of my card.  See my previous blog post for detailed tutorial on how to change cut files into sketch files. 

  • I used Ctrl V to replace my rectangle and deleted the sketch part of my design.  I drew a line across the centre of the rectangle and in the LINE STYLE WINDOW changed it to a perforated line.
  • I then drew a 3.5in square and drew lines across it at .5in, 2in, 2.5ins and also changed these to perforated.  I drew a 1.5in circle in the centre of the 1.5in section.

STEP 3 - Constructing Your Card

  • Fold the 3.5in x 3.5in piece of card along the score lines to make a box and glue the first .5in side to the front of your card the last .5in bottom of your card.


  • Cut your house x 2 and piece together. You may notice that I haven't used the bow for the wreath as this turned out to be far too small. Construct your houses, only one is constructed onto the 3.5in x .5 in rectangle you cut earlier.

  • Put some vellum behind the three windows of your houses.
  • One house is stuck onto the front of your card and the one with vellum windows is stuck to the front of the box you have constructed inside your card.
  • Cut out your Christmas sentiment and adhere on the inside of your card above your house
  • Add a battery tealight to the hole in the box and your card is finished. 
As I said it is never too early to start your Christmas preparations and as I usually make 50 cards each year I shall be making several of these for the people on my nice list!


DESIGNS USED:


PRODUCTS USED:


Saturday 27 August 2016

The Story of Us - Gallery Wall

Hey there, Niki here again today with another gallery wall project - they are becoming my signature and my house is slowly becoming filled with them! I just love photos and wall art and I want to fill my house with pictures of my beautiful family.

This gallery wall is all about the photos. It features 'selfies' of me and my husband pre-children. I have selfies in quote marks, becuase we've been taking photos of the two of us in this way LONG before they were called selfies - I think we were ahead of our time! Lol

So this wall is called 'the Story of Us'. It starts with a photo of us on our first ever holiday together back in 2005 and ends with our wedding photo in 2010. We have plenty of photos of us around after our wedding and with our children (who pretty much came along straight away) so it is lovely to have a space dedicated to just the two of us, and the fun we had together before holidays changed forever :)

So I've had the photos sorted out in frames for a while now so I just needed to sort the pretty bits to go in between. I decided to stick to silver vinyl and phrases containing the word 'story'. This first one is quite large as it is effectively the title of our wall, whilst the others are quite small, designed to fit amongst the pictures.


I cut the vinyl using the default vinyl settings - I love that this is so easy and that I don't have to think to hard about how to set my machine!

Once eveything was up on the wall I decided that I needed a few hearts to fill in some gaps so I took the heart from one of the cut files above and cut it several times.

Here is the finished wall - it looks fab in real life and is a wonderful addition to my home.

I hope this inspires you to get some photos up on your walls, this gives me such joy every time I walk past it and everyone who sees it thinks it looks amazing (including me lol!)


Designs Used:
Sail Away Font (used for The Story of Us)


PRODUCTS USED: