

Hello everyone! Marie-Clare here with a simple design project using Silhouette Studio as a simple desktop publishing tool. Did you know that this free software is as powerful as some bought packages? It's great!
My little boy is starting to recognise letters, so I wanted to make him some sight word cards.
These can be cut using your Silhouette Cameo or Portrait using Print and Cut, but they can also be designed in Studio and cut with a paper trimmer.
You will need:
- Silhouette Studio
Step One
 Open a new document and use the Design Page Settings button to set up your page size. I am using a standard A4 page. You can deselect the "Show Cut Border" check box because you are not going to be cutting this sheet. (At this stage, if you are cutting your cards with your Silhouette machine, set up registration marks)
Step Two
Use the shape tools on the left hand side of the drawing space to draw a rectangle for your card. I then used the rounded rectangle tool to add a border inside this.
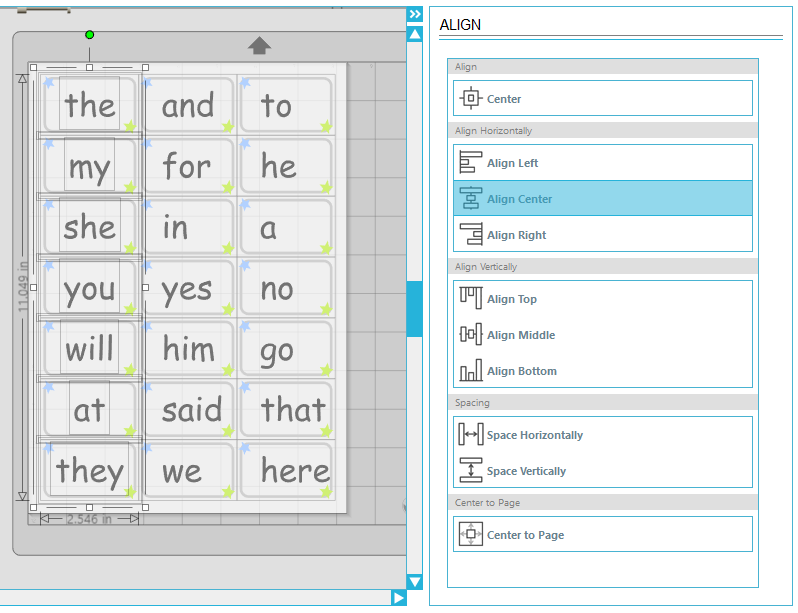
Select both of these shapes and open the Align tool (top right toolbar), then click "Align Center" and "Align Middle".

Step 3
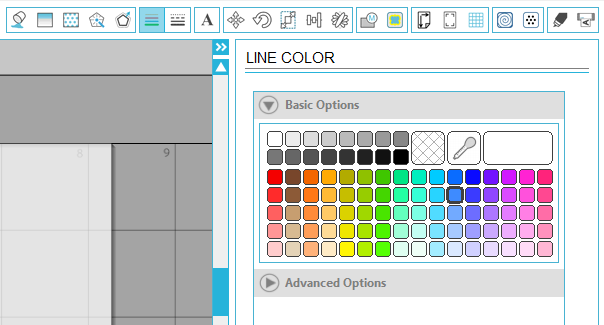
Use the line colour and line style buttons on the top right hand toolbar to change the colour of the rounded rectangle and adjust the weight of the line. I went for a grey colour and a 6pt line.

Step 4
Add some embellishments if you wish. I used the polygon tool (left hand toolbar) to draw a very simple star, then copied and pasted it into two corners. I used the fill tool to change their colours.


Step 5
Use the text tool (top right toolbar) to select a font, and write your first sight word. Resize it to fit inside your card shape.

I used the system font Comic Sans because it uses similar letter shapes and forms to early readers and writers.
Now, select the designed part of your card (rounded rectangle and two stars) and right click to group them together.

Step 6
Now comes the clever part. Select your entire card, and go to the top right toolbar. Find the Replicate tool (it looks like a little flower!)

Scroll down until you see the "Row of three" and "Column of four" option. You can select "Fill Page", but I find I can squeeze more in just by doing it myself.
Click "Row of three".

Then, with all three shapes selected, click "Column of four" and repeat until your page is filled.

Step 7
Because you didn't group the text to the design, simply double click each "the" and replace it with a different sight word for each card.

Then, select the entire first column and use the Align tools to align "center". Repeat for the second and third columns.
Step 8
Send your file to print, and use a paper trimmer or scissors to chop up your new simple sight word cards!


No comments:
Post a Comment