

In my previous blog post on 5th August 2016 I showed you how to make a temporary lightning tattoo and Harry Potter style glasses. This week I am going to show you how to make a) the banner and b) a sorting hat with a scratch off area to see to which Hogwarts' House you have been assigned, and a tiny owl to attach to a straw, just because it is cute!

EQUIPMENT:
Silhouette Cameo + mat
Printer
Scratch off sticker sheet
White card
Twine
Witch hat Loni Stevens #13410
Smart Owl by Silhouette #79470
Font: LD Lightning by ScrapnFonts #133919
STEPS:
The banner
Open the hat file from your library and onto the work area. As always, select, ungroup, and fill the pieces with colour. Rearrange the hat band and hat together if you want to print them as one piece, which I did. Group them. Select the hat and change its cut settings to Cut edge.
To make the holes for the twine, draw a small circle about 2mm diameter, copy it. Align both of them and space them apart appropriately to fit the hat. Group the hat plus the holes and then copy as many as you need.
To add names, Click on the Text tool (LHS). Select the Font style LD Lightning and write the names you want on the hats. I used fill colour white. Make sure you select all the names and select No cut settings for them! Place the names on the hat brims and make them an appropriate size. For the banner, my hats were 9cm wide.
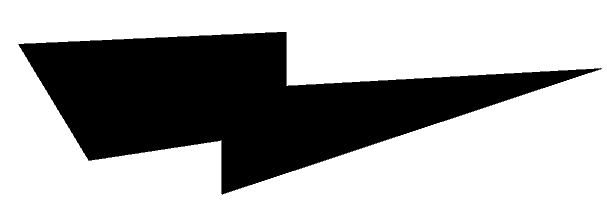
I showed you how to make this lightning shape in the earlier post (18th August 2016), but here is one you can Right click, and Save As to your desktop. Within Silhouette, click on File/Merge and select the image from your desktop. Now you can trace it. Delete the image and fill the shape with colour as you want. Make holes as you did earlier, and place them on the top of the lightning bolt for the twine to pass through.
I kept the stars separately to glue on top. I also cut extra to sprinkle on the table. Here was my layout.

Switch on your registration marks, print the design onto card, and then cut in the Silhouette with the blade at the right height and the correct settings selected within the software for your thickness of card.
The Sorting Hat scratch card and Hedwig straw decoration
I am aware that for young children, this might end in tears, so it depends on their age and emotional make up, whether this is a good idea! My thought is that if you have many children, or adults, it would be a fun way to divide them into groups for a quiz, or a game.
The four houses are: Gryffindor (Lion), Slytherin (Serpent), Ravenclaw (Eagle) and Hufflepuff (Badger). There are many lovely insignia images on the internet, but to avoid copyright issues, I just used the names of the houses. The tiny Hedwig owl (with glasses) was simply too cute not to use, so I have attached him to a straw for fun. My owl measured 3.5 cm in width. The hat I used was 7 cm across. The small strip of paper was 1cm x 3.5 cm.
As before, make as many hats as you need. I made the band white this time to allow House names in different colours. I then copied the shape of the hat band which is cut from scratch off sticker sheet, then stuck on top of the card hat.
Open the owl file and ungroup the pieces. Colour fill the pieces and re-construct the owl. Group it all and select Cut edge. The small strip of paper is glued to the back of the owl, allowing a hole through which the straw can go, and be held.


PRODUCTS USED:
 |
 |
 |
More fabulous ideas for a Harry Potty themed party, the sorting hat idea is inspired!
ReplyDeleteHi I'm new to all this how do you get all the different colours from one sheet please thanks Reggie
ReplyDeleteThere is an excellent beginners' print and cut tutorial by my colleague Niki, here
Deletehttp://silhouetteuk.blogspot.com/2016/04/a-beginners-guide-print-cut.html
Hi Reggie. Welcome to learning about your new machine. What I am doing here is something called a "print and cut" technique. You buy a file from the design store, it imports to your software and then you follow the steps in paragraph one, however if that seems like a foreign language, you need to read through some step by step tutorials that you can google on the Internet. The silhouette School is a good starting place.
ReplyDeleteThe basic answer to your question is select a a shape, then go to the fill colour tool on the top menu and fill with a colour of your choice. I hope that helps.