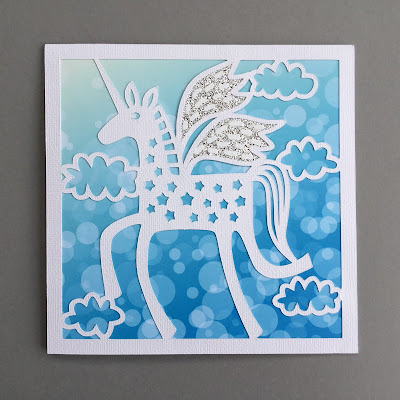
Hello, Janet here with a quick and easy card style. I love to take my time crafting a card for someone special, but sometimes there just isn't the time and a card is needed RIGHT NOW.
When you need a card in a hurry it's a great opportunity to use adhesive cardstock; no need to get out adhesives, scissors or protective mat. Just cut, peel, press and your card is made.
The Silhouette Adhesive-Backed Cardstock comes in 12" x 12" canvas textured sheets with peel-off backing paper. The Essentials Pack contains 16 sheets; four each of black, white, warm grey, and cool grey. 25 sheet packs of single colours are also available of which there is a huge range, my favourites being Mint, Strawberry, Key Lime, and of course, White. See some of the lovely colours in use in my Vertical Text card.
The quickest way to make this Unicorn Card by Nic Squirrell would be to cut the whole thing from light to medium-weight cardstock, but then the card would be pretty flimsy. Heavy-weight cardstock would probably be too thick for such an intricate design. I'll show you how to make it as a separate card front mounted on a heavy-weight card blank. This means an extra step, but with no compromise on quality.
What You'll Need
Silhouette Adhesive Cardstock
Card blank
Unicorn Card design by Nic Squirrell (#176308)
Scrap of silver paper
Patterned paper
Re-size the Card
Resize the whole card to make it compatible with card blank and envelopes.
Its quick to resize the design by entering the dimensions on the Scale tab from the Transform panel.
When specifying dimensions, and you wish to maintain the proportions, remember to ensure the size is locked (padlock is closed) and click on the padlock to toggle the lock on and off.
Enlarge the card to fit your card blank and envelopes.
Make a Separate Card Front
Isolate the card front so it can be cut from different card than the base/card blank.
Ungroup the card and delete the score line (Object > Ungroup, select then click back space).
Select remaining parts and release the compound path (select, Object > Release Compound Path). Select the rectangle only and resize the width with as above with the lock off.
Group all the unicorn parts (select, Object > Group). Move the square across and centre it over the unicorn (Transform panel, Align tab, select Centre symbol).
Decorate the Wings (Optional)
Make optional fills for the wings.
Before carrying out the group step above, select and duplicate the wing interiors and move aside (select, right click > Duplicate).
Cut the components
Cut the card front from the Silhouette Adhesive Cardstock. This is listed in the media list as Cardstock, Adhesive Backed. Carry out a test cut if you haven't cut this media before. The settings below show the suggested settings, I was able to reduce the Force to 28 (note new terminology and layout, v.4.1.136).
(optional) cut the wings from silver paper/card.
Trim patterned paper to be slightly larger than the aperture, but smaller than the card front. (I used a sheet of the bokeh paper that I designed in an earlier tutorial).
Assemble the Card
Peel the backing off the adhesive cardstock and align the patterned paper on the back.
Align and press the combined pieces to the front of the card blank.
(optional) Adhere the silver paper wings to the inside of the wings.
(extra optional step) Cut the tiny wing decoration from white vinyl. The sticky backing makes placement of these many tiny pieces SO easy. OR leave them off altogether if you are in a REAL hurry!
Job done!
Bye for now,
DESIGNS USED:
 |
PRODUCTS USED:

|

|

|

|


Stunning card and love the Unicorn Pegasus crossbreed
ReplyDeleteThank you Katie.
Delete