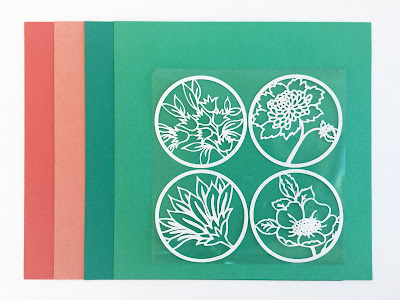
Hello, Janet here again with a cardmaking project using Silhouette Heat Transfer Material and a selection of Decorative Floral Backgrounds from the Silhouette Design Store by Alaa' K. I've made a set of floral notelets, or notecards, knowing that heat transfer vinyl will cut these detailed designs well; small enough to fit regular 127 mm (5-inch) square envelopes. There are ten designs in this style and I picked my four favourites, using four different colours of textured cardstock.
If you haven't used heat transfer on cardstock I do urge you to try it. Why, you ask? Well, it is possible to cut more detailed designs than from cardstock, it is easier to weed than regular vinyl (the vinyl itself is not sticky), it's easy to get positioning spot on, and there is no glue to worry about.
Materials Used
Heavy-weight White Cardstock
Medium-weight Coloured Textured Cardstock
Silhouette Smooth Heat Transfer Material in white
Heat Press or Iron
Strong Liquid Adhesive
127 mm/ 5" Square Envelopes
Silhouette Cameo
How to Make the Card Panels
1. Draw a circle for the card front sized at 122 mm (4.8-inches).
2. Open the designs in one window in Silhouette Studio.
3. Resize the designs to 110 mm (4.33-inches) - two will fit side-by-side on the 9-inch wide vinyl.
4. Cut circles from the coloured cardstocks.
5. Place the heat transfer material shiny side down to the mat. Cut out decorative panels, remembering to flip the design if you have added wording to your designs. I found the default smooth vinyl setting was perfect with the AutoBlade, but I advise that you carry out a test cut first.
6. Remove (weed) the excess pieces from the heat transfer and cut the designs apart.
7. Align the designs onto the circles and adhere them together by activating the adhesive on the heat transfer by pressing each pair with a heat press or iron. (To prevent the design curling up, I found it handy to turn cardstock and vinyl pairs over while waiting to press them).
Heat Press: Use a cool-ish setting. I used heat setting 6 on my Hobby Jack heat press (which I believe is around 120ºC, so a good bit cooler than you'd use for garments). Press initially for 8 seconds, and then re-press for a few more seconds if it hasn't stuck when you check by carefully lifting a corner. Ensure you use a protective layer (non-stick paper or silicon sheet) between the HTV and the hot platen. For ease I use a silicon sheet fixed to the upper platen of my press.
Iron (non-steam setting): You can use an iron (with steam turned off) with a similar temperature, but if you move the iron around, the design may shift too.
When it has adhered all over, carefully pull away the whole backing sheet and press again for just a few seconds.
Card Base
1. Take one of the coloured circles, and 'replicate' it below, overlapping the two circles as shown below.
2. Select both, and weld them together.
3. Using the knife tool, remove a slice from one of the circles. This will be on the rear of the card base and ensures that it will stand without rolling to one side.
4. Add a fold line along the card centre.
5. Duplicate and cut the card bases. Fold along the crease line.
6. Adhere the front panels to the card bases using liquid adhesive.
These small cards will be useful for many occasions and a set of them would make a great gift. Applying heat transfer to cardstock is quick and easy, I hope you'll try it out.
Bye for now,
DESIGNS USED:

|

|

|

|
PRODUCTS USED:

|

|

|

|

|


Really lovely Janet
ReplyDeleteFaith
Thank you Faith. The so easy technique is a useful one to add to a cardmaker’s repertoir.
Delete