

Hiya, Niki here today sharing this fun Christmas Layout. I loved this cut file when I saw it in the store. I wanted to cut it from different patterned papers but I was worried that I would lose the definition of the letters amongst the patterns, so I thought I would put a sketch pen offset onto them.
I started off by opening my design on screen:

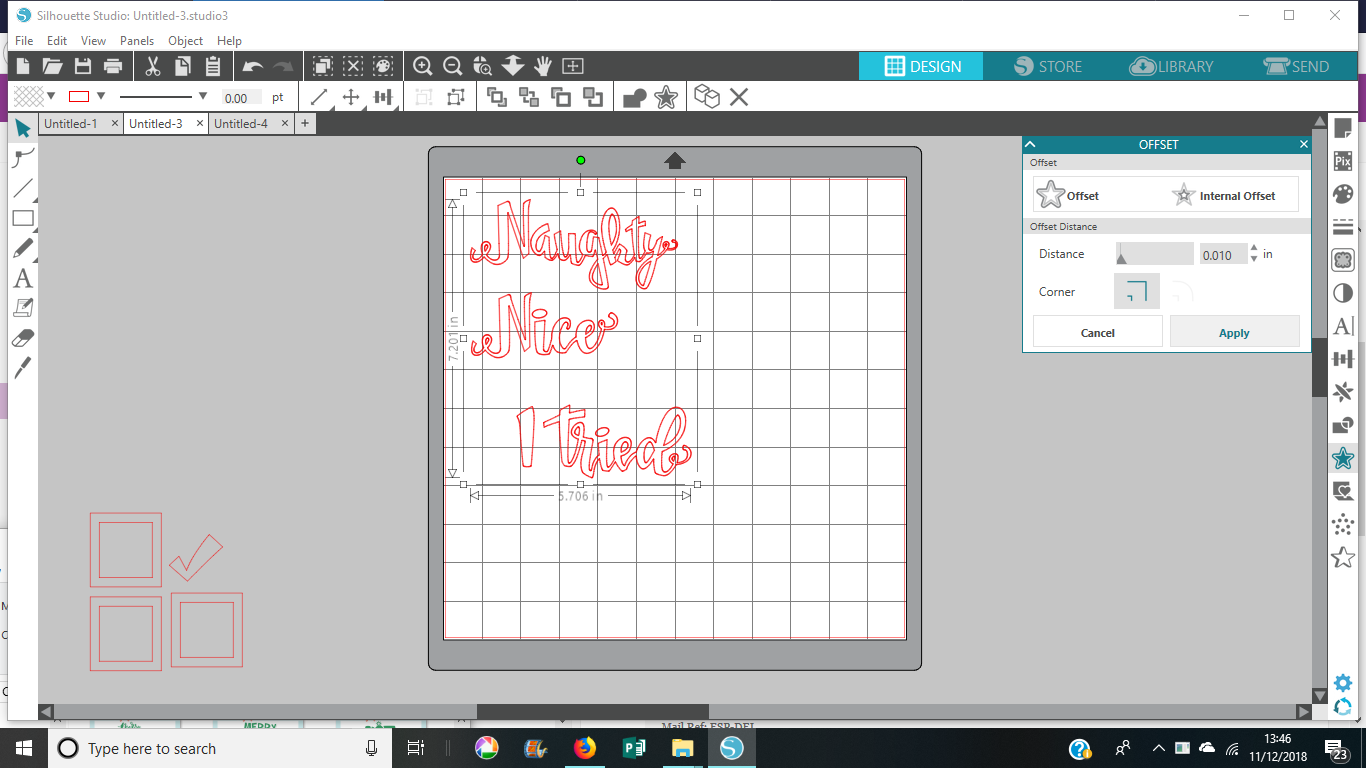
I ungrouped and removed the pieces I wanted to cut from black cardstock without an offset. I just put these to one side. I then selected the parts of the designs that I wanted to apply an offset to. I opened the 'offset' window and clicked on 'internal offset'.

This added a large offset but I turned it right down to 0.010. This puts such a small tiny offset on my design that it can't really be seen on screen!
I ungrouped the offsets and then moved the offsets (the lines I wanted sketched) over to the right side of the screen. I needed them to be separate from the lines I wanted to cut.

At this point I realised that the middle parts of the letters also needed offsets. So I ungrouped and moved the little bits out the way of the rest of the files. I created an offset (not an internal offset) for these and set them to the same size (0.010). I then left the offsets over on the right side and moved the original cut lines back onto the words so they were in the right position.

In the 'send' screen, I could then select all the offset pieces and on 'tool 2' I selected 'sketch'. They then went blue. So the red lines will be cut by Tool1 and the blue lines will be sketched by Tool2.

Back in the Design screen I could then move the offsets back onto the original files. To do this accurately I zoomed right in so I could make sure my offsets sat perfectly inside my cut lines. As you can see from the screenshot below, you can hardly see the difference!

Once all files were back together and in the right place I was ready to send to my Silhouette.

Here they are in the 'send' screen. The red cut lines aren't visable other than the tiny loops (I realised I'd missed creating offsets for these but decided not to bother!!) I then sent my file to cut and sketch at the same time.

You can see the effect here: The sketched offset is so extremely close to the edge of the design, it's given the patterned paper a great outline so that the design has definition on the edges and the words show up beautifully.

I then put together the rest of my layout. I wanted the words to show up well so I kept the rest of the layout fairly simple.


I've used a few embellishments from a mixture of this year's Christmas collections, a gorgeous sequin mix and finished off by splattering with some paint.

Thanks for joining me today. Give this technique a try, it's a really great way to make your cut files pop off the page.

Happy scrapping xx

DESIGNS USED: Naughty Nice I Tried Christmas Phrase Design ID: 231114
No comments:
Post a Comment