I am a bit of a bookgeek and thought it was about time to use this geekyness in crafts! So here are some adorable booksmarks for you to make and gifts to all your book nerds friends!
Supplies Needed:
White cardstockPrinter
Twined ribbon thread
Silhouette CAMEO/CURIO/PORTRAIT
Nerdy Hamster Design (ID #123653)
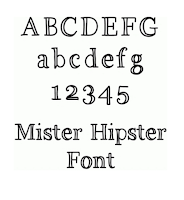
Mister Hipster Font (ID #67254)
1. Preparing your design:
- Assemble the hamster design together and group together.
- Work on the bookmark shape; create a triangle. (I chose to have the size around 15 cm x 6 cm.) Then use the internal offset option to create a a striped triangle. Make sure to change the color of the line to black and increase the line thickness to around 2.5 or more.
- Make an offset of your hamster image to approximately till the distance is about .330 cm. Duplicate the offset, so you have two copies.
- Now separate the striped triangle from the lined one and place the hamster offsets in the in each triangle in the position you want the image to be placed. On the lined triangle, gather the offset and triangle and weld them together. On the striped triangle, gather the offset and triangle and subtract the offset shape from it.
This is how it will look after you've done the welding and substracting:
Now place all the different parts together and group them.
3. Now you add the text. Choose the font Mister hipster and write your text. I wanted more space between each line so I increased the line spacing a bit (around 132%). Duplicate the text to your right to use as background later on. On the first text, choose fill color black and remove the line color (leave it at clear), to see how it will look when you print it.
On the duplicated text, you need to release compound path. Now you need to clean the text from the extra bits so when you choose compound path later on, you still get the colored background. (I chose to have the writing in white and have the standard red lines so its easier to clean). Select the text and choose compound path.
Now you can change the color of the text, I wanted it to match the hamster's bow tie. First you need to select your text, choose the eye dropper on your fill color window and and then click on the bow tie. Your text should now match the color of the bow tie.
Arrange the red text back so when you assemble them together, it will go behind the black text instead of in front. After assembling the text, group it together and resize to fit inside the bookmark.
4. Print and cut design: Set your paper to current print size and add registration marks. Choose style type 1.
Now you need to go to your cut settings, click on your design and choose "no cut". Ungroup your design and select to cut edge of only the border design.
If you want to add a ribbon to your bookmark, you can add a small circle about 0.5 cm and set it on cut.
Now you can just print your design and cut it with your machine. :)
DESIGNS USED:


PRODUCTS USED:


No comments:
Post a Comment