

Hello, hello - Karen here with a layout I made using the utterly gorgeous and very sparkly Silhouette rhinestones.
STEP 1 - Making the rhinestone template - NOTE: It is vital that rhinstone templates are not resized as this will alter the size of the holes and will therefore affect the final design.
- I started by choosing a scalloped rhinestone border from the set I had downloaded. To do this I Ungrouped all the borders, dragged a box around the scalloped border and then grouped this.

- I then chose Select All, deselected the scalloped border and deleted the rest. I now had one scalloped border.

- In the Replicate window I chose Mirror Left and moved this to the left side of my page. I then chose Rotate One Copy, then I chose Mirror Below to get my four sides. I lined them up as shown below.

- Next I deleted all the 'dots' that I didn't need by Ungrouping each side, deleting the surplus dots and then Grouping again. I then centered it to my page.

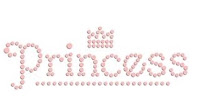
- I added my title. Once I had added my title I decided that I wanted to change the small gem at each point of the scallop to a larger one so copied one from the Princess title and used this to replace them. I also coloured the dots the colours I wanted to use on my design to help me when I placed the gems.

- Finally I used a piece of 12 x 12 card, one I knew I wouldn't use for anything else, to cut out my design.

STEP 3 - Adding the journaling.
- I temporarily added my frame to the page to enable me to work out the spacing for the text and found a quote on the internet that perfectly matched my photograph. I used Georgia Peach Sketch Font, size 48 and changed the line spacing to 60. I then removed everything but the text from the page and used my Silhouette and a white sketch pen to write the journaling.

- Next I cut the butterfly frame from a piece of white card.
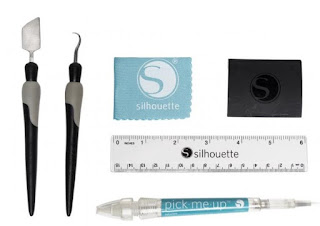
- I used temporary adhesive (Herma) to attach my template to a piece of black cardstock I had journalled on. I used the rhinestone brush to fill the holes with rhinestones. This is a good video showing how it works. I used the 'Picker' tool to remove the ones I didn't want to be small and clear and replaced them with the desired colour and size.
- I used the rhinestone setting tool to fuse them to my page.
- Once I was satisfied they were adhered I carefully removed my template. I then added my photo and frame.


DESIGNS USED:


PRODUCTS USED:


I found this absolutely fascinating Karen. I have never used rhinestones, and never done any journaling. You explained it very clearly!
ReplyDeleteThank you Hilary. It is difficult to know whether you are explaining things clearly or if the just sound clear because you know what you are doing and expect everyone else to do so too.
Delete