Hello, Janet here with a pretty table setting for a special occasion using the Silhouette Printable Cotton Canvas. Previously I've used Silhouette Printable Cotton, and so I thought I'd take this opportunity to compare the two and share the differences between these two products, and help you choose the perfect one for your project.
|
|
Packaging - These pictures show the differences in the packaging. The apparent size difference is due only to the difference in the stock photos. They are both US Letter Size, and each pack contains eight sheets.
Appearance - The canvas is thicker and more textured than the thinner, smoother, cotton fabric. It is also has a creamy white colour compared with the bright white of the cotton fabric. Both media are printable with an inkjet printer, but the colour and texture difference gives slightly different colour reproduction (comparable with printing photos on cream v. white paper, for example).
Print & Cut - Both are compatible with the Silhouette's Print & Cut feature, and should work with any inkjet printer which takes a reasonable thickness of cardstock. Just set your page size to US Letter and turn on registration marks, not forgetting to change your printer page setting to Letter size too. The media should be loaded into your printer so that it prints directly on to the fabric surface.
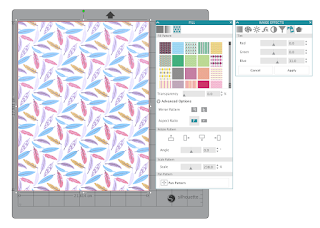
Printing - Both can be printed on through the Silhouette software. If your printer has the capability, you can print edge-to-edge (more details here). To print an edge to edge pattern, simply draw a letter-sized rectangle centred on to a letter-sized page and fill it with any pattern installed in your software. Alternatively drag an external pattern or photo into the shape (jpeg or gif format).
Basic scaling, orientation and colour editing is available through the advanced Fill options and Image Effects.
You can increase the saturation prior to printing to make the colours more vivid.
When printed edge-to-edge you have a piece of patterned fabric approximately 21 cm x 28 cm (roughly a quarter of a 'fat quarter') - great for quilting and small sewing projects.
Cutting - The Silhouette cuts both materials well and will cut out printable objects if cut lines are set up in a Print & Cut. There are settings for both materials in the Silhouette software: Cotton Canvas Printable, and Cotton Fabric Printable. The ideal cut for the canvas is a 'Kiss cut', cutting through the canvas, but not the backing paper. The ideal cut for the cotton fabric cuts both the material and the paper backing. As with other media, the ideal cut settings can be ascertained using the Test Cut feature.
Backing - Both have a stabilising layer as well as a paper backing and both are intended to be cut with the paper backing still attached. When the paper layer is peeled off the canvas, it is self-adhesive, and can be used like a printed, textured sticker. Removing the paper layer from the cotton reveals a shiny, smooth surface. This can be adhered to other surfaces with glue, or its light tack surface can be heat activated with a medium iron, to stick lightly to other surfaces. The pack instructions make no reference to this feature, and my personal recommendation is to use it as a temporary stick prior to sewing or gluing, or to keep it only for very light use.
Sewing - Both of the materials can be sewn by machine or hand, but I feel that the sticky backing on the canvas is a little tacky for extensive sewing.
MAKING THE FEATHERS
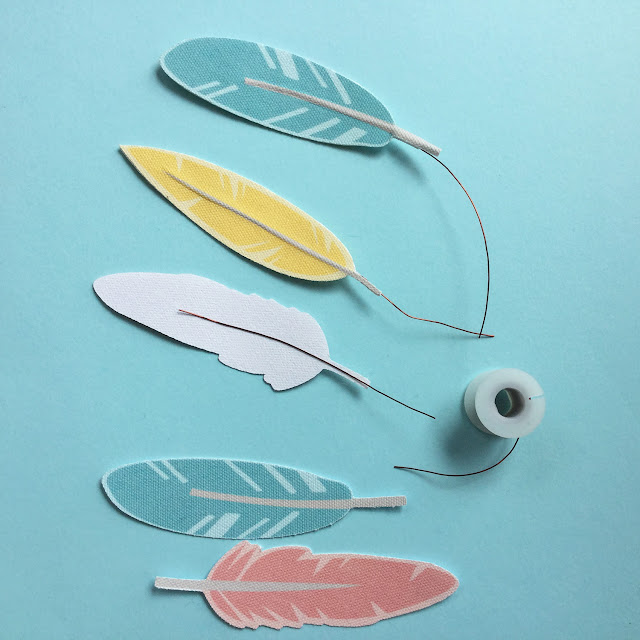
I used the Printable canvas to give a more rustic look to this project. The feathers were cut in pairs and the adhesive backing made it quick to assemble the feathers, paring them back to back.
STEP 1 - Set up the Print & Cut
In Page Setup change the size to US Letter. Tick the Show Print Border and Show Cut Border. In the Main Menu (top of the page), change the Print Page Setup to Letter size. When you look at the virtual mat, the registration marks are joined by the cut (red) line, and the print (grey) line is visible within the page borders and outside the cut line.
STEP 2 - Prepare the Design
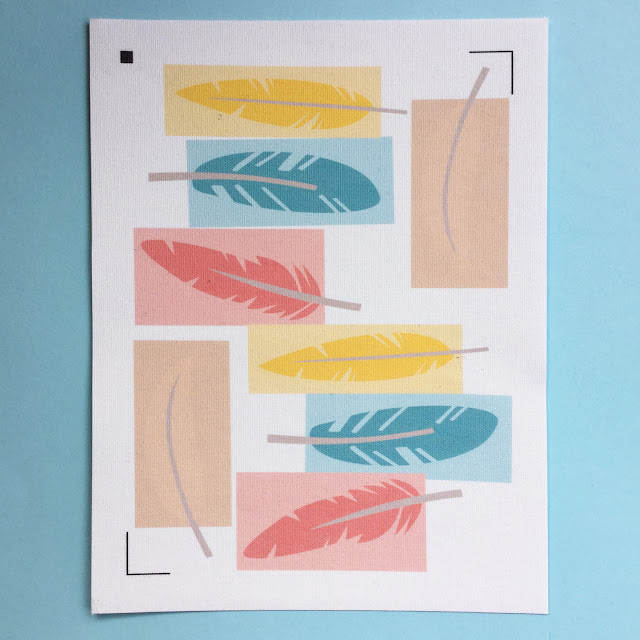
Arrange the feather pieces to form whole feathers and add colour fills using the colour picking method (detailed here). Add boxes around the feathers filled with the background colour in case the cut lines are a little off (printers call this a 'bleed'). This can also be achieved by making external offsets, although drawing boxes is quicker. Make all the lines clear with the exception of the cut lines around the feathers. Make mirrored copies of the feathers (highlighting each feather in turn, open the Replicate panel, Replicate tab, and make a mirrored copy). Arrange them to fit within the red print line.
STEP 3: Print & Cut the Feathers
Ensure that the Page Setup is still set to Letter (the grey print line should still in the correct position from Step 2) and send your file to print having first increased the Print quality to best. Mount the printed sheet on a cutting mat and send it to cut using the appropriate cut setting to achieve a kiss cut.
STEP 4: Assembling the Feathers
Remove the feathers from the backing sheet. Cut a short length of wire, placing it on the back side, along the central vein of a leaf. Place a mirror image of the feather on the back and run a fingernail along both sides of the wire to make the vein stand proud of the leaf. Trim the excess wire.
STEP 5: Finishing the Feathers
Arrange the feathers on a napkin as desired. Here I've placed them under a piece of twine tied around bands of felt and a strip of feather patterned fabric cut from a sheet of canvas printed edge-to-edge.
These will make my table settings look great for the party. Once the occasion is passed I have further plans for the feathers. I'll be repurposing them to add to some dream catchers I'm putting together - there is quite a selection in the Silhouette Design store.
Bye for now,
DESIGNS USED:

|

|

|
PRODUCTS USED:

|

|

|

|

|


No comments:
Post a Comment