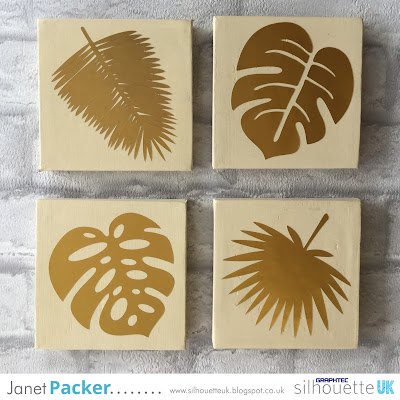
Hello, Janet here with a quick and easy contemporary home decor project featuring a set of mini painted canvases and the Silhouette Printable Gold Foil. The printable foil comes in three colours: silver, gold and rose gold, in a pack of eight, 8.5″ x 11″ sheets. These gorgeous sheets are self adhesive and inkjet-printable.
To decorate the mini canvases, I used some of the tropical leaf shapes by Amy Robison (#83624, #83618) from the Silhouette Design Store.
Materials Required
Silhouette Printable Gold Foil Sticker Paper
Silhouette Cameo, or Portrait
4-pack of Mini Canvases (12.5cm x 12.5cm, 5" x 5")
Chalk Paint
Water-based Sealant
Foam Brush
STEP 1: Prepare the Canvases
Paint each canvas with chalk paint, allowing the paint to dry between coats. Apply a thin coat of sealant with a foam brush. This dries very quickly and ensures a good adhesion between the foil sheets and the chalk paint, which can otherwise have a powdery surface.
STEP 2: Prepare the Files
Draw boxes equivalent to the size of the canvases in the software using the rectangle drawing tool. Open the leaf files, select the leaves and resize them to fit the boxes.
Remove the boxes and change the Page Setup size to US Letter.
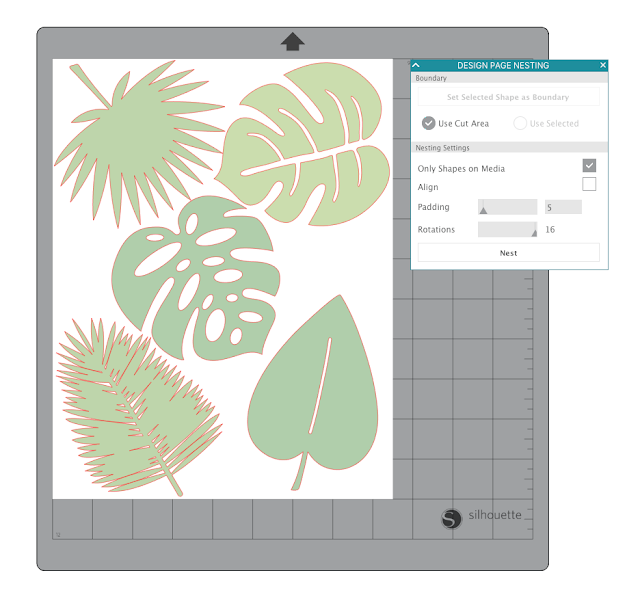
Note: I added an extra leaf in case that complex leaf shape proved too intricate to cut from the foil. I needn't have bothered though, as the foil cut beautifully.
Arrange the leaves to fit within the letter-sized sheet.
(Optional) To make the arranging process quicker, use the Nesting Tool (Silhouette Studio Designer Edition and above). Increase the padding (space between the shapes) and the rotations as shown, ensuring that you are using the cut area as the boundary.
Note: The rotations value can be at maximum for Printable Foil as there is no obvious surface texture to this media. If I were cutting from linen textured card, for example, I might have rotations set at '0', '2' or '4', depending on the importance of matching the surface pattern on the pieces.
Read more about the nesting feature here.
STEP 3: Cut the Media
Feed the media on a cutting mat into your Silhouette. Click on the send tab and select the 'Foil - Printable' media type. Adjust the settings until a test cut cuts through the foil and not the backing, achieving a 'kiss cut'. I was able to reduce the Force by two, but otherwise the defaults worked fine for me.
STEP 4: Apply the Foil
Remove any tiny waste pieces. I do this by bending the cut foil sheet and lifting off each piece by a corner. Larger waste pieces can be left on the sheet. Carefully peel away one leaf shape at a time and smooth it onto a prepared canvas (no need to use transfer tape for images of this size, just carefully hold it in your fingers).
That's it - the canvases are complete and ready to hang on your wall. I love how they turned out. In real life they look so effective for such a quick project. I'm sure you can think of lots of other projects where these foil sheets would look great too. Do share them on the Silhouette UK Facebook Page.
Bye for now,
DESIGNS USED:

|

|
PRODUCTS USED:

|

|

|

|

|


They look VERY effective Janet and love the design.
ReplyDeleteFaith