

Hi! Bev here with a tutorial on creating a bunting flag with a personalised motif.
WHAT YOU WILL NEED:
- Silhouette Cameo/Portrait
- Silhouette Heat Transfer Vinyl in Black Glitter
- Fabric
- Sewing Machine
- Bias Binding
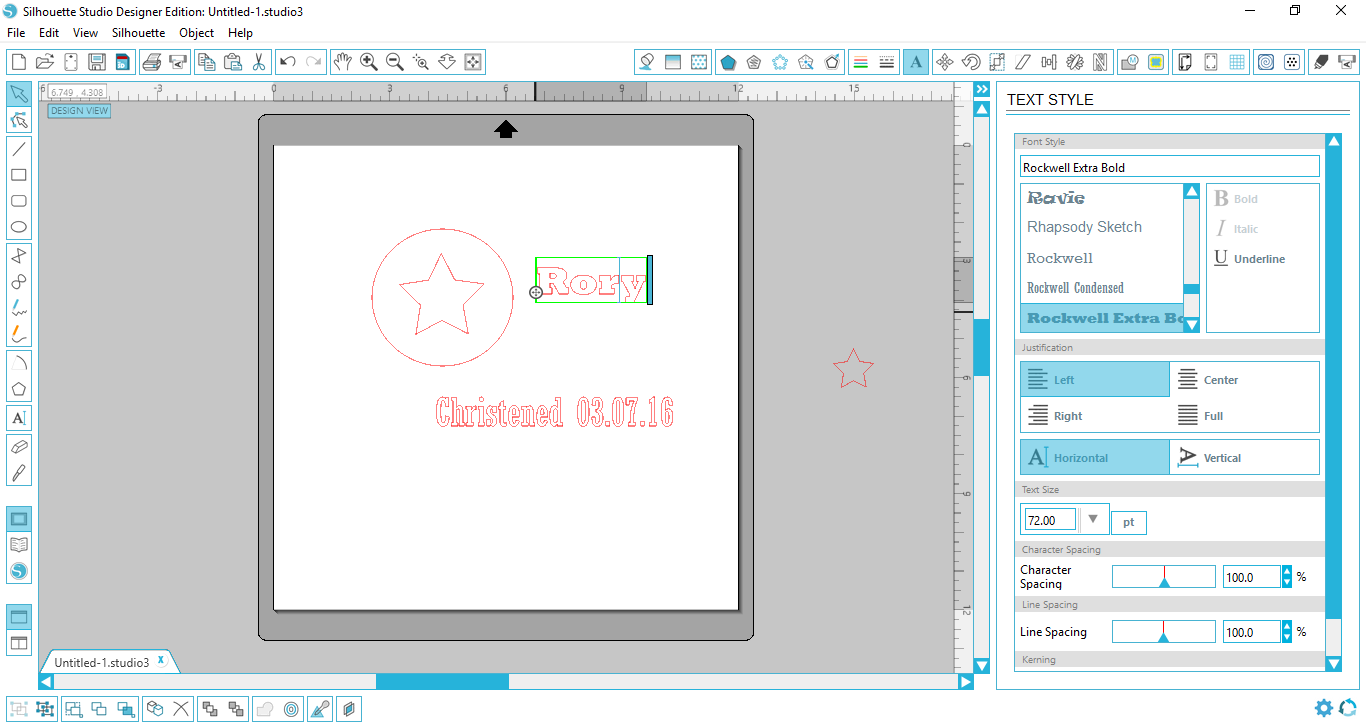
Open a new page in Silhouette Studio and select the text icon. Type the lines of text (for this project I used Rory and the christening date)

Next, select the ellipse icon on the left hand side of the screen. If you hold the shift key as you draw the ellipse it remains perfectly circular.

I purchased the shooting star frame by Sarah Hurley from the Silhouette design store. Select the stars, right click and ungroup. Delete the excess stars and resize the large one to fit in the circle you have created. Resize the smaller star and replicate it so you have two, one for either side of the circle.


Step Two
Now you have all the elements you need to create the motif. The next stage is to change the font to your preferred one. We are building the final look in this next few steps. I created the final piece and then changed certain elements which you will see below.

Once your fonts are chosen, double click on the text until you see a little cross hair within a circle icon in the bottom right hand corner of the text box. By dragging this over the circle, it will wrap the text around it and you can position it as you would like it to look.


Step Three
The next task is to place your vinyl face down on the cutting mat and select the correct settings for the project. I use the flocked setting for glitter vinyl and it works brilliantly for me, however I would always recommend a test cut to save you time and tears!

Once the vinyl has cut and been weeded, use a hot iron without steam, and a Teflon sheet or muslin to iron it onto your fabric. Glitter vinyl does not need as long under the heat as smooth vinyl does, making it a great beginner vinyl to use.


Step Four
Measure and cut the fabric into a triangular shape (I use the measurements of 7" across the top and approximately 9" downwards) and cut a second piece the same size. Place them right sides together and sew the two long sides together. Turn inside out, and press with an iron. The last stage is to add a length of butchers twine or hessian twine between the fold of the bias binding and sew the length of binding to the top of the bunting flag.

And there is your finished motif style bunting flag, where the possibilities for personalisation are endless. I really enjoyed sharing with you and can't wait to see what you create!

Shooting Star Frame by Sarah Hurley
PRODUCTS USED:
 |
 |
 |
 |
 |
This is lovely Bev. You've inspired me to make some bunting for myself (off to the fabric store this afternoon).
ReplyDelete