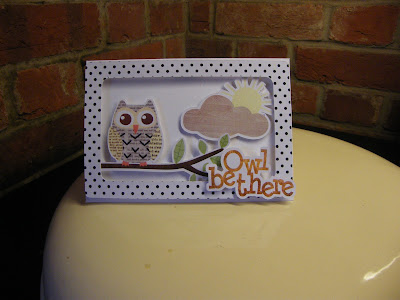
Hello, Karen here again and today I have a card I made for a friend who invited us to her wedding.
I didn't want to make a 'normal' acceptance card and she is far from normal - a drama teacher and that says it all!
STEP 1 - Filling your shapes.
- I wanted to use a print and cut owl that I already had but also wanted to make a card that had several layers to it.
- I didn't need to resize the owl but wanted the owl on the left so used the 'Flip Horizontally' option.
- Next I opened up my phrases and deleted the ones I didn't want by ungrouping them and selecting the one I wanted and deleting the remainder. Be careful when you ungroup and delete that you don't delete the centre of your letters.
- I then separated the border from the words
- and changed the cut line to no cut on the words.
- Next I made sure that the centre of the letters were not grouped with the outside by choosing 'Release' in the Modify menu.
- In the 'Fill Pattern Window' I chose a pattern to fill my words and filled the centre of the letters with white.
- I grouped the centers of the letters with the words and centred the phrase with the outline using the centre option under the Align Window.
- I arranged my sun and cloud how I wanted them and colored them as above. I then changed the cut to 'no cut'.
- Finally, I resized my cloud and sun to 3 ins wide (7.5cms) and added a white border by choosing the Offset Shape option .
- The last thing I had to do was to make the frame. I did this by drawing a 6in x 4in (10 x 15 cms ) rounded corner rectangle and another one 5.5ins x 3.5 ins (14 x 9 cms) and centered them. I filled the smaller one with white and the larger one with a poker dot pattern. Then I opened an A4 page, with registration marks, and arranged my pieces onto this.
- I printed my page and then put it through the Silhouette to cut the pieces.
- Finally I layered the pieces up onto a blank 6 x 4 card, using lots of foam pads to give maximum dimension.
I hope you are now able to fill cut shapes with colour and pattern as it doubles the use of all your shapes and phrases.
 |
 |
 |
PRODUCTS USED:


No comments:
Post a Comment