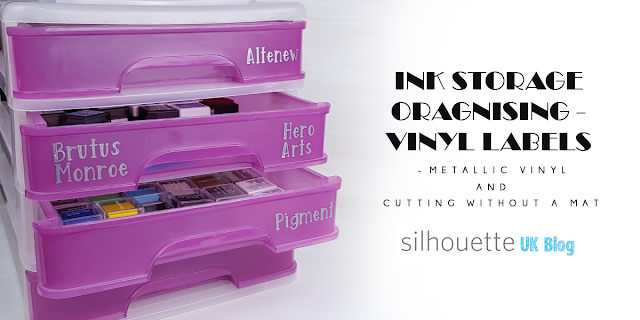
Hi everyone. It's Verity here from Pretty Little Button bringing you another project. So today's project is more on an inspiration and a little how-to for cutting without a mat for beginners. I have recently been reorganising my craft room, trying to make things more efficient. My previous mini ink storage was pretty as it hung on the wall, but wasn't easy to hand when I needed them. So instead, I clear out this draw storage that sits just to the right of my desk and reutilised it for my mini inks. To make it even more efficient I decided it would be best to label which inks are ink which draws. Of course, my trusty silhouette to the rescue to make custom labels out of vinyl. The metallic vinyl was perfect for the job as it is a little darker where I store these draws. However, the metallic silver catches the light making it super easy to read in low light!
Also, these 12" vinyl sheets don't require you to cut with the mat, and there are a few simples things you need to follow to do this. So reading on for how to with ink storage organising and make your craft room more efficient.
Card storage and organiser details:
I have designer edition studio and do not have the weeding lines feature in the more advanced studio versions. To make it easier to weed, I drew little boxes to insert my label titles in, so I could just peel the straight away to leave the title. Also, it prevents wasting more vinyl than needed.
Next, I added my label titles within the boxes making sure they fit within. The font I'm using is Amelia. As this is a thin-ish font, I added a 0.01 offset, just so it would be easier to cut and not tear.
Before you send to cut you need to make a few alterations to cut without a mat. Open up the page setup window. Select the drop-down menu for 'cutting mat' and select 'none'.
You will now notice your 'cutting mat' will disappear from your design space. Before you send your to design to cut, you need to load your 'media' (Vinyl). In your machine, you need to move the rollers in order to grip your media.
On the right-hand side, move the leaver from the 'locked' position to the 'unlocked' position as seen below:
Next, rotate the white roller feed until the grips pop out of their little slots. Move the roller feed to the left to the next little slots as seen below:

Put the leaver back up into the locked position. To load the vinyl, insert your sheet like you would your mat, but on your machine screen press 'load media'. You are not ready to send your design to cut.
Remember to test cut before you cut your design out, your machine and blade can differ from the factory default settings. As you can see, my cut settings for the metallic vinyl below is quite different from the default I had above. I think I need to replace my blade!!
Remember to use your Silhouette tool kit to weed the vinyl from the boxes. Cover the labels with transfer tape and burnish onto the tape. Lift this up and position onto your draws. Again, burnish this so the vinyl sticks to your surface and peel the transfer tape off.
*Quick tip, make sure your surface is clean for good adherence*
If this has inspired you to try this out, please post below. I would love to see it!
Until next time,
Verity

Profile | Pretty Little Button Blog | Instagram | Facebook
PRODUCTS USED:


I've never moved my rollers! - to scared, this has helped a lot, thank you Verity.
ReplyDeleteFaith
You're welcome, they are easy to move and put back so do't worry and have a go! V x
Delete