Hello, Nadine here with a Father's Day card tutorial using our free Silhouette Design of the Week.
You can of course cut your tie using normal paper or card or fabric. In fact, a cute idea that my friend has been doing is photographing fabric and loading as a pattern for print and cut. I had some of our family tartan left over from another project, so decided to see if the Silhouette could cut it. As it's a thick wool, I feared that a clean cut would be difficult, but it worked wonderfully, so I'm already plotting lots of cushions and interior design projects involving yummy wools and tweeds!
What you’ll need:
- Silhouette Cameo/Curio/Portrait
- Regular and fabric blades
- Silhouette Mat
- Paper and Card
- Sketch Pen / Pen holder
- Fabric for the tie (I used a swatch of tartan)
- Silhouette Clean Cut Stabilizer
- Optional
- Mini brads
STEP ONE: Create Faux Stitching
I used small ovals to create a stitched effect on the collar. Replicate an oval sized 0.186cm by 0.08cm to create 11 identical ones and use the Space Horizontally option within the Align Window to make sure they are evenly spaced. Once you have the top row, rotate a copy for the vertical line and then mirror to make the opposite side.I used a pearlescent paper so cut with the standard Patterned Paper cut settings.
STEP TWO: Stabilise Fabric
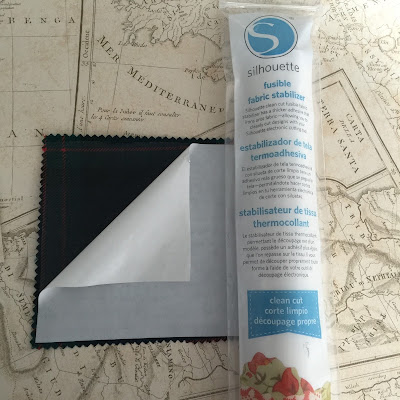
I used the clean cut stabiliser, but the sew version would work equally well. Iron onto the wrong side of the fabric for just a couple of seconds and peel back the paper.
STEP THREE: Cut Fabric
As I wanted to cut my tie exactly aligned to the tartan lines, I used the PixScan mat.
Cut using your fabric blade on a depth setting of 5 and thickness of 33. If like me you hate waste, go ahead and add shapes for different projects to be cut also. You'll notice I welded the tie and knot and cut a second separate knot, I did this so that the knot would layer smoothly onto the one beneath.
STEP FOUR: Create Sentiment Banner
I point-edited a rectangle to make a banner - see steps below:I used Sketch Serif Font from the Silhouette Design Store (# 53543) in 15pt to write the message. Sketch pens are quicker and easier for a small shape like this than print and cut, so I used a gel pen in the Silhouette pen holder.


Lovely as always and very impressed with the precision of your tartan cutting.
ReplyDeleteFabulous tutorial Nadine and so useful to show us precision placement on a pattern using the PixScan. Many thanks.
ReplyDeleteBrilliant tutorial xx
ReplyDeleteWow the tartan looks amazing - so clever! C x
ReplyDelete