I'm excited to bring you another project and tutorial using the Silhouette Mint™. In my earlier post, introducing the Silhouette Mint™, I showed how to make a stamp using an entire design from the Silhouette Design Store. Today I'll show you how to make a custom wedding stamp design combining two files, a shape and personalised with the bride and groom's initials. The technique shown could easily be used for other stamps combining a number of elements.

MATERIALS USED:
Mint Machine & Software
Mint Inks - Ash Blue & Teal
Mint Stamp Kit - 30mm x 30mm
Fonts and Designs from Silhouette Design Store
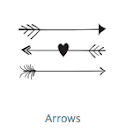
Arrow File (one of the 50 free designs)
Wedding Stationary Envelopes, for example.
STEP 1: PREPARE THE DESIGN
The Tree
I chose the Tree Slice file, designed by Sophie Gallo, from the Store and downloaded it into the Mint software.Like the Silhouette Studio® software, newly downloaded files can be found in the Library in the Recent Downloads folder. I also downloaded the two fonts used, LW Stencil and LW Perfect Print. N.B. Fonts already installed in the Silhouette Studio® software are available in the Mint Software.


To automatically centre the design and make it as large as possible on the stamp, follow these steps:
- Select the image,
- Open the Scale Window and
- Click Fit to Stamp.
The Heart
Open the shape tool and select the heart. Draw a small heart and rotate it to an upright position. Make a second heart, but drag the sizing handle to make it slightly smaller. Select it and fill it with white from the Preview Colours at the bottom of the window.

Align the white heart on the black one and group the two together (Object > Group). Drag the heart to the centre of the tree slice. Adjust the sizing proportionally by holding down Shift and Alt keyboard buttons and clicking and dragging any one of the sizing handles.

The initials
Now to add the initials. Click Text Tool to open the Text Window and type the initials and a plus sign. Highlight the text (highlighted characters will have a blue cast and are enclosed within a green box). Select font style and approximate size (I chose LW Stencil Font #57509 for a 'carved' look and a font size of 12).

Ungroup the text and move it into position. If you drag without ungrouping first you may find that the text leaps to the edge of the heart - it is attempting to fit your text to the path of the heart. You can now fine tune the placement of the individual letters. Click, hold and drag each one into place (I moved the plus sign upward).

The Arrow
Open a new design window (File > New). Click Show Library (I saved my free designs to their own folder) and double click on the Arrows file.
N.B. The arrow design in the tutorial is slightly different from the image photos. The one in the tutorial is easier to use.

Ungroup the design (Object > Ungroup) and delete the unwanted arrows (highlight by clicking, then Edit > Delete). Now to make an offset so the arrow will show on the dark portions of the stamp. Select the arrow and activate the Offset Window by right-clicking with your mouse and selecting Offset.

- Select Offset
- Adjust distance to 0.25"
- Select Round
- Click Apply.


Open the Tree Slice file and paste the arrow (Edit > Paste). Re-size and Rotate using the drag handles. Then use a right mouse click to bring up the order options and click Send to Back until the arrow is behind the heart, but in front of the tree slice.

The Date
To complete the design you can add the wedding date using the LW Perfect Print font (use method above as for the initials)

STEP 2: SEND DESIGN TO MINT
When you are happy with the design open the Send to Mint window. The screen display changes to show how the stamp will look on the slide (it reverts to black and white and the design is automatically reversed) and the Send to Mint Window is displayed.

Slide the plastic stamp mount into the stamp base until it clicks into place. Remove the paper liner from the stamp mount, exposing a sticky pad. Carefully tear the slide open and remove the slide (take off the plastic film if it has remained on the stamp) then align the printed stamp onto the sticky pad with the design uppermost.

STEP 4: INKING THE STAMP
Follow the directions for inking the stamp in the instruction booklet using the Ash Blue and Teal inks. Further hints and tips can be found in my earlier blog post.
STEP 5: USING THE STAMP
The stamp can be used to decorate an array of wedding related items. As the ink is a pigment type it will stamp on a variety of surfaces and isn't limited to card and paper. Initially the bride used the stamp to embellish her invitation envelopes. She plans to use the stamp to decorate her wedding breakfast napkins and napkin rings and I'm sure she'll find many other uses for it.
The stamp can be used to decorate an array of wedding related items. As the ink is a pigment type it will stamp on a variety of surfaces and isn't limited to card and paper. Initially the bride used the stamp to embellish her invitation envelopes. She plans to use the stamp to decorate her wedding breakfast napkins and napkin rings and I'm sure she'll find many other uses for it.


DESIGNS USED:
 |  |
 |
 |
PRODUCTS USED:
 |
 |
 |