Wednesday, 8 June 2016

Using Your Silhouette to Cut Fabric for Patchwork.


Hello, Karen here.  Now I have to confess that before becoming a member of the UK DT I only used my Silhouette Cameo for scrapbooking but I have discovered a whole new world of craftiness out there involving my machine.

I decided to try cutting pieces to make a patchwork square (not sure what I am going to use it for yet).

You will need

Silhouette Cameo/Curio/Portrait
Fabric Blade
Silhouette Mat
Silhouette Fusible Fabric Stabiliser - Cut and Sew

STEP 1 - Designing your shape. 

  • As I had never tried patchwork before I did a little research on the internet and discovered that you can make many, many lovely quilt blocks from just a simple triangle.  I used the Polygon tool to draw a triangle that had a 3in vertical and 3 in horizontal line (hope that makes sense what I am saying).  This would give me a the correct size of triangles to make a finished piece measuring 12 ins square. On the cut settings I changed the lines to 'no cut' as I didn't want to cut out the triangle but to cut out the outer edge which we are about to make. 


  • From the internet I also learnt that you need to have a 1/4 (quarter) inch seem allowance and decided to incorporate this into my shape by firstly adding it to the left side and the bottom - again using the Polygon tool.
  • Next I selected everything (Ctrl A) and grouped them (Crtl G) and rotated the drawing 45 cw and added the final seam allowance. 
  • Finally I rotated it CCW 45. 
  • On a clean page I drew a 2 inch triangle and replicated it so that I had 32.  I then laid out the pattern I wanted for my patchwork square. 

  • From this I could see that I needed 4 triangles of four different colours and 16 triangles for the outside of the star.
  • I replicated my triangle 4 times to make the triangles for the star.

  • You can comfortably get 12 triangles onto a new drawing page to add to the four above to make up the 16 you need for the outside of your block.

STEP 2 - Cutting your fabric. 

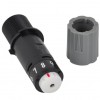
  • I already had a fabric blade that I had purchased a while ago but never used - these are the same as the normal Silhouette blades but have a blue housing to distinguish them from the ones used for cutting paper.  The idea for this is that you keep your blue blade just for cutting fabric and the blade isn't blunted by using it on paper and card. 
  • I also used a new mat as I wanted to be sure the fabric would stick down nicely.  
  • To be doubly sure that my shapes would cut out I ironed my fabric onto some Silhouette Cut & Sew fusible fabric stabilizer.
  • I placed my pieces of fabric onto my cutting mat and used a fabric blade to cut them.  I chose double cut just to be sure they cut all the way through. 
  • I was really pleased with how quickly and easily the pieces cut out - 12 perfectly cut triangles in about 1 minute. 
  • Once I had all my pieces I laid them out to correspond with the pattern above and stitched them together.
  • As the Cut and Sew is has adhesive on both sides I left the paper on the pieces until I had sewn and ironed them  and also used a piece of silicone craft mat between the patchwork and my iron.  I think I will try stabilising my fabric with light weight interfacing next time. 
Now I have made my first quilt square I am going to investigate how many different patterns I can make just using a simple triangle.


PRODUCTS USED::


Light hold cutting mat for Cameo


Tuesday, 7 June 2016

Challenge :: Free Design of the Week - Cactus

Good Evening!! I am back with another freebie and challenge post for you!
It's a trendy shape this week - a 3D Cactus!! So on trend right now as you will have seen from Sara's amazing post this morning!


It would make a great photo prop, accessory to a cowboy or a trendy bit of home decor like our lovely Design Team member Nadine has done here


And talking of cowboys, how cute is this creation from our guest designer Scatty Jan? Check out her blog for the full project!


So what will you make with yours?


Design of the Week - Kawaii Inspired Cactus


Using the free design, I created a Kawaii inspired cactus, I used this design to make a digital print, a garland and a t-shirt for my daughter. Here is a thorough tutorial how you can make your own kawaii cartoon using simple shapes and lines from the silhouette program. And how from that design you can make a garland, a t-shirt and lots more projects.

Supplies needed:

Cardstock
Printer
Silhouette Cameo/Curio/Portrait
Twine cord ribbon
Free cactus design
Free plus background from the silhouette library (PLUSBG)
Free flower design from the silhouette library (FLOWER)
LW SUGAR font (ID #56447)(for the t-shirt and print)


1. Preparing your design:


When you open the free design it will look like this:


You only need one of the cactus shape, so ungroup and delete all the extra ones. Also deleting the line in the middle of the cactus. 


Now you need to stretch it a bit. 


I wanted to add a bit of pattern to my cactus, so I chose the free plus background design that was free with my silhouette machine.


Resize the design and release compound path.


Colour your cactus in green and before transfering the plus shapes to your cactus, color them white. 
I also rotated the plus shape a bit so it looked more like crosses.


Add a couple of them to the cactus, leave a  gap where you want to have the face of the cactus in. 


Working on the face:

Start with doing the smile. Draw an arc, about 201ยบ degrees, resize it and rotate it to the right angle. 
Using the line color, color your smile black, and using the line style, thicken it to about 1.9 pt.


Now we work on the eyes:

Draw an oval circle about 0.52 x 0.41 cm and duplicate it so you have two of the same size.
On the second oval, resize it so its about 0.16 x 0.13 cm duplicate so you have two. 
On the second oval, resize it even smaller to about 0.08 x 0.06 cm.
Color the big ovals black and the four smaller ones white


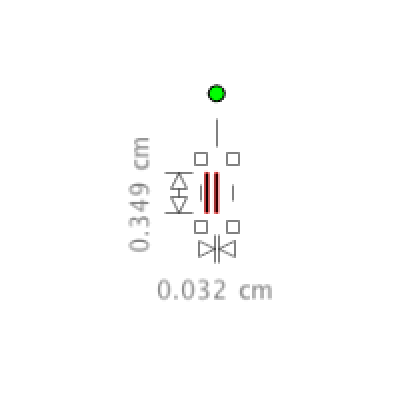
Using the square, make a thin rectangle, 0.34 x 0.03 cm. duplicate it so you have two of them.

Place them on top of the black oval and rotate them so you they look like eyelashes. Now you can weld it together. 


Mirror the design to the right.


Arrange the two white circles on front and place them inside the black oval, position it till it looks like a cartoon eye. Move the black shape away, group the two white circles, duplicate to the right and position them inside the black eye shape.


Now for the cheek, make a circle about 0.4 cm radius, duplicate and color both with a light pink color. 


You have everything ready now for the face, just positioning everything on the cactus and resizing the shapes till they look good.


I wanted to add a little flower to my cactus, I used one of the free flower designs that come with my silhouette machine. It's called "flower".

Ungroup the design and attach each petal to the other and weld it together. 

Color it in a darker pink color and place it on the "head" of the cactus. 


Your cactus designs is ready to use in your designs. 


I have continued the tutorial using the cactus design to make a garland:

To make the garland design, make an offset of 0.5 cm. and group the design together. Add to circles of about 0.06 cm on the top of the design for holes to attach your garland.

\

I resized the design so its about 11 cm tall. Duplicate the design and ungroup. Remove the flower and add a darker green color to the cactus. You will have to delete the offset and do a new offset on 0.3 cm. Group your new design together. 

Put your page settings on your current printer and add registration marks. 
Add as many cactus designs you can on the page. 


Put the cutting settings cut only the edge of your design and the two holes. 


2. Assembling your design:


Print and cut your design. Using a twine cord, assemble your design and it's ready to hang on the wall :) 


To make the t-shirt design, just ungroup everything, remove the offset and cut each design seperately using the heat transfer vinyl settings. iron/hot press each layer separate. In the end I also added "HUG ME" text in the bottom using the LW SUGAR font from the Silhouette store. 


For the digital print, assemble all the pieces you used for the t-shirt and and group it together. Put your page settings to current printer. 

On a mac you can get a high resolution print by doing these steps: 
File -> print -> Open pdf in preview -> export file as PNG or jpeg (remember to set your DPI high enough). And save your file. Now you can either print at home or print it at your local printing company. 


As you can see I am a bit obsessed with cactuses! Hope you enjoy this tutorial and I would love to see what you make with this design!


DESIGNS USED:


PRODUCTS USED: