Saturday, 3 September 2016

Print and Cut Planner Stickers

Hiiiii

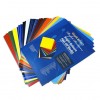
Caroline here with another tutorial for you, this time with some adorable print and cut planner stickers.

I am such a baby at trying new things, so I have lusted after making these planner stickers for ages but not had the guts; and let me tell you - I feel a bit silly now as it was so simple and pain free. So much so that I thought I must be doing something wrong.

This is the print and cut file I used by one of my fave designers...


Seriously - how gorgeous are they!

What you will need:
  • white sticker paper
  • silhouette portrait or cameo
  • colour printer
How to make them:

If you're like me and just have an A4 printer the first thing you will need to do is to change your page layout, to do this you need to click on the top right of the page, design settings and you can select Portrait, this will resize your page to A4. See below...


Next you need to open the Registration Marks window, again on the top right of the screen, see below...


You will see some grid lines appear like in the picture. Make sure that your chosen design sits within the large corner lines.

Once your page looks like the picture above you are OK to print. I recommend that you set your printer to best quality. I tested different paper options but found that plain paper worked best. Don't forget to change your normal paper for the white sticker paper!! Of course I did that HA!


When it comes out of the printer you will see it has also printed the grid lines like on the screen - that's just how it should be as that's how the silhouette machine knows where to cut.

Go ahead and pop it on to your mat in the same way as in the pictures above.

You will need to change your settings...


Set your blade to 2 in your machine. This will make sure that only the sticky layer is cut through and not the whole sheet.

Here are mine straight from the machine and ready to peel off! 


I use a planner ALL the time - I can't manage without it, but I have to confess I cannot resist sticking pretties in it. At the start of each month I have a page set out that came with the planner and it's a great way to plot my main areas of work that I need to cover.

Here it is with no decoration other than the month alphas...


 Here are the stickers - LOVEEEEE!


 I only used some of them, the rest are clipped in to the front of my planner ready to use throughout the month.


 I only used some of them, the rest are clipped in to the front of my planner ready to use throughout the month.https://tillyandarthur.wordpress.com


Friday, 2 September 2016

Vinyl Acrylic Plaque Using Wet Application Method

Vinyl Acrylic Plaque Using Wet Application Method tutorial by Nadine Muir for Silhouette UK


Hi there, Nadine here with a little plaque I made for my granny's birthday. I decided to decorate an acrylic plaque with some coral coloured vinyl. As acrylic is non-porous, it's suitable for the wet application method. In this technique, a little water spritzed on the surface helps when applying vinyl as it allows a little play when aligning and it also helps prevent air bubbles.  As my design fills the plaque, I also have some hints for appligning the vinyl.  I think acrylic plaques look very pretty and can represent good margin for those cutting for business as my plaque cost just 99p!

What you’ll need:

    STEP ONE: Acrylic Black Template

    My acrylic blank came with an SVG showing me the template size, including the circle holes, so this step was super easy for me.  If you don't have a file, make the template by measuring your blank and using the rectangle and ellipse tools.

    STEP TWO: Back Button Frame

    Make each button from design ID 4979 into a compound path and size to about half their original size.  This is necessary as we will be welding into a frame and if we don't do this step, we will lose all the inside shapes upon welding.

    Making Compound paths Vinyl Acrylic Plaque Using Wet Application Method tutorial by Nadine Muir for Silhouette UK

    Arrange in a jaunty frame, with each button touching the next.  Once you are happy with the frame, select all the buttons and Weld (right click or use shortcut key Cntl+Shift+W).

    STEP THREE: Personalise

    I used the font LD Elegance in font size 175 to write my Granny Dilys' name.  My top tip here is to use the offset tool.  Not only does it weld your overlapping parts of the letters together, but allows you to make a slightly bolder font which can be much easier to cut.

    Offset text to weld and make bolder. Vinyl Acrylic Plaque Using Wet Application Method tutorial by Nadine Muir for Silhouette UK

    STEP THREE: Alignment Trick

    I offset the outside outline of the plaque's rectangular template by 2mm and made into a frame by selecting both rectangles and making a compound path.  This part of the design will be too big for the plaque, but allows me to perfectly align the vinyl on the acrylic.  The holes also help to align.  I have incorporated the left hole into a daisy shaped button.  For the right-most circle, I made a ring, but on reflection, just the centre circle would have been easier!

    Alignment trick for Vinyl Acrylic Plaque Using Wet Application Method tutorial by Nadine Muir for Silhouette UK

    STEP FOUR: Cut and Weed

    I used a blade 1, thickness 8 and speed 7 to cut my vinyl and the weeding tool to remove the unwanted parts of the design.

    STEP FIVE: Wet Application Method

    Remove the protective film from the acrylic and use transfer tape to apply the vinyl using the hinge method described in my apply vinyl to glass tutorial.  The outer frame and hole circles will let you align the top centimetre of the design.


    Pop a drop of baby shampoo or dish soap into a water spritzer.  Sign supplies shops sell specialist liquid for about £10, but for such a small project, I couldn't justify the purchase.  Spray a very fine mist onto the plaque and then smooth down the remaining vinyl. 
    Vinyl Acrylic Plaque Using Wet Application Method tutorial by Nadine Muir for Silhouette UK

    Alternative Reverse Hinge Approach

    I love talking about methods, hints and tips with fellow crafters.  My friend also makes the frame and uses the holes to align her plaques.  To apply though, she recommended another option, which is a Reverse Hinge Method.  Start in the same way by weeding the vinyl and applying the transfer tape, but this time place the vinyl flat on the table, sticky side facing up.  Then you can line up the acrylic to butt against the alignment frame at the top.  Use the top edge of the acrylic to hinge and lower the rest onto the vinyl.


    Squeegee

    Once you've applied, whether with the regular hinge, or Danielle's reverse hinge method, now use the squeegee tool to squeeze out all the extra liquid and make a strong, air bubble free bond.  Remove the transfer tape and dry the plaque.

    Remove the protective back film and add some ribbon. 
    Top tip
    Tie the knots at the front so that the plaque lies neat to the wall or door.  Carefully run the flame of a lighter over the end of the ribbon to seal it.

    The Finished Product

    Vinyl Acrylic Plaque Using Wet Application Method tutorial by Nadine Muir for Silhouette UK

    Vinyl Acrylic Plaque Using Wet Application Method tutorial by Nadine Muir for Silhouette UK

    Vinyl Acrylic Plaque Using Wet Application Method tutorial by Nadine Muir for Silhouette UK


    DESIGNS USED:


    PRODUCTS USED:


    Thursday, 1 September 2016

    Magnetic save the date cards with free calendar file


    Hey there, it's Sara. It has been very busy month in my family as we've just had two weddings in one month! I wanted to show you in this tutorial, how you can make your own save the date cards using magnetic sheets and the Silhouette machine.


    Supplies needed:
    LD CHARMING font (ID #14116)
    LW SUGAR font (ID #56447)
    Free calendar file
    Printer
    Silhouette CAMEO/PORTRAIT/CURIO

    MAKING YOUR DESIGN:

    Use the Draw Smooth Freehand tool to make two wavy lines.

    Using the rhinestone effect, make the spacing 0.48 and choose the 10ss rhinestones.


    Use the same settings for both lines. 


    Release Rhinestone and choose a couple of the circles and enlarge them to 20ss rhinestones and 16 ss rhinestones


    Then color them in light yellow so it looks like string lights and remove the line color.
    Select all the circles and Make Compound Path.

    Open the label shapes, ungroup and use only the shaped pictured below.


    Resize , copy the label and place it on the side. 
    Place the original label where the top part is covered by the string lights. 


    And crop your light design. 

    Color the copied label in light beige and arrange it behind the light. 


    Add the free calendar file.


    Ungroup the calendar and remove the date of the event. 


    Add the heart shape file and resize it, color it in pink and place it 
    where the date of the event should be.


    Using the LW SUGAR font and write "Save the date". 
    Place it on top of the calendar. 


    Using the LD Charming Bold font, write the month and year of the event.


    Add the name of the couple in bottom using the LD Charming Bold font.


    Add in the end "INVITATION TO FOLLOW" using the LW Sugar font.
    Resize it so its smaller than the names.

    I like to remove the line colour, so I see how the image will look like once its printed. 


    Now you can resize the whole design to fit on Silhouette's magnetic paper. 


    Add registration marks and make sure you set the cut settings to cut edge only. 


    THE END RESULT: 
    A lovely save the date cards!


    `


    DESIGNS USED:


    PRODUCTS USED: