

Hi Lovelies, Niki here with a quick tutorial about backfiling a shape by using your Silhouette, rather than but cutting each piece by hand.
This is the layout I have made. As you can see I chose a background cut file that needed filling in with squares. In hindsight, squares are pretty easy things to cut by hand, but this tutorial works brilliantly with any cut file that you want to back fill.

To start, I cut my shape out in white textured cardstock. Once cut I ungrouped and released the compound path in order to make each piece separate.

I then selected a square, then removed the rest of the shapes.

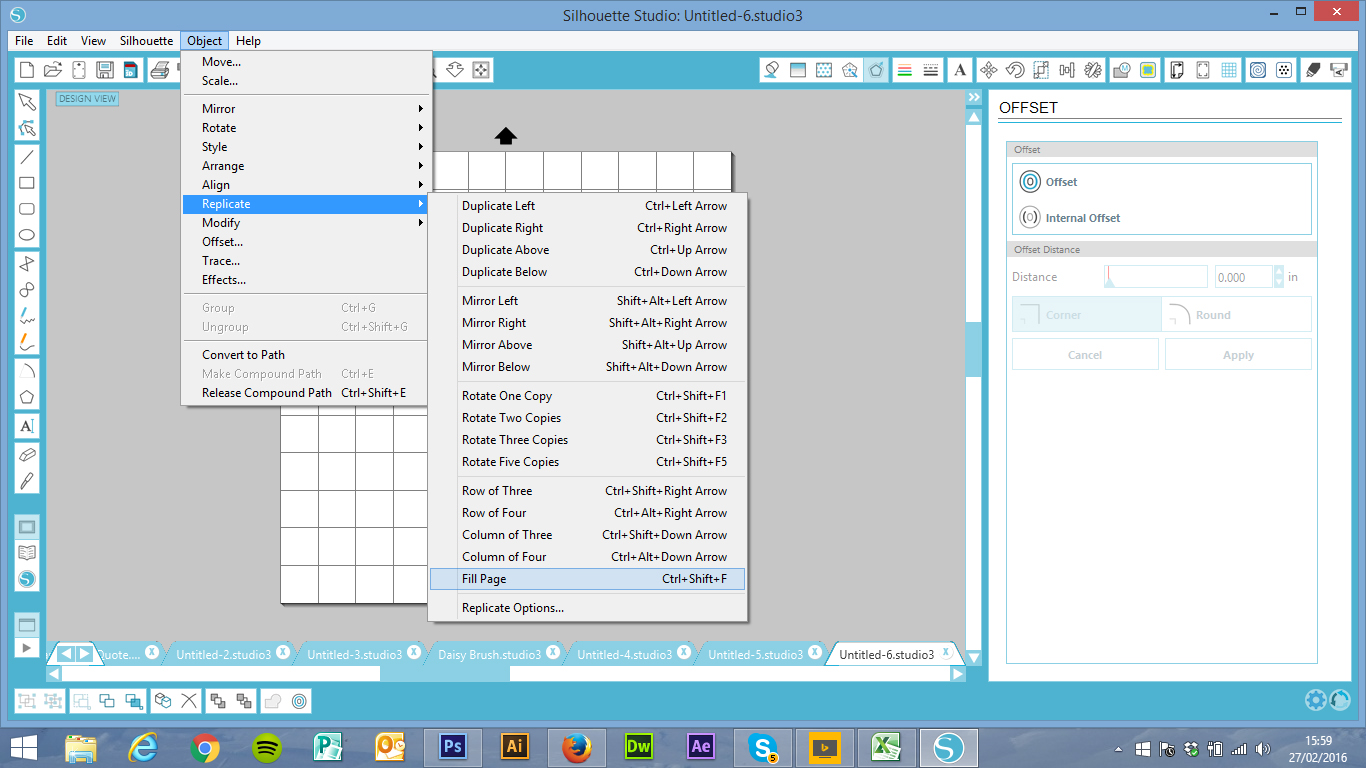
I then selected the square, went to the Object menu at the top and selected 'offset'. This brought up the Offset window on the right side of the screen. I selected square corners, and set my offset to 0.250. Any smaller and I wouldn't have had enough space around the edge of the square to stick it to the back of my original cut shape. Once I was happy with the size of the offset, I clicked 'apply'.

Once applied, I then removed the original square from the middle, and deleted it, leaving me with just the enlarged square left on the page.

I wanted to fill my cutting mat with the enlarged squares, so went back to the 'Object' menu at the top and selectd 'Replicate' and 'Fill page'. This then filled my page with squares.
I was then able to lead my mat with lots of small pieces of patterned paper and run it through the Silhouette. 16 perfect sized squares cut in moments.


I then created my title by writing it out in my selected font. I welded all the letters together that I could and then also used the offset tool to make a shadow for it.

Thanks so much for joining me, I hope this tutorial helps

Designs used:
Link Square Lace Background #17826
LD Demure font #8718
Great layout and tutorial! C x
ReplyDeleteWhat a great idea Niki, Such clever design and real eye for detail. Well done. X
ReplyDelete